Friday, 5 May 2017

Victorian Couple Update

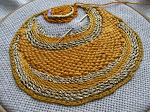
OK, so I think I will post these two pictures, showing the piece out of the frame, as I worked the woodgrain in the hand.  I still have a lot to do on the woodgrain because it needs to be pushed back even further, but with each stitch it hangs together better.  I like working that pattern, but it does take a long, long time!

I'm pleased at the progress I've made so far, I got down the main pattern ideas and will work from there.  There is one section of the woodgrain that will be pulled out, but I'm pulling out quite often as I go along with this project anyway, as its only 10cms x 13cms e.g. the young man's face is only 2cms!

Obviously working that small has given me eye strain problems again.  So I need to rest up a bit and sort some other things out too...  

But I will say, since my hiatus, I've discovered I can no longer work in artificial light, I have to have daylight to sew now.  Especially as I still don't use a magnifier.

Its so easy to become completely absorbed in a piece like this, because you are creating a story, or an important extract from a larger story.  


Must dash, already thinking about my next project, as this one has had all its major decisions worked out, including how to puff out this young lady's hair.  

I got the date wrong earlier btw, the fashion and hairstyles would suggest 1850s-60s because crucially her ears are covered by puffed out hair.  For the puffing, I know how I shall proceed and for her bun halfway down the back of her head, I'll make a hair 'rat' with felt.  Her hair will be silk and glossy, compared to his.  

I don't generally have a problem with fixing hair, as I used to have very long hair myself at one time, a staggering 36 inches of the stuff.  I think if you have thin long hair you can really enjoy it, but mine was thick and very hot, honestly it was like wearing a blanket across my shoulders the whole time.  I lot of people miss their long hair, pleased to say, I don't miss mine and wish I had the haircut I have now, years ago.  

The finer details of her dress will extend beyond the margins of the mount, which is a bit annoying, as I wanted quite a lot of detail in that area.  

...'We must proceed on the basis that we will get some things right and some things wrong, but just so long as you get slightly more right than wrong in the long run, you should continue anyway.'.. that's some of the Bauhaus indoctrination I used to get in art school. Those people drove us nuts, as they are famous for doing.  

But I will say, if I've learned anything about creative output, its that you cannot judge your own work at the end of a long day objectively anymore, you have to sleep on it and look at it afresh the next day, because being so close to the coal face, you really aren't able to fully judge merits until your eyes have rested fully.  

Here's an art school story that will make you say ahh.
Periodically I used to march over to my drawer that I had all my artwork stored in and I would pull it all out and make 2 piles, one was called 'abysmal' the other was called 'ok'.  Then I would gleefully tear over to the bin and throw all the abysmal stuff out, feeling hugely relieve after this cathartic act of vengeance on myself...  of all people?

One day I came back into the room unexpectedly and found one of my class mates actually salvaging pieces of my artwork to incorporate into his portfolio!  He looked at me with sad eyes and said "you might not like these drawings, but they're better than I can do, do you mind if I keep them?"....


Tuesday, 2 May 2017

Embroidered Woodgrain - stage 1

OK, so the woodgrain is underway.  I had to increase the contrast of the various tones, because otherwise it would look just too indistinct for the naked eye.  The main colour will be a kind of gold, mid-way mark I think.  I might reduce the dark rings even more by packing in some more light colour.  But the main thing is that with Stem Stitch you can go under or over, inside or out, create peaks or curves, lines or satin stitching filling. Its the most versatile stitch out there I reckon, and its so addictive to work!

I lowered the ISO on this image this time instead of hitting 'enhance' in the edit studio.  

I decided the leg of the piano would be given a circular treatment.  I need to work on that at the same time as the rest of the woodwork, otherwise they might not sit well together e.g. they have to balance each other I think...The top of the piano will be given a much simpler treatment, to suggest the reflection of the light hitting it, but also because I don't want the young man's jacket to be drowned out.


Oh, and here's the view of the sky from my kitchen at dusk...what a vision!

When I see a sky like that, apart from feeling really floaty and awestruck, I really want to try and either paint it, sew it or draw it.  That's what I call gilt edged clouds...

Monday, 1 May 2017

Victorian Couple Update 01 May 2017

See how my posts are now much more pragmatic.  

I made some good progress yesterday, as soon as the blister on my index finger quietened down a bit.

As you can see from this image, the windows are in, the pelmet has been selected and the pattern for the drapes have been swatched up.  Feeling somewhat relieved that the stage is now being set for this afternoon tete a tete in circa 1840, I decided to wade into filling in the piano forte.  

The piano is actually one of the main reasons I selected this image in the first place.  To cut a long story short, I did some experiments with Stem Stitch filling as applied to various textures and the upshot was I realised it lends itself to woodgrain incredibly well.  More later, have to dash...


Sunday, 30 April 2017

More Progress on the Victorian Couple

As you can see, I had massive problems to contend with.  Namely tone, quality of line for the faces and those dear windows...


I think I re-did the young fella's face about 5 times.  In the end I chose Gutterman's fine sewing thread and used a combination of straight stitches and couching.  I was still not sure about his face last night, but when I examined it this morning, I was surprised at my own success, because faces are hard and faces this small are really hard - one wrong move and you create the wrong expression, the wrong age, the wrong peek into his soul...

Books about portraiture are very helpful when it comes to working out how to do faces, because at each stage of our lives our facial structure changes.  One tiny mistake can mean disaster and I find when that happens, I like to start again.  Also with this chappie, notice his mouth is open and this is a very important part of this image, he's speaking to her and she's looking up and paying him attention, not the piano for that moment...


The whole time I was doing the face, I kept remembering the first time I saw this young man's face, and the funny thing was, it was his younger face that came through the image as I sewed it.  How sweet...

So that's sorted, now onto other things...

Then the windows gave me the most incredible amount of trouble.  I realised I needed the windows because the faces were being left white and they looked so white, I wanted to balance them out.?

Well of course, these dear windows start to steal the show and then need the most almighty push back.

I thought the windows were really going to tip the balance of the whole thing at one panic-stricken point, so that's when I decided to leave them alone, while I pegged down the young lady's face.  That took 3 attempts.  More so because I forgot I was using Guttenberg for the faces and plunged into using embroidery floss which was far too dark..

Her face still looks very dark but not compared to his and certainly not after I give her hair a lot of attention.  Hair is such fun to do!


I'm pleased with her face, or rather that its so understated by comparison to the young man's.  This is the correct note I wanted to strike e.g. he's visiting her, he has something to say and she is serene in contrast.  (As they drummed into me in art school all those years ago 'less is more'...)

Here's the image with the flash turned on.

This is a worthwhile endeavour in that it highlights the tonal problems of the piece.  Her dress is far too close in tone to the sky because I spent a long time evaluating sky tonal values while her dress was covered up.  But more than that, I did want her dress to remind him of the sky and I want his hair to remind her of wood....you'll see why in the end.  Its all about linking themes...

I was aiming for that association originally, but now I need to separate those ideas somewhat.  I'm still thinking about that and hope that by the time I've finished with the curtains, wooden patina of the piano and the decorative elements of her dress, then the whole thing will be OK.

But that's a long way off and a lot of work to do before I can be sure?  To assist me, I've looked at the image with all the swatches attached and viewed it from several distances, and even upside down.  So now I forge ahead...

In so doing however, I realised the piece has gone beyond the margins of the mount that I've lined up for it?  So now I'm thinking about some kind of border to encapsulate the whole thing and most importantly to hold in the bits I'll need to chop off and bring in line with the new dimensions I have to sort out.  

I have to rest a bit today though, as I noticed my index finger has a small blister.  I was never one to get along with a thimble...

cya...

Saturday, 29 April 2017


Two Posts in One Week - Whatever next?


Well, updates dont come much shorter than this.  Here's what I'm up to.
I was so pleased I managed to get the windows in, but alas, I must have been really tired by the time I tackled the gloss painting of the mouldings...to be sure, that section has to be re-done.


Thursday, 27 April 2017

Hello Everyone - I'm Back!

Well, its certainly been a long time and yes, I’m back.  

Pleased to say I’m well again and feel quite energetic once more (TG and all the angels…oh, and my own brains!) 

Not that I ever forgot y’all, and I certainly never left off what I was studying in needlework.  The thread really did continue and my exploration was always ticking away, always...

So, what I’ve decided to do this time round is not write really looooooooooong posts that drain every ounce of strength from my pre-frontal cortex, but instead make the needlework drive the posts, rather than the other way round…? 

Without trying to sound  immodest, you understand, I like to think I’ve made considerable personal progress, albeit intellectually, as regards certain mechanical problems in my needlework that keep popping up and were driving me personally to utter distraction….

Because of that, I knew I had to ‘go back to the drawing board’, trouble was I went back further and further and ended up, of all places, in the middle of the Cretaceous period? – I kid you not!  

Strange connection you might say, not really, because at the same time I was also re-designing my garden!

Ye old doodle cloth has been my trusty companion throughout.  Sorry no pictures of that bedraggled comfort blanket...haha. 

But you know, its funny how you start on a very private hunch that seems awfully like fretting, that can take you through quite a few months and yet at the end of the journey, eventually, you find you actually discovered something for yourself…So all that time spent away was not in vain.

I plan to return to all my previous projects and sort them out and this Victorian image is the one I decided to start with.

‘Motivation has to depend on emotion, if there isn’t emotion driving motivation, then it ain’t gonna happen’.
I heard that said recently, and realised that was what I needed to do, recall the original emotion that prompted the needlework idea and get back with the program!

Obviously, this one is extremely sentimental and speaks for itself. 


I have several problems with this piece and they only popped up as I went along and kept popping….

For starters, the padding of the shapes has brought all the curved areas forward to the same frontal axis.  Which is fine for a drawing, but is too confusing for a work that’s in relief, such as this. 

So I decided what I’ll need to do is make the relationship between the sleeve and the loose pleats of the skirt distinct. 

The way I decided to do this is the same as if it were a painting e.g. pick out areas of darker tone to push back shapes that are further from the centre of the image.  It may work, or it might be disastrous.  I decided to try a test section on a separate cloth first.  All I know is, I will have to do something about the problem, because otherwise the arm and the pleats will all have the same appearance…

Decoration and contrasting textures will help, but I need to press on, while at the same time think about how I will sort this one out?

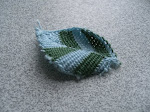
I’ve also been working on Stem Stitch Filing as probably the most effective way I’ve found to fill a shape, if you want the the stitch direction to explain the form, like this leaf in the bottom left of the image:

As you can see, last year was my year for buttercups…


I like to think what’s different about these specimens is that I was trying to make ‘botanical’, rather than stylised depictions of the ‘Little Frog’, which is the translation of Ranunculus. 

Well, I have to rush off now, until next time xxx

P.S.  I hope this blog post comes out reasonably OK, as I've lost Live Writer and my computer is too old for the new Open Source version.  


Wednesday, 8 July 2015

Hello friends, long time no see!

Well I’m back!

Been really busy, so here are some piccies…

Been also working on some new observations, hence I’ve taken some raw video footage of a very exciting discovery…more later.

Don’t want this post to be too long-winded, so here are the piccies with some short descriptions of what I was/am aiming for.

So until next time….keep sewing and keep learning!

MedievalLadyMorehairandgoldpurl

This is a study in split stitch.  I had looked at Opus Anglicanum work in detail and did several try outs.  As I progressed with this, I chose finer and finer thread, until I made a mental leap and started something else…

Padded Embroidery Figures

Next I started this piece, which is quite complicated, but very exciting.  Its a gift for someone special, she’s seen it and is also very excited.

Here is the other figure in the piece…

Victorian Beau

While I was working on this, I decided to go back to the Medieval lady with her falcon and study bird feathers for a while.

That’s when I decided to make this…

Chaffinch

As you can see, a different style is emerging in my work and its much more related to how I draw or paint. 

Notice the feathers on this little bird are sewn in the direction of the real feathers e.g. the stitch simultaneously describes texture and form. 

I have used stem stitch filling for the feathers, where the work is carried across the back, so that the grain of the work is always maintained, especially if you are trying to achieve gloss.  I was using plain cotton floss for this, but I noticed if you stitch it always in the same direction, it looks like silk!

Then I decided to make something special for my mother. 

1950s Toddler Ironing

We were recently reunited after 14 years.  She liked this card very much.  But alas since then, we have fallen out all over again.

Again the stitch used was mainly stem stitch filling, in the same direction with the thread carried across the back of the work.  The hair is couched.

Then I decided to make this:

Madrid Ball Gown - over skirt garland

Which is the overskirt garland embroidery on a Victorian ball gown worn by this figure:

Madrid Ball Gown - face

Her bodice is complete and so is the overskirt now…

Madrid Ball Gown - bodice

The bodice is supported by stiff card and laced very tightly at the back, over and over again.

I’ll leave you all now and hope that I can post again soon, but before then I need to have a wall knocked down and another built so that I can grow lots and lots of Clematis – wish me luck!

xxx