Friday 28 October 2011

Long & Short Stitching

As you can tell,  I’m still trying to make my posts shorter…

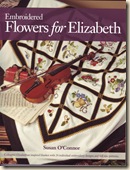
Recently I received Flowers for Elizabeth (FFE) by Susan O’Connor, published by Country Bumpkin.

Flowers for Elizabeth by Susan O'Connor

To say the book is wonderful is an understatement!

I bought it for the patterns and to help me with colours.

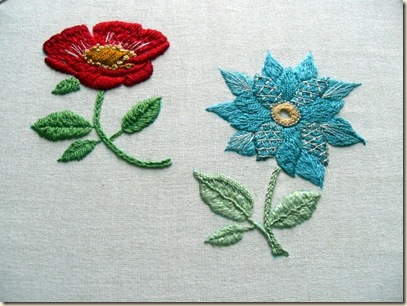
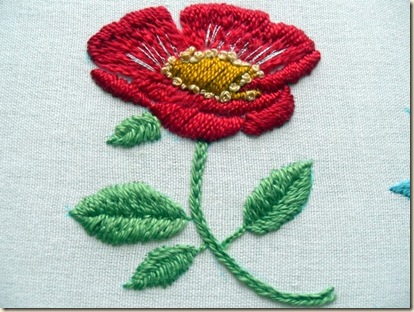
And so, that book led to these two flowers.  They are not patterns from the book, exactly, but inspired by it.

Long & Short Stitch Sampler

FFE includes lots of wonderful little tutorials of stitches and techniques, but alas it does not cover Long & Short (L&S) Stitch in any great detail.

As we all know, L&S is pretty difficult to master and there is a lot of, sometimes, contradictory information out there about how to tackle it. 

Personally, I always had an inkling that I was doing something wrong, but I didn’t know precisely what it was until recently. 

We’re told there are basically 2 distinct ways to work the stitch.  Either you come up into the space between 2 previous stitches or you split the stitch on a previous row to re-emerge.

After watching several exemplary videos and reading as much as I could online, I was still  no closer to producing what I wanted to see.

That’s when I decided take a closer look at how the Elizabethans tackled L&S.   I looked again at all the sources I have and concluded that they worked L&S two ways too:

  • When their thread was (thicker and) twisted, they used a ‘brick stitch’’ technique, and came up between two earlier stitches.  Although when they worked this ‘brick’ method, their stitches were much more compact than modern references.  The resulting texture comprises of lots of little bumps that are pointed at the top and bottom.
  • In contrast, when they used a flat filament silk, they would split the stitch of the preceding row and end up with a comparatively smooth  texture and gradual colour blending. 

As I was working with cotton perlee this time, which has a firm twist, I opted for the former method but still wasn’t happy with my efforts.

To cut a long (& short) story short (lol), I began to realise I was doing something wrong.

In fact, it turns out I was doing 2 things wrong but I had to solve the mystery in a particular order…

Then I came across a quotation that helped me a lot and provided a starting point for much-needed further investigation:

“Long & Short Stitch is very similar to Satin Stitch”.

I found that observation very illuminating.

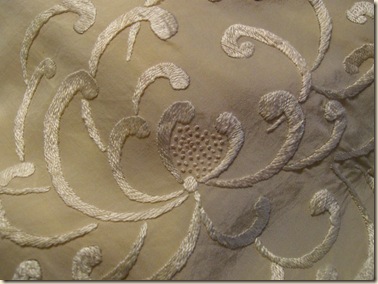
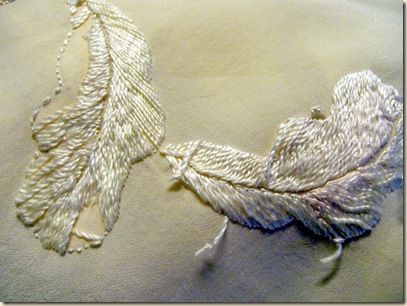
That’s when I decided to pull out my handmade vintage, Chinese silk  dressing gown that had been given to me, because I remembered it displays good examples of (unpadded) Satin Stitch:.

CIMG5846

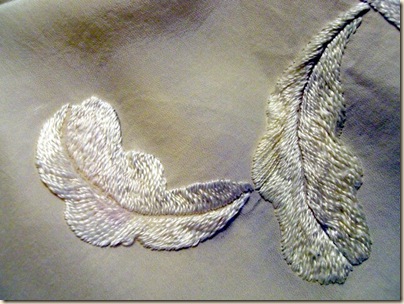
Here is a close up of the leaves,

CIMG5848

This is the back of them.

CIMG5849

Two things struck me while looking at this textile again.

1.  How you can see that L&S really is an ‘extension’ of Satin Stitch.

2.  How loose the work is, on both sides. 

This got me thinking…

I realised that the first thing I was doing totally wrong, was that I was pulling the thread too tightly after each Satin Stitch.  Hence I would ‘shrink’ the effect and inevitably cause more problems for myself by then needing to pack in more (and more) stitches to create a ‘fullness’, that I had inadvertently lost by pulling too hard in the first place.

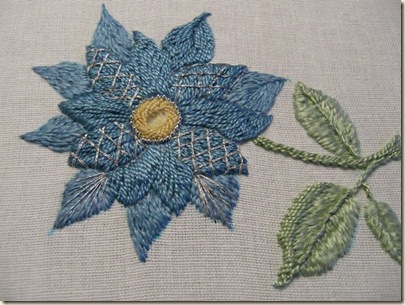
Then I started to make the Borage pictured here, but this time much more loosely than I was used to doing.

 Long & Short Stitch - Sampler - Blue Flower with silver highlights

This approach paid off and its not a complete failure but it was still ‘woolly’, figuratively speaking. 

When I came to do the leaves something happened

I find working Satin Stitch very time-consuming, I think everyone says that, but I’ve always felt it was because I wasn’t doing it right. 

Anyway, while I was thinking, I instinctively turned the work 90 degrees to achieve a better slant, as I was working the inner section of the leaf at the time. 

When I finished that row I checked back over what I had done and could immediately see the stitches were smoother, more regular and more importantly, I had managed to work faster!

Long & Short Stitch Leaf

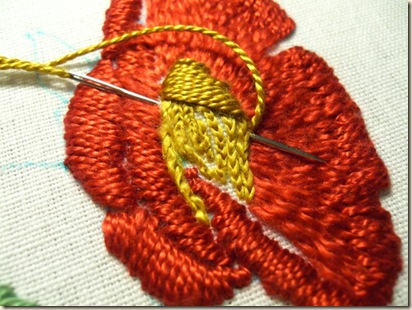
To jump forward a little, because I didn’t manage to take shots of the leaf being worked, this is the centre of the Peony being worked, later on.

The thing to note about this picture is that this is the direction in which I used to work the stitch. 

close-up of padded Satin Stitch

Then I changed to this method.

Padded Satin Stitch

As you can see, I now work in the most comfortable position, which is to go with the natural direction of my thumb and sew horizontally, rather than vertically.

There are various reasons why this way works better for me, quite apart from it simply feeling more natural. 

As things had picked-up, I continued with the Peony.

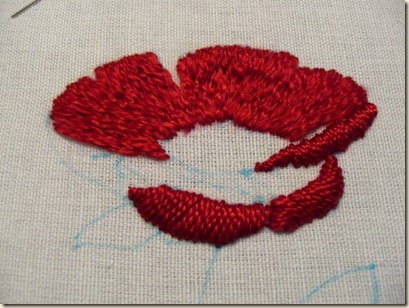
Stage 1

Long & Short Stitch Red Flower WIP

So working similarly, because Satin Stitch and L&S are virtually one and the same, I applied exactly the same principles to my L&S areas and quickly completed several red petals. 

Then I moved on to making a tiny, Cretan stitch sepal.  This was pulled out eventually because it proved to be too cramped and ‘busy’ in texture. 

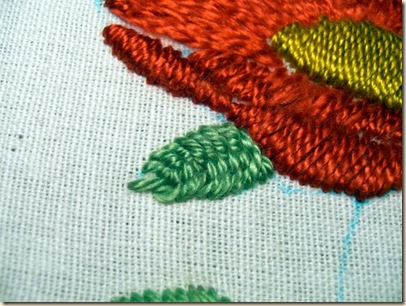
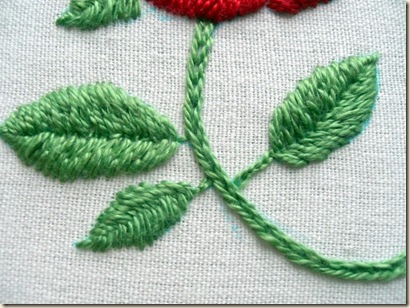
I decided then to split the plies once more and make the 2 smaller leaves with Fishbone Stitch and the larger ones with L&S.

Cretan stitch sepal


Long & Short Stitch leaves

The stalk incidentally, is made with Wheat Stitch.  This is described in FFE and is a very neat way to produce what looks like a very orderly chain stitch band but is compiled of 2 separate lines of stitching. 

Peony 1


Gotta go ppl !

P.S.  I have great news about The Bag – I have finally found a silk supplier that has filament silk that really ‘glows’, is a reasonable price, and is processed less than 10 miles away!

 

Tuesday 25 October 2011

Historical Embroidered Faces

Back to business here!  I shall be making a new video soon, this time on a Celtic Knots.  Immediately after, that I’m going to finish off the ‘3-d Corded Detached Buttonhole PDF file’ I mentioned a couple of posts ago.
For now though:  I noticed some draft posts I had lined -up that were in danger of being overlooked due to the (dear) book.  This is one of them. 


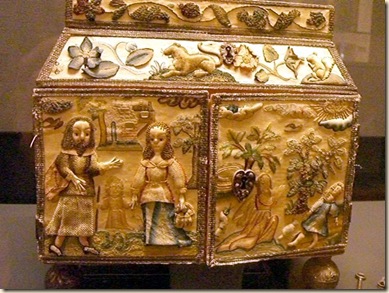
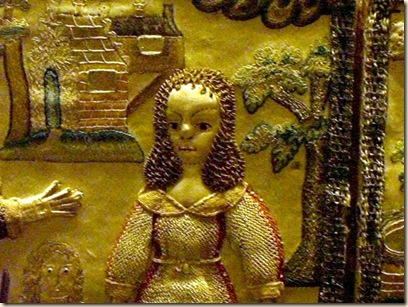
Last time I visited the Ashmolean Museum I saw among other things, 2 wonderful embroidered faces, one was from the elaborate Casket pictured below, and the other was from a giant needlepoint ‘tapestry’ piece, that I discuss briefly at the end of this post. 

Added to which, after my goose-bumpy visit to Witney Antiques, I was considering stitching a little face myself.  I haven’t had the chance yet to try it, but this post includes a picture of a ‘stitching pattern’ of one of these faces, for when I do manage to ‘clear my decks’.

Casket Faces

As we all know, these magnificent embroidered Caskets were sold in kit form, (probably door-to-door) by salesmen who could also supply the materials needed to complete them. 

This particular Casket, on display at the Ashmolean, has an emotive note regarding its provenance accompanying it.  The note was found in the box by the original owners and is more than a little sad as it explains some important historical background behind the scarcity of these boxes.

CIMG4897

The transcript of the note says:

‘The Cabinet was made by my Mother’s Grandmother who was educated at Hackney School after the plague in London all the young ladies works were –burnt- destroyed that they were about at that time.  She left school soon after, therefore this was made before 1665.’

(The word ‘burnt’ is struck through on the Museum note.)

Conjecture on Possible Construction Methods of Faces

CIMG4898

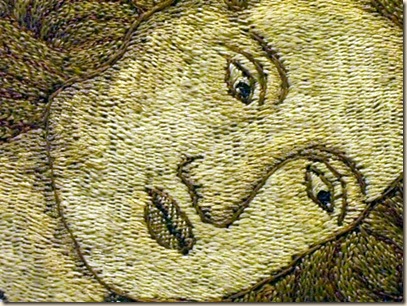
Seen lit from above in this way, we can really tell just how dimensional the lady’s little padded face is. 

Her forehead protrudes further out than the cheek bones and is realistically dome-shaped, even though she has unusually wide eyebrows. 

Notice how well formed her  cute nose is.  It too protrudes, even though its highest point is actually a little off-centre. 

See how taut her ‘fabric’ complexion is.  To my mind, their method of working meant that the stitches used to define the facial features are not only descriptive but functional too, as they are used to ‘mould’ the shape.

The really interesting parallel I was able to make recently, was just how much this female figure resembles a period doll.  In fact, an Elizabethan doll described as being in “remarkable condition” popped up  in an episode of  the ‘Antiques Road show’ that I saw last year.   Apart from the similar treatment of the facial features and their proportions, I noticed also, that the little wooden hands were finished on the toy dolls exactly as they are in miniature form, on these Stumpwork Casket figures.

Pattern and Stitch Plan

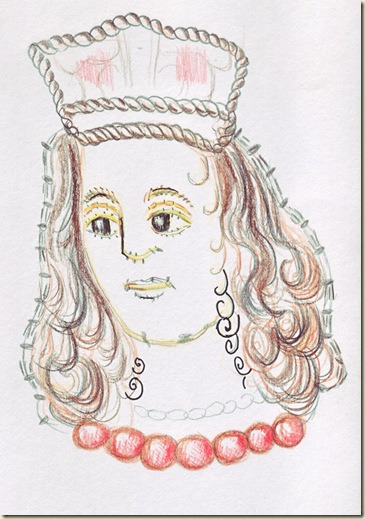
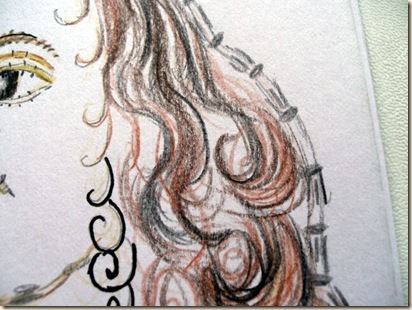
Below you can see I have made a careful drawing from an image in the catalogue (sold worldwide) from Witneys exhibition.  This Queen’s face appears on a embroidered mirror.  

As a drawing, it looks a little strange and that is because its actually a drawing of the stitching used on this particular textile face.

I think the ‘pattern’ is clear enough to translate back into stitching, as I have counted the stitches as precisely as I can with the aid of my magnifier. 

I suppose you could say its a kind of ‘dot-to-dot’ of stitching, if you will, in that all the small vertical lines are where your couching and/or quilting stitches should go. 

The interesting thing about this sketch is that you can clearly see, she was stitched away from the main fabric and added as a kind of ‘slip’, subsequently. 

Notice how the edge of the figure has a finely couched white cord running round it, that is secured with very small perpendicular couching stitches. 

As I noted from peering at slips on display at The V&A, the cord has a dual purpose in this instance.  Firstly it would conceal any frayed threads that could poke out plus it would provide a much-needed firm base with which to stretch the piece into place, as you stitch.  

It goes without saying that this idea, in all likelihood would work far better than simply grabbing a tiny hem and pulling it about.  After all, they wanted their stitching to last.   In fact, I have since learnt that the idea of reinforcing hems in this way, was a working method that was possibly carried down from Saxon times (?), when they would finish off all their hems with fine braids, to reinforce them against wear.    

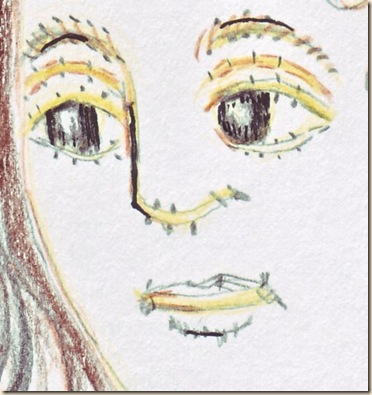
stumpwork stitch diagram

Of course, stitched faces are utterly dependent on the convincing treatment given to eyes, so all eyes have to be especially large. 

stumpwork face close up

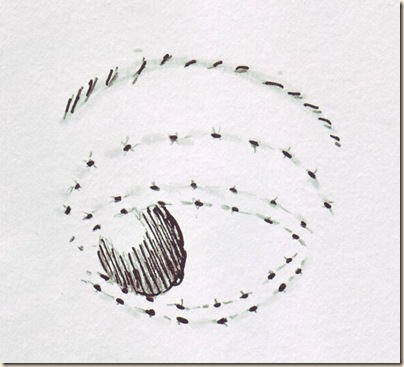
If we take an even closer look at the eye socket area from another piece of historical embroidery (found in another Witney catalogue) that I made a drawing of, you can see the path they would have taken with their tiny quilting stitches. 

Eye quilting stitches

The Curious Case of Ink Lines Left Unworked

Going back to the royal face, in the picture below, you’ll  see, I’ve deliberately used black marker to identify the ink lines that remain visible on the embroidered mirror.  In my personal view, you can perhaps tell from this, that they deliberately left key ink lines ‘unfinished’. 

Those areas are:

  • the side of her nose
  • her eyebrows
  • her lower lip and
  • the finer, framing curls of hair

It may just be conjecture but, I now think this was, in all probability a deliberate decision (?).

It could be that black silk was known to disintegrate and was very expensive or ‘troublesome’ in some other way?

Also, it could be that the whole thing just looks better with certain areas defined in black ink?

My personal view is that they were deliberately left as unworked inked areas for emphasis, rather like under-drawing in a painting, to help define key features, especially when viewed from a distance e.g. hung on a wall. 

under drawing


Needlepoint Faces

In contrast, here is a close up of another lady’s face that appears in the centre of a large needlepoint ‘tapestry’ from Spain c.1625, titled ‘A Musical Party’, that also hangs in the Ashmolean. 

I have included it here because interestingly it incorporates stem stitch for its outlining.  (See earlier post where historical outlining is discussed.)

CIMG4949

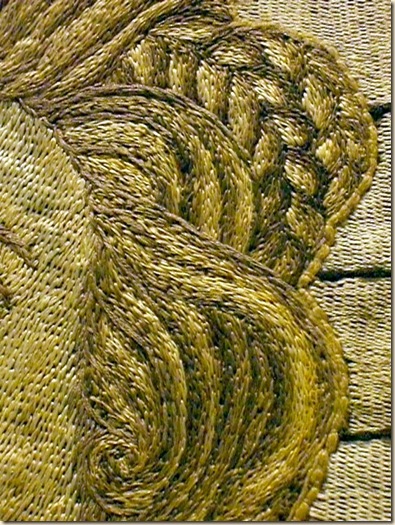
On the subject of stitched hair, would you just look at this!

CIMG4950

Needlepoint hair is a total feast for the eyes and this example from the same artefact is breathtaking. 

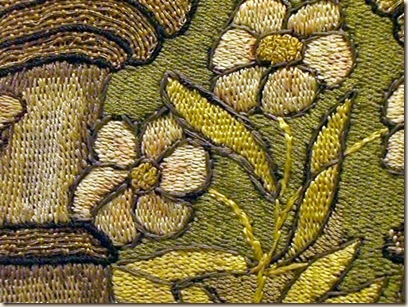
Now, it wouldn’t be fair to talk exclusively about faces, so let’s give a little time to the Continental treatment of the flowers on this piece.  Again, see how they stem stitched the outline on those as well.   

CIMG4948

This ‘workshop piece’ is positively huge and hangs wall-to-wall, alongside 2 other tapestries ‘proper’ from Holland. 

My notebook for that day says:

Outlining in brown stem stitch, sometimes split stitch, sometimes whipped running stitch.


Comments welcome !


Must dash ppl !


Monday 17 October 2011

A Knitted Bluetit

The book bounced back  for its final edits and they took me a lot longer than anticipated.  Consequently, everything is severely behind, so this post is a filler.


News from the (Book) Shed

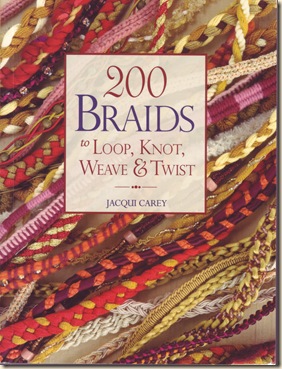
Back in the summer I mentioned I would be buying Jacquie Carey’s book on braids, especially as its now available as a handy paperback and what a little feast it is! 

Haven’t had the chance yet to really pour over it, but on a quick flick, I certainly admire the way its been set out.  Lots and lots, of very yummy techniques to try out… 

200 Braids to Loop Knot Weave & Twist 

A Tiny Intarsia Knitted Bird

Back in the Spring I caught a case of ‘Bird Fever’.  Not the kind reported in the press you understand, but a textile version! 

Now that I come to think of it, it started because the owner of my LYS introduced a nice new line of wooden, American, Double Pointed Knitting needles.  They are so fine they could even, possibly, seem a little like toothpicks.  Realising the potential of such fine tools, I became really curious as to what kind of bird I could make with them? 

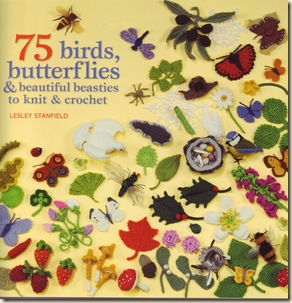
So this post is about making a small knitted Bluetit from this wonderful book by Lesley Stanfield:

75 Birds Butterflies and beautiful beasties to knit & crochet

The following  sequential pictures detail how I made one of these little chaps.  I adapted the pattern every so slightly and used some DK yarn.  As I had all the right colours, whereas the pattern suggests 4-ply.  So in that sense, you could say its a ‘stash-buster’.

As the pattern is quite detailed in certain parts, I carefully wrote out the repeating sections and crossed them off as I completed them.  That way I feel I can keep better control of the directions and not dread possible interruptions.  So with notebook, tiny needles, burning curiosity and some peace and quiet (at last), I set to work.   

Head

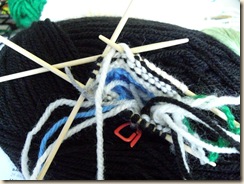
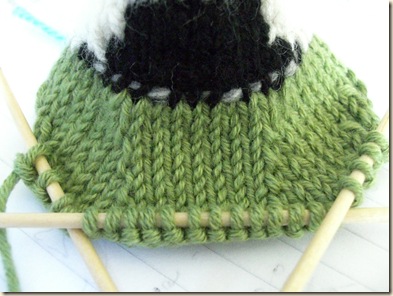
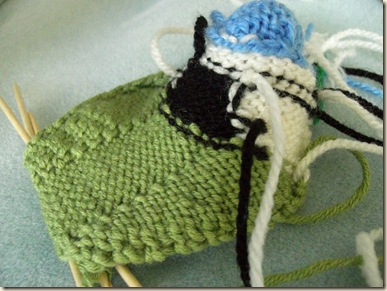
First you knit the top of his head with 3 needles using a fourth needle to work the rows.  I included an all-important ‘life-line’ at this stage.  That is, a length of contrasting coloured yarn that’s fed through the stitches, just in case you need to unpick a mistake later on.

As you can see, the inside of the work faces you for the purl rows and then you turn it upside-down, to have the outside face you for all the knit rows. 

knit top of head

Then you knit his neck..

knit neck

Then you knit his shoulders and back..

3

Above you can see I introduced another surreptitious  ‘life-line’ of grey yarn at the bottom of his neck.  Pleased to say I didn’t need any of them, but I really liked knowing they were there…

Then I made the tail with simple ribbing.

Knit tail

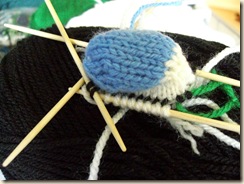
Then you knit his body, growing (incredibly) outwards from where his beak will eventually be placed (!), to make his chest and tummy. 

This section involves several ‘Short Rows with Wraps’, to achieve the correct dome-shape. 

I must interrupt at this point to say, I’m a little bit fussy about my Short Rows, as I don’t think there should be any visible holes afterwards and  certainly that was the way I was taught.  But you know, its funny how not all books give you the same advice on this aspect and some even make it a kind of ‘virtue’ to have holes!!!

In fact, I find myself using a book’s treatment of ‘Shorts Rows’ to gauge what calibre of knitting book it really is.

So I would like to add, that the (dreaded) hole you can see further on down here, in the close-up of his tummy, is not a result of bad technique, but rather of fiddling too much with the original location of his leg, so please forgive!! 

Knit tummy

This picture is a little out of sequence, but proves the no-holes maxim!

Lots of short rows with wraps for tummy

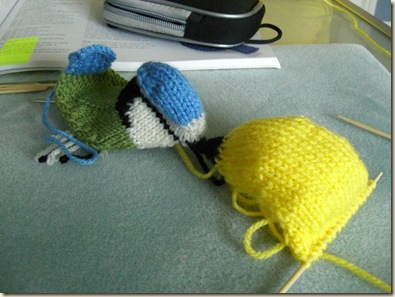
Then you carefully pick-up a precise number of stitches on each side to make the ribbed wings…

Pick up and knit wing

Picking-up stitches for a left handed person is a bit weird, especially as I knit right-handed, but its not difficult really, you just have to make doubly-sure your stitches are pointing the right way afterwards and as you can see, I use a crochet hook to help me with this part.

Pick up and knit stitches for second wing

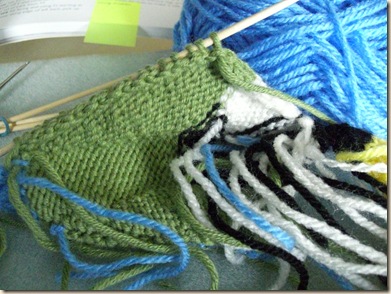
Before you can think if stuffing him, you’ll need to weave in all those yarn ends…

Purl wing

Ta da ! 

Woven in ends

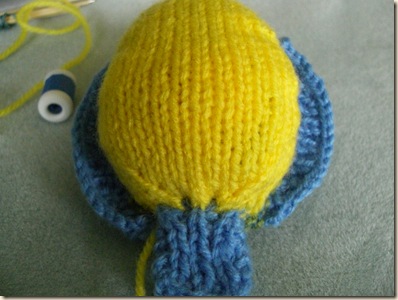
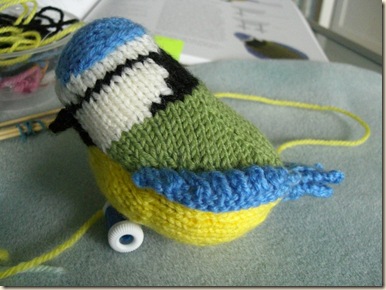
Then you sew him together and get him well and truly stuffed!

Stuffed bird

At this stage I thought he looked, perhaps a little rotund? so I fixed that by moulding him into shape a bit (aka squeeze bird between 2 sweaty palms).

Next, onto his wiry little legs…

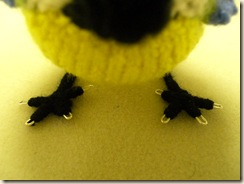
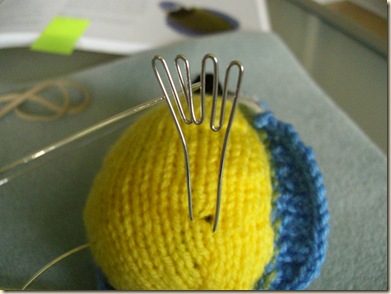
Make wire feet and bind

The legs are pretty straightforward once you can successfully locate your (prized) jewellery-making round nosed pliers and a ruler.  I used silver plated wire and as you know, once you bend that, you are stuck with it, otherwise the silver cracks off.  This was my second attempt at forming the cute toes.  (o-oh, but I just know everyone will be transfixed at that horrendous hole that I explained earlier!)

Then you fiddle about with his feet a bit, until he can stand-up straight and you can then finish off his legs with binding, ending just short of his shiny toes…

Leave toes unbound

Then you find him a convenient perch…

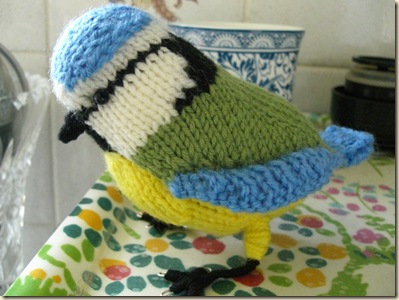
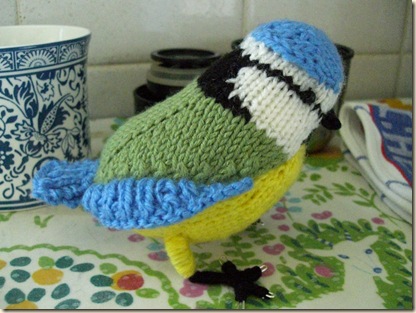
Fine feathered mini friend complete

and try and decide which side you prefer..

Fine feathered friend - right side

N.B.  I found only one, tiny error, in the pattern and that was a simple ‘typo’ concerning yarn colours.  It was obvious to spot and so didn’t hinder me. 

I stuffed him with all the lighter-coloured snipped yarn ends.  I should also mention, that I changed his beak slightly after I knitted it, by sewing neatly into it with fine sewing thread, to bring it together, kind of thing, and refine the shape at bit more.  In this way, his beak has ended up a little ‘longer’ methinks, than in the book, but it suits him as he’s a larger, DK yarn version.

Jewellery Repairs

As my jewellery pliers were (finally) located and in use,  I decided then to repair and alter some costume jewellery that was hanging around..

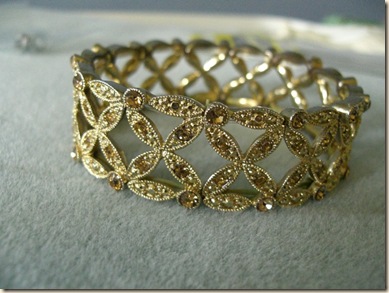
Next is an elasticated bracelet that I needed to re-string.  I really like the design, it looks ‘Moorish’ don’t you think?  Whenever I wear it, people are always enchanted, in fact I wore it to the V&A last year and believe it or not, the guard even opened the door for me! *flutters eyelashes demurely*     

Transparent jewellery elastic is quite expensive and securing it at the end can be tricky.  For that part I joined the ends to some cotton thread by forming a Weavers Knot, then sewed into the knot with the remaining cotton yarn end, taking care to smooth out the bulk of the resulting bobble shape.  

I felt satisfied that the completed repair would hold and in fact it did.  Eventually tho’, the bracelet snapped another elastic (there are 3), this time while I was walking around the 2-hour tour of ancient Pompeii in the summer, would you believe, so its back in the workshop. 

Although it’s not real gold, when I bought it, rather like dye lots for paint/wallpaper/yarn etc, it was in a display tray with countless others where the gold differed in hue on each one, some were too pink, the rest too green.  I chose this one because its somewhere in the middle and really looks quite like antique gold.  I wear it on its own, with perhaps a simple tiny pendant so as not to steal its thunder.  No need for me to mention where I bought it….(it begins with ‘B’) 

1

The next item up for repair

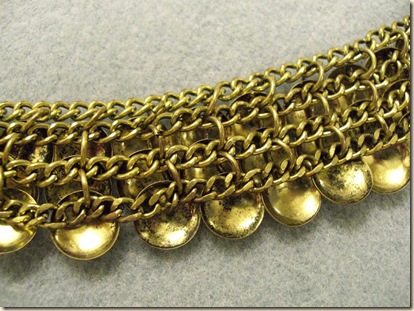
I was so pleased this summer to see the the shops were full of designs inspired by pre-history.   Like this simple necklace…

Gold necklace 01

A piece like this can be very flattering if worn high up the neck, where the light can be reflected up into your face and eyes.  

When I tried it on, it was much too long, but that’s not a problem if the jump rings are of good enough quality to withstand adjustment.

So I shortened each side with my wire cutters and reattached the clasp.

This is the back of this very simple construction which is exactly how they used to make necklaces in bygone days..

Gold Necklace 02

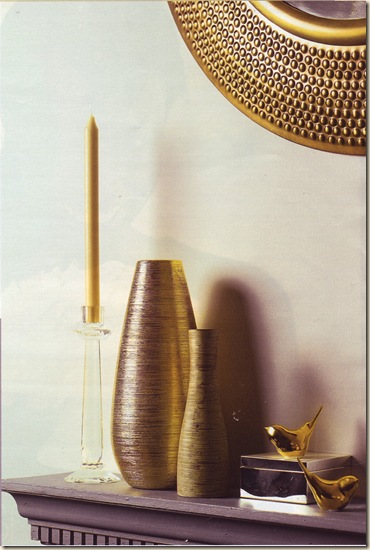
Interior design has also been taken over by this ‘ancient look’, combining gold, silver and bronze.

Gold interiors

Notice the (imitation) punched-gold technique employed on the mirror.  Its the same method that was used on the Bronze-Age ‘Mold Gold Cape’ that I mentioned a while ago.  That amazing, pure gold ceremonial garment, had been beaten from a solitary slab of gold, if you recall. 

It was discovered at a burial site near the very significant huge Welsh copper mine, called The Great Orne, that was the largest copper mine in North-West Europe, 4000 years ago.  It was a major trading centre for pre-historic communities.