(This is an especially long post – I wish I could cut it down, but such is life…)
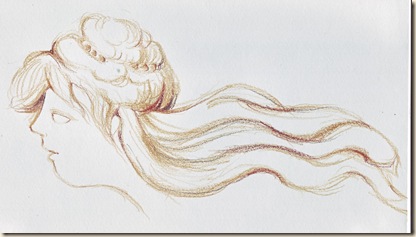
Here’s a quick sketch I made with Conte pencils of what I think the Aemilia Ars lady would have looked like fleshed out. As you can see, she had to have been very young, and reminds one of a mystical figurehead from an ancient ship. I once did an extended art project on sacrificial images, specifically looking at all the figureheads stored in the hull of the Cutty Sark. Its such a shame those artefacts have perished. (More about this W.I.P. further along).
Important matters to be addressed
Due to finally getting the chance to experiment with several serious issues concerning the repro bag, I have decided that I may have jumped to incorrect conclusions and now find evidence to the contrary. My recent discoveries make life kind of easier but in turn present new challenges.
The three things are:
- Acorns on the bag
- Diagonal migration of DBH
- Trellis stitch using only metal thread.
First off - Diagonal Migration of DBH.
As you know I am left-handed and I start DBH the opposite way to right-handers. It was recently brought to my attention by an EGA teacher (guess who) that diagonal migration for DBH is a red-herring (Thank you, I appreciate it).
I have not yet had the chance to find out exactly why this happens, but the Aemilia Ars lady proved to me that if I start at the other end, then I don’t get that weird visual data.
In other words, I may have to rethink where I start motifs in order to negate the diagonal tendency e.g. when I started the Ars lady from the neck I got the diagonals but when I started from the forehead I did not. (I think it boils down to the old ‘flip and rotate’ conundrum for us lefties.)
I will spend some time working out ‘what is what’ on this topic, but I just wanted to say for now that, even though I am left-handed, if I can, I prefer it if my work doesn’t betray that. (I know; why be ashamed, blah…its not really shame, its about wanting to be mainstream.)
Next: the Acorns
The acorns and the cords have given me more cause for concern than anything else on the bag. It was so interesting to meet with Bill Barnes recently (he of Golden Threads) because of his own volition, very kindly pondered the cords for a long time and actually offered to ask a contact of his to make them if I didn’t feel I wanted to take that on, as well. Its nice to know I have a back-up plan, but my view is, the cords ‘go with the territory’.
Acorn Nitty-Gritty
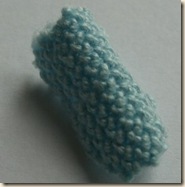
Now I need to rewind a little here: If you recall, when I received the image from Florence (The Bag was made in England, it’s stored in New York, and the image came from Florence) I was struck by what first appeared as tightly worked reverse-side Trellis stitch they had used for the acorns. I think I mentioned, that it appeared to me then, that they may have been worked in 2 sections, then sewn together to produce firm little cylindrical forms. Here is a mock-up of what I thought I was seeing:
See how from a certain distance, the chevron rows of Trellis merge in the eye, to become neat pairs of crossed ‘arms’ and those appear as regular columns, if you do as I have done here, and let the mini-fabric curl naturally.
Tight Trellis Stitch mesh impossible with metal thread
Well, because I couldn’t find fine silver thread that would form Trellis knots without ‘jamming’, I went to see Bill Barnes in the hope that he had something better suited to the task. (Going to see him was a cost-saving exercise - I keep telling myself - even though it cost quite a bit to get there and devote the time – still it was very kind of him to see me, as he doesn’t usually meet with customers.)
However, now I have had the chance to really sit down and try and sort out which of my three versions of Lurex is best suited to the job, one is from abroad and the others are English.
I’ve thoroughly tested all three and concluded that basically you can only ever make a very loose-looking reverse side Trellis with silver Lurex thread, which is the finest metal thread available today. Try as you might, it will never take on the appearance of the tightly worked chevrons on the acorns of the bag.
This prospect was very disheartening. I kept asking myself, ‘if I’m using foil and the Elizabethans used real silver, surely the foil could work up more tightly than the silver, not less so?’ On the contrary, Lurex will only go so far in completing the little knot, then it jams and if you continue to pull it, you just get the dreaded splitting and unravelling.
So, with that, I returned to look at the image on the computer, but this time I didn’t look at the acorns and instead took a wander halfway down to examine the body of the little blue butterfly which had been worked using similar methods but much more loosely.
You might think ‘well why didn’t you notice that before’ and I have to admit there is an element of ‘not seeing the wood for the trees’ but you have to understand, the tension used to make the acorns is much, much tighter than that used for the thorax of the butterfly, so much so, I honestly thought they were different stitches.
You might also be right in wondering if I established the presence of the characteristic lower knotted area that would identify it as Trellis stitch, truth is, even tightly twisted silk (and we do not know exactly how tightly the Elizabethans twisted their silk) does untwist with time and from the pieces I have seen where this has happened, the Trellis knot does appear looser and smoother. The distance at which the image was taken was also confusing me.
Ceylon Stitch Butterfly
This butterfly has worn a little loose because it lies exactly where the bulk of the bag would have protruded. Hence, I found this had exposed the connecting thread between two particular stitches and those stitches were larger as a result. This enabled me to really see that they were made not by knotting the thread, but by looping it, as you do with Ceylon stitch.
We also have to remember that the image I have is medium definition (£32 all in) perhaps the high resolution (£110) would have cleared up the confusion a lot quicker but I found that price tag to be prohibitive.
To support this updated opinion, I’ve gone back and looked at lots of other examples. This means, in my view, that Trellis stitch still appears to be one of the network buttonhole stitches that was not worked historically using metal thread, either blended with silk thread, or on its own. To summarise, they had the same problem then as we have now. (I have mentioned before GST is not suited to it either – please see relevant discussion on that topic here.)
2-Sided Cylindrical or spiral working of Ceylon Stitch?
If I am now to consider making the acorns out of spirally worked Ceylon stitch, it begs the question of what inner support the structure has? This whole topic is very interesting because in my view, The Bag is not exactly Stump work per se. It anticipates, later Stuart Stump work, but is about 60 years earlier. Textile scholars have given this type of embroidery the name ‘Elizabethan Flying Needle Lace’.
If you would like to see a really good video that discusses a famous Stuart Stump Work casket in detail you should click here. The sound quality is below par but the close-ups are excellent. To quote from it: “In 1660 there was an explosion in decorative arts as a result of the Restoration of the monarchy."
Historical Context Notes
The construction methods of Elizabethan 'Flying' Needle lace * ‘follow on directly from what they had learned from the tradition of embroidered Book Binding. Wherein they discovered that the embroidered bindings lasted longer if metal thread were added (and blended? with) the silk’.
This also makes sense in terms of Swetebags and clothes, as they would have to undergo a certain amount of abrasion.
* Paraphrased excerpt from Erica Wilson’s Embroidery Book, 1973 Pub. Charles Scribner’s Sons.
From what I saw at the V&A recently, later 'Stump work' for the most part abandons the custom of blending metal thread with silk and instead utilises wires to support the 3-d structures.
Back to the Acorns
I can see that the lower stitches are wider than the top half and that the foundation stitches are many and elongated. My initial guess is that they used a backstitch for the base line.
Did they use a rolled-up inner support?
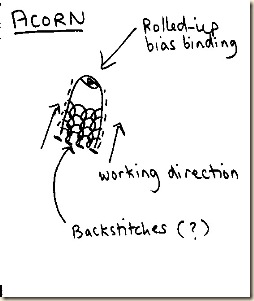
I made a tiny support by rolling up some bias binding and using one strand of silk and one strand of gold Lurex and kind of turning the work as I went along. It proved a very difficult exercise and I was not happy with the results and figured out that Ceylon really needs even markers at the sides for it to pull up correctly, so now I come back to my initial understanding that is, it had to have been made in two halves and not spirally.
So now I’m going to try working it along one half of the supportive padding, using evenly spaced edge stitches, then doing the same for the other side, like this:
It remains to be seen if I leave the little supports in there because on the historic acorns the shape is flattened out somewhat. Next time I’ll use some folded over linen instead.
_________________
We’re hoping to visit Florence soon – hence my enthusiasm to complete the Aemilia Ars piece.
Just to say that, you may have been able to spot from the images I posted last time that I made a mistake quite early on there (and it was a dreaded biggie). It only became apparent when I came to work the chin. Pleased to say I’ve corrected that now, more later…
_________________
We’ve just returned from a blustery Brighton. I love that place it for the creative ideas it gives you.
This time I was particularly struck by all the amazing costume jewellery rings made into yummy flower motifs, like chunky moulded leather roses and ethereal electrical- wire flowers.
So taking the Elizabethan lessons of ‘making embroidery more durable and thereby able to withstand a certain amount of abrasion’, I’ve decided to embroider a ring using those techniques.
It might turn out to be a bit more Baroque than Tudor, but I don’t mind. The important thing is to get these old ways out and do things with them!
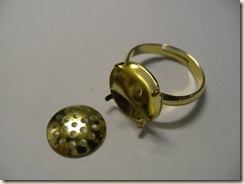
Here’s the craft shop ring I intend to use. This one comes with a handy ‘sieve’ which will be great for anchoring all sorts of stash-busting embellishments…
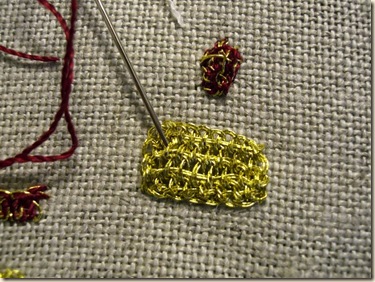
One of the things I intend to do with it is this:
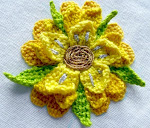
Can’t say I’m a huge fan of Lurex but doubled-up as it is here, I find it much more workable. This is a fingernail- sized piece of trusty old 3-d DBH.
Not sure yet if I’ll sew the DBH petals directly onto the sieve or use a tiny piece of linen then attach that to the sieve? One of the things I have to keep in mind is to watch out that the little prongs will still be able to grab over the increased bulk. It’s still at the drawing stage but I’m getting my materials together, especially some of this Pearl Purl that is now going spare…
I’m making it as a gift and the recipient prefers silver. So, to get some more Elizabethan jewellery ideas I visited this cool lady’s website: Alyxx. (Btw, if you go about two thirds of the way down the page there, you can see the reticulated pattern she chose for the Partlet, it’s the same as the one I chose for the Girdle Book.)
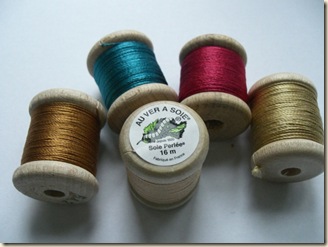
Oh, and look what arrived from Paris after they had their customary 2 weeks of August shutdown…
I don’t want to say how much this little lot cost, just that the red is wrong but I can’t bring myself to return it.
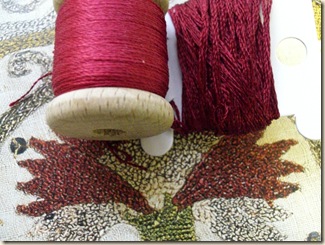
Below is a comparison with a better red from Silk Mill, but I do love the lustre of Silk Perlee
Without your own colour cards, the disparity between screen colours and printing ink must make silk suppliers a mint, don’t you think…
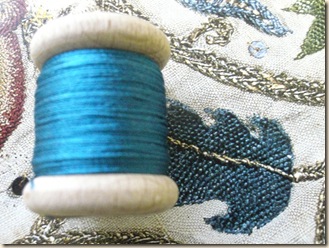
Just look at this divine blue!
cya!
P.S. The colour references are from The Victoria & Albert Museum Textile Collection – Embroidery in Britain from 1200 to 1750.

