This post is not short, is in 3 parts and 2 are on topic….I’m still working on the book I mentioned before…
More About My Research into Plaited Braid Stitch (PBS)
If you recall, last time I put forward the observation that the essential path Plaited Braid Stitch (PBS) takes is this classic Triquetra shape.
I should add, that apart from it being a Celtic symbol, it was also an important Germanic symbol.
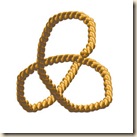
PBS, however, is further woven or interlaced. If we isolate that idea for the sake of exploration and look round for Triquetras in ancient times that were similarly ‘woven’ you find this shape:
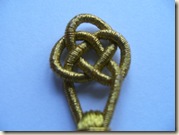
The circle component of this interlaced Triquetra is believed to signify the concept of eternity for ancient people. In my view, if you take this basic pattern and look around the decorative culture of the time for similar formations, both in two-dimensional and three-dimensional representation, you come to this classic shape:
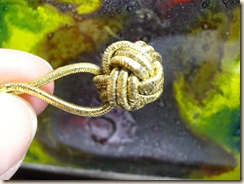
This is a Turks Head Knot or Double Coin Knot. I prefer to call it a Turks Head Knot (THK) because this is the visual pattern that is formed as the framework for making one of these spherical knots.
As you can probably tell, once you snip the ends off, it becomes very difficult to untie this type of knot. I’ll talk more about that next time.
For now I’ll just say it’s certainly a very versatile knot with ‘hundreds’ of uses. (Google the blog: ‘Stormdrane’ for in-depth knotting information).
It was and still is, commonly used on sailing boats but long before that it was used by ancient peoples to cover or ‘hold’ things, like the handle of a dagger or bow (and arrow). In those instances the knot would have been formed with leather cord and suchlike.
To understand how to make one you need to apply the basic weaving rules of ‘Unders & Overs’. Once you follow the pattern round closely with your eye, you can then translate it into 2-d and 3-d representations, as the Celts, the Anglo-Saxons and the Vikings did.
I am most interested in the central formation of the THK in its initial flat stage. In isolation it is a classic pattern that was popular for many centuries before the Elizabethans.
Another way you can form THK is into a circular Guilloche pattern. It is thought that this kind of knot was used during ancient Celtic weddings to tie the hands of the couple together, hence we refer to people who are going to get married as ‘tying the knot’.
Incidentally, there are 36 Turks Head Knots on the Sweetbag I am studying.
More later….
********
Royal Wedding Rings
Speaking of ‘tying the knot’, Royal Wedding fever is everywhere and who can help but be swept up in the magical romance of it all. William & Kate are such a photogenic couple, I think record numbers of people will turn up for their big day, for sure.
Interestingly, Kate Middleton’s wedding ring will, in all likelihood be made of the highly precious and rare Welsh gold, which is mined in, (erm) Wales and has a unique pink tinge. Royalty have always wanted their wedding rings to be made of this particular gold as it forms a traditional link back to England’s first ancient Celtic kings.
*********
Royal Wedding Knitting
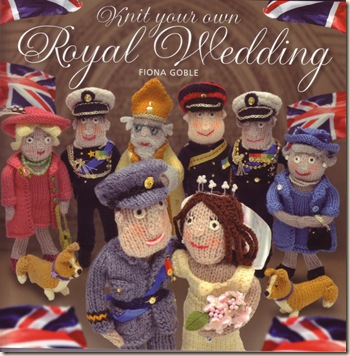
Gold, woven patterns, Viking Knit & Royal weddings have all kind of fused in my imagination and I decided (finally) to knit the characters as per the instructions in this adorable little book (paperback).
I decided to buy it because the figures are made in Double Knitting yarn using 2 needles and the body parts and little clothes and accessories are made up of two pieces each. The hats and even the shoes are also made with 2 needles!
Personally, what I found most important to learn before buying it, was if I would be able to make their facial features look as they should. So I was really pleased to note that the little noses are formed using a very simple crochet chain stitch and the rest of the embroidery for the faces is very straightforward. The gold chains on the uniforms are made of metallic knitting yarn and the mini buttons etc can all be sourced at your LYS. The pattern uses 3mm / No.11 knitting needles ! (*tingling with excitement*)
I won’t say anymore because I think you should buy the book, its a very cute keepsake and besides, the templates of the figures could also be adapted to produce your own family’s knitted portraits !!!
Knitted Flowers
Well, I should have started the figures by now and I still maintain a vague hope that at least Prince William will be knitted up in time. But while I was waiting for the book to arrive I was laid-up with some kind of weird sub-virus thing that I get when I’m really exhausted and not listening to my body. Anyway, that’s all boring stuff but it meant I got my knitting needles out (while resting) and once I get some decent wool in my hands I can get a little, um, shall we say….carried away…and decided to knit a batch of roses…
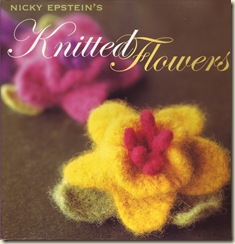
My favourite knitted flowers book is this one by Nicky Epstein. It’s is a lovely book and started me on my knitted & crocheted flower book collection. The colours in this book are really inspiring but I find the suggestions for yarn difficult to source.
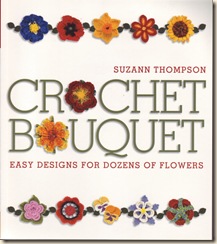
Then there is this book that I like a lot because it breaks down all the detailed components of flower construction so you can let your imagination carry you away, as well containing lots of patterns based on vintage Irish crochet lace – yum yum. Great rose patterns, with the cutest rose bud design and of course, lots more patterns for leaves.
So I decided (tentatively) to make a few knitted corsages, because Kate Middleton is an English Rose and the bunting is flapping in the breeze, so I picked out some nice rose patterns.
Knitted Flowers
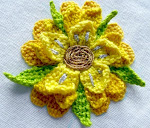
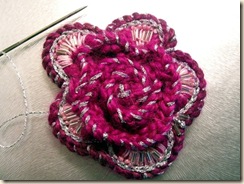
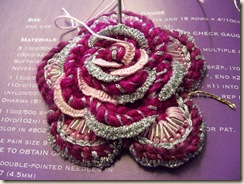
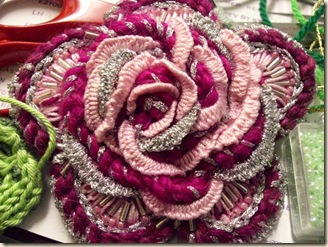
Now a funny thing happened…no sooner had I knitted up one of Nicky Epstein’s patterns than I found myself adding embroidery. This rose is in fact the back of the pattern and looking a lot like a five point Tudor rose…
Rose 1
As I said, I went a little wild embellishing it as you can see..
And by this point I felt it was really a bit over-the-top, so I picked out some of the stitching and ended up with this…
My problem with this rose was that I had used Magenta to begin with. It’s not my favourite colour as I think its too acid. The other mistake I made was I used silver metallic thread instead of gold. The silver just doesn’t work, its not my choice but I was making it for someone else. When silver is placed close to Magenta like this it just looks very grey. To try and balance this OTT rose, I beaded the leaf and embellished that with silver too. But the whole thing didn’t really succeed and so after that I decided to take a different route.
The best colour combination for Magenta is to pair it with lovely green and gold and I try that later on…
Rose 2
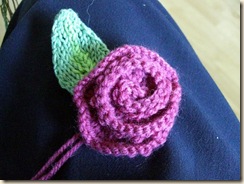
Then I made this, another Nicky pattern. This time however, the leaf has two shades of green.
Anyone reading this blog will know that leaves are some of my favourite things and I wanted to see if, for a corsage or bag charm idea, the contrast of embellished leaf to understated flower would work? As far as the knitting goes with this one, I think it would have benefitted from larger needles but I was too ill to go and find them.
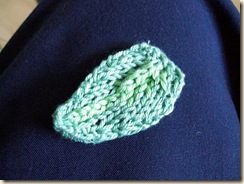
Two-Tone Knitted Leaves
Two-tone lacy Stockinette stitch leaves become a little complex and there aren’t many patterns out there for them. What you find is that with all the YOs and colour changes you can end up losing the lacy effect.
But I was adapting the pattern as I went along and even though the lacey holes did get gobbled up, I wasn’t deterred and took the time to produce a little 2-colour leaf pattern once I established that you can colour change a YO but you must purl into afterwards or else the hole is lost forever…
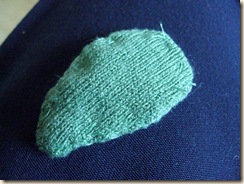
I also covered the back of the leaf with a thin piece of a re-cycled green knitwear. This part is really easy to do and you just stitch through both layers like a sandwich.
I hardly wore this top but I find now its great used in this context, as its so soft - It might feel a bit wasteful to cut up a perfectly serviceable garment and use it for scrap but we need to remind ourselves that a lot of the old textiles we donate does actually end up being taken apart and reconstituted as yarn bulk in the big textile centres of Europe.
Rose 3
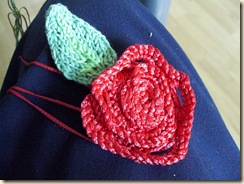
Then I made this next rose in a nice glossy red-orange knitting ribbon. This pattern is the same one that I used for the Magenta rose but turned the right way up!!
I’m using more of that luxurious French yarn called Bergere that I embroidered with last year and mentioned that the gold shade was great for flower centres worked in tent stitch.
However, its very slippery to knit with (especially on metal needles when you’re too drained to go and find your bamboo ones) and this was the first time I had knitted anything with it. I think the tension control is quite good all things considered, and if I made summery bag charms with this pattern, I think I would string up say 3 or 4 and dangle some i-cord.
Rose 4
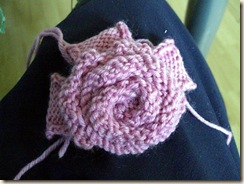
Then I made this larger reverse Stockinette rose with 6 curly outer petals (rem. 3 yet to do!). This is the rose pattern from the book ‘20 Flowers to Knit’. Dinky handbag-sized book, great designs! I like this pattern a lot and hope to eventually tie this rose to my bag.
To attach it, I’m either going to make some green i-cord or use some pastel pink velvet ribbon. The colour is easy to wear and the size of the flower is appropriate for a large daywear bag. (The actual colour is more pink than this image.)
Rose 5
So, after a modicum of success I decided to head on back to my Magenta conundrum and tried another pattern that I prefer all round. It’s another ‘Nicky’ and interestingly incorporates the technique of turning the left hand needle in a complete 360 degree circle and knitting on. It produces very sculptural results!
Then things started to get interesting…
First off, what I had learned from the first Magenta rose was that if you embellish the rose a lot, you end up with something like a dressage rosette…(aka a no-no).
Gold Knitting a Leaf’s central vein
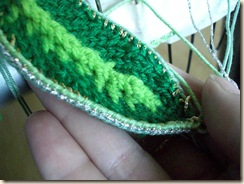
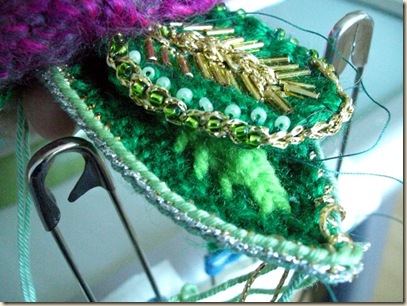
So this time in contrast, I decided to limit the embellishment to the leaf. Furthermore, I took the idea of two colours again and knitted up the central vein in gold metallic knitting yarn.
I added some gold bugle beads (which were applied at night by a tired stitcher) then I started to explore possibilities with the edge of the leaf….
Elizabethan Twining Technique
Then I recalled that in Sweet Bags, Jacqui Carey includes a chapter on Twining, which is an ancient braiding technique used to edge the seams of Sweetbags and is on the bag I’m studying.
Twining involves twisting and then weaving into warped threads before pegging them down. The unique effect produces pretty bands of alternating colour.
I decided now was the time to try my hand at twining the edge of a larger leaf, rather than just embroider it with chain stitch and beads again because although the embroidery looks pretty, it was a little difficult to stitch evenly onto knitted fabric.
Needless to say, my first attempt was really weird. Then I realised the process boiled down to essential weaving and so my next problem was ‘how to tension the warp threads sufficiently’ and bring some order to the chaos of threads I had swung from all my fingers.
In Sweetbags, we are told this technique involved 2 people.
Kentwell Hall Light-Bulb Moment
Then I recalled that when I had visited Kentwell Hall and watched a Mistress re-enacting fingerloop braiding, she used a tree trunk to support her work, working the braid towards herself.
101 Uses for your Kitchen Table
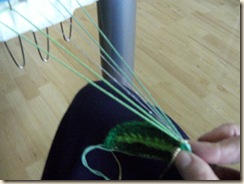
So I decided to try this by using my kitchen table and this time working towards the table while sitting sideways and holding the start of the braid in my right hand. (Incidentally this orientation is similar to that adopted for tablet weaving.)
The method I chose to get round the problem of supporting the work came to me as a result of having all my knitting paraphernalia out…
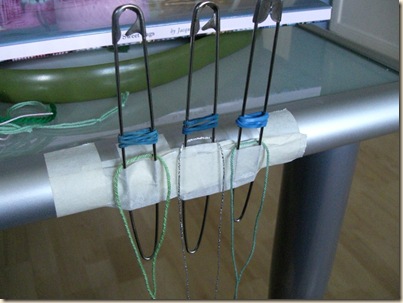
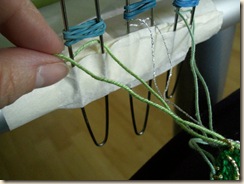
So here is my very own quasi loom solution for setting- up a twining session. Here you can see 3 pairs of threads looped round the metal supports. I’m using 2 shades of green and a silver thread for this and I will be weaving with gold metallic knitting yarn. The pins also made it easy for me to check if I had actually turned all the threads, especially if the work is interrupted.
How to Twine
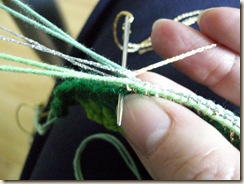
Twining a braid over a seam in this way, involves turning the warp threads once, anti-clockwise for a half turn, and weaving into the twisted yarn, then into the fabric of the item.
This means the threads that were at the bottom, will then be transferred to the top, and so on. In this way the colours of the braid alternate as it is woven and the resulting direction of the twist is ‘Z’.
I have translated the “half-turn anti-clockwise” instruction to simply mean:
LIFT EACH PAIR (loop) OF WARP THREADS OFF THE PIN AND TURN THEM TOWARDS YOU ONCE, (so the left strand of the pair then becomes right and visa versa). Do this for all three, always starting the same side, then weave into them and peg down as described.
Notice there are 3 small elastic bands 2cms up from table edge. The looped lengths of thread will sit within that space.
I used only 3 colours of warp thread, tied once at the working end.
Carey however, demonstrates a 3-pair (6-colour change) and a 6-pair technique (12-colour change).
Its worth noting that when you use 12 different colours, half need to be twisted anti-clockwise (‘Z’ twist) and the other half clockwise (‘S’ twist).
To start, make sure all your threads are the same size. Although you can adjust them again as you attach them to your fabric before you start weaving.
Above I am sitting sideways under the warp threads and have secured them to my knitted leaf edge.
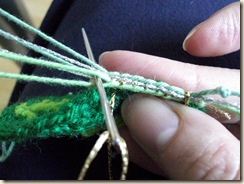
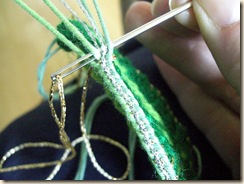
Then I start to weave, ‘under & over’ as usual, you can say to yourself as you do it: ‘yes, no, yes, no’ or ‘in, out, in out’ or whatever, just as long as you don’t miss any.
Then you bring the needle across to make it snug with the rest of the work
Then afterwards you tension your working thread..
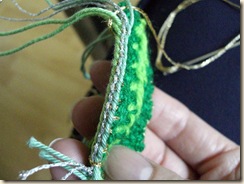
Then you come back, with the needle pointing towards you, so you only pierce the fabric at the opposite edge once by pegging down all the threads and returning in one move, much the same as standard satin stitch.
After the above step, you relax your right hand slightly but don’t put the work down (as this will slow down the whole process too much for checking) and with your free hand you flip the position of each pair of warps threads, in quick succession.
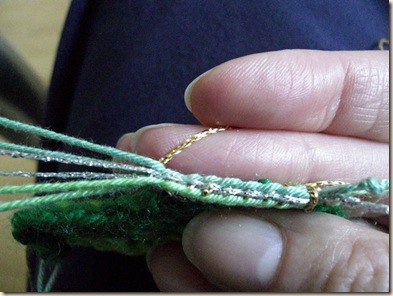
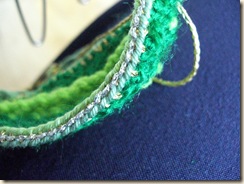
This next picture shows you how smooth and regular the work turns out. I was really amazed at how quick and easy the whole procedure is.. (the part that took the longest was taping the pins to the table!)
Carey says in her book that “Twining has been confused with embroidery and tablet weaving” but as she proves, it is totally distinct.
I’m really glad I’ve worked out a way of making it without the need for someone else to hold my warp threads.
The braid you can produce in this way feels extremely compact and flexible. It will certainly be a hard-wearing solution to binding seams on bags etc…..and truly wonderful for decorating the edges of knitted leaves and making them more sturdy...
Cya !

