Friday 30 April 2010

Stumpwork mini-book inspired by an Elizabethan Girdle Book

CIMG3664
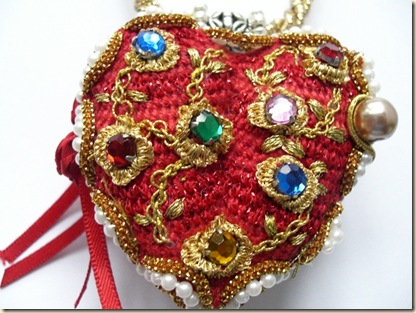
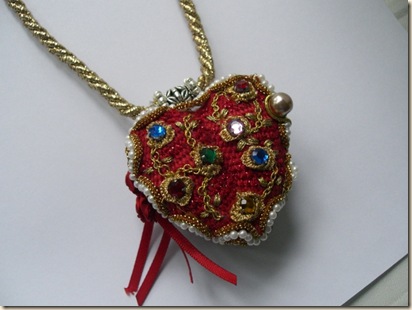
Here’s my reproduction version of a tiny (Secular) Girdle Book.  As you can see, what started out as small doodle of a heart became 2 hearts,  which were then stuffed and mounted onto cardboard…and the rest is history, as they say…

It measures exactly 2 inches by 2 inches and is 1 inch in depth.  It is covered in (fake) gems because in Elizabethan times different coloured gemstones had a Talismanic signficance e.g. gems to guard you against being food poisoned, others to keep your lover faithful , etc.  This idea began in the Middle Ages or possibly before.  The design on the front is padded Detached buttonhole base, embellished with a whipped running stitch chain rose stem with tiny leaves leading up to each gemstone 'rose' with gold buttonhole petals.  Elizabethans did not use prongs to hold the gems in place, but instead little petals, like I've done on here.  I have used pronged rhinestones as I needed these particular colours.     
CIMG3665

CIMG3666

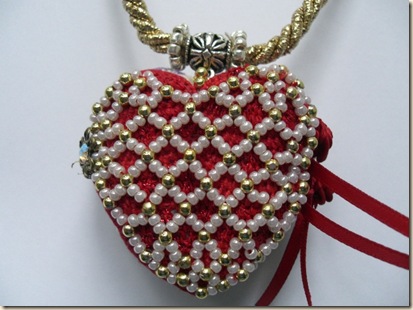
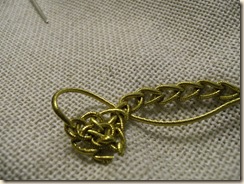
And Pictured below is the reason why the thing took so long to complete:
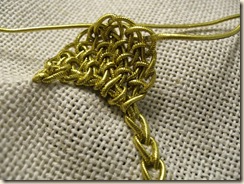
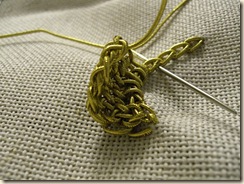
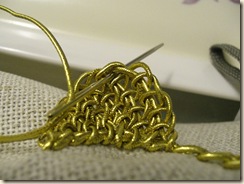
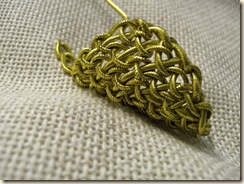
Grid design + Moulded Shape = Much Brow- Furrowing !!!

CIMG3662
Cost in materials = £5.50
Time spent = 11 hours +

The book has 4 pages and 6 sides of detail, made of fabric and other materials. 

The historical Girdle Books usually contained prayers and words of solace.  They were made of a metal casing and contained little pages.  They were so richly decorated that they eventually became highly desirable fashion items in their own right.   

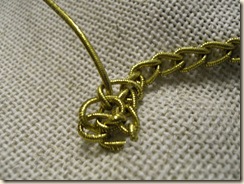
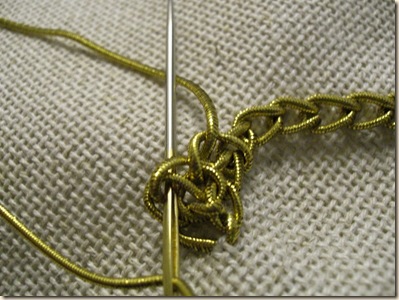
All it needs now is a neck on the cord - the original historical design would have had a very long chain and would have hung from the waist, way down around the knees.  Perfect for dipping into whilst walking around your cloistered garden.  I shall also be adding a proud Turks Head Knot (purchased and not toiled over!!)

All that remains then is for me to reveal to you the INNER pages………….bet you can’t wait !!!!!
Have a great Bank Holiday!

Thursday 29 April 2010

Contemporary red rose inspired by techniques learned so far

So I thought I would use some of the techniques I’ve learned so far to work on my own contemporary rose pattern.   
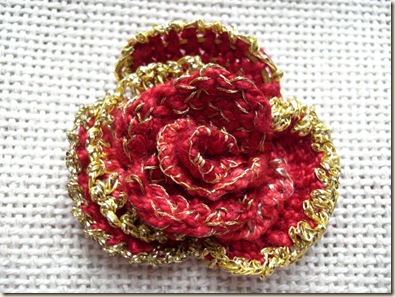
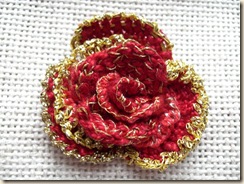
contemporary rose 1
I come back to this motif often using different methods and this time I wanted to devise a workable solution, primarily, for the conundrum that is the rose centre.  I’ve been looking at ways to try and achieve a more realistic centre because if you look inside a rose you can see at the centre there’s always a tightly wound coil of new fresh petals about to open. 
Ideally I would have preferred this practice version to be much smaller but I was using some cotton perle and that’s a bit chunky for my grandiose ambitions.  What’s interesting here  is I can see several things happening that simultaneously encourage me and give cause for concern.  First off, even though it’s completely embroidered it does look a lot like a crocheted or maybe Brazilian rose. 
The other thing is that, like The Orange (see earlier relevant post) it is very Spanish.  I should explain that I’m partly of Iberian extraction and you know I never realised until now, since dipping my tentative toe in with using gold metallic thread, how much all that Spanish decorative input has subliminally informed my aesthetic appreciation.  Ruby red and gold combos are big in Spain; jewellery; bull-fighting costumes; religious iconography, especially the heavily gold-worked robes on the statues of Saints. 
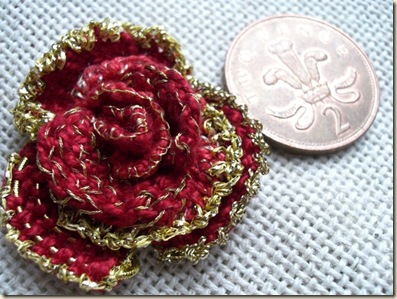
Contemporary rose 2
Now the idea of anatomically realistic embroidered rose centres is a bit of a challenge.  You can either suggest it or conceal it but to really describe it, you need to go dimensional. 
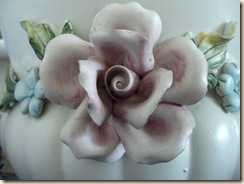
Last year I decided I wanted to try and find my own way of somehow building-up the central stitches.  Often to find solutions to a particular problem its good to look outside, at other disciplines.  In this case I found it helpful to look at the simplified ‘code’ captured so well on jewellery and porcelain designs, like here:
 CIMG3568
This is a very clear simplification of a 3-d rose.  I love this potholder and I especially like the way the edges of the petals fray out, just like the real thing.  Well, I wanted to get that idea down with a bit of thread.   I didn’t sketch any preliminary drawings or anything, I just picked up from where I left off last year, but on a larger scale.  
From what I’ve discovered so far about perpendicular Detached Buttonhole (DBH) is that it curls in a particular way however, Single Detached Buttonhole – Brussels Stitch - because its mesh/lattice is that much finer, produces an even more delicate petal rendition.  Now I quickly discovered that if I make petals using both types of stitch, structurally, they complement each other really well and that’s useful for shaping. 
Perhaps its an exaggeration or maybe not, but I do think that when you work with thread in this 3-d way its a bit more than sewing and has a lot to do with the discipline of soft-sculpture…for me anyway…
So I decided to use Brussels stitch for the two central areas, then some DBH, then some more Brussels.
You’re watching for the way each kind of petal bends and you add, either a not-so-curly one next time, or a thicker one, so it just grows, organically, like real roses.  If you notice real rose petals are not uniform in the way they break out.  By making some petals thick and some thin, I can ‘sort of’ mimic that natural formation.  I should add, that I agree a lot with watch *Grace Christie (writing as Mrs Archibald Christie) said all those years ago, that even when you are sewing life-like objects, “the sewing should always show through”.      
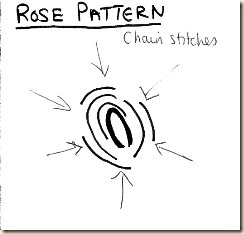
Here’s the basic pattern:
Contemporary Rose Pattern
I didn’t sew all the chain stitch foundation rows in the beginning, just the centre and 3 outer rows, then I filled in the gaps with more petals.  Here’s a diagram of how the centre should look:
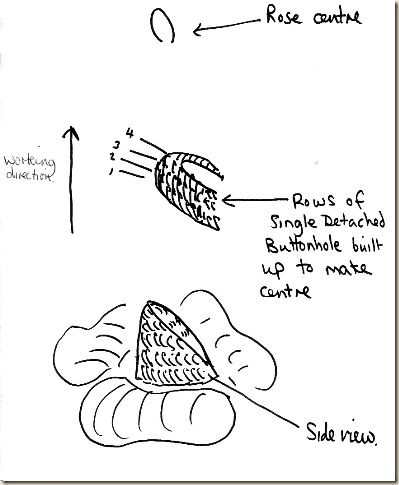
Contemporary Rose - centre
Now unfortunately I don’t have any photos of the first all-important stage because it was, after all an experiment and I was surprised when it worked, because last year I tried it and it went a bit funny.  The improvement I made this year, which I learned from The Bag’s blue flower, is to use just a normal chain stitch foundation, then after that, its very easy to work with. 
I should add, to fully understand this post, you might find it useful to see my recent video on Single Detached Buttonhole, (you don’t have to but), it explains that if you take the orientation of this stitch into account, then you can use the concept for a lot of things.  Now in the video it shows you that when working flat, if you want Brussels to ‘behave itself’ you turn it upside down and bring the thread to the front.  Well, for 3-D Brussels, the solution is to simply ‘turn the work’ on each change of row, so that way: ‘left side will become the right and visa versa’. 
Now the other thing to remember about working in this way is that unlike ‘needle weaving’ you’ll need to support the work as you go along, in such a way so as to temporarily create a ‘loom’ idea with your fingers.  That might sound difficult, but really it isn’t as all you’re doing is putting your index finger BEHIND the stitches as you go along to give them something to rest on.  This part needs to be explained because if you don’t do that, then you might just pull everything too hard and the structure kind of collapses. 
This is how I started:
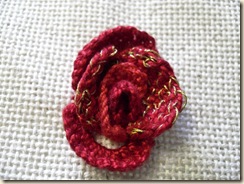
CIMG3625
Here is the index finger behind the work...
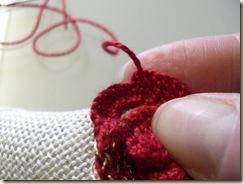
          CIMG3629 
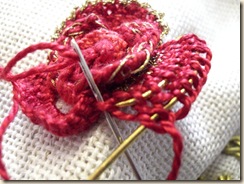
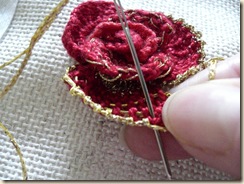
Below you can see I’ve pulled the stitch through and I’m nearing the end of that row.  The petal will spring up when you’ve finished, especially due to the fact that AFTER the last stitch, you PEG it down into the fabric.  This detail adds to the definition of the curl  and pulls the whole thing forward.  I’ve discovered, Brussels stitch fans-out much more than perpendicular DBH and the pegging down part really adds to its final shape. 
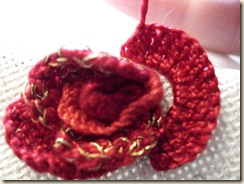
CIMG3631 
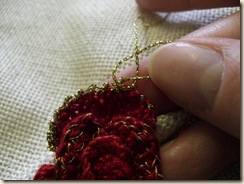
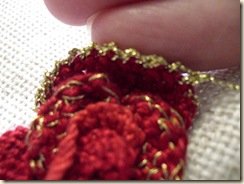
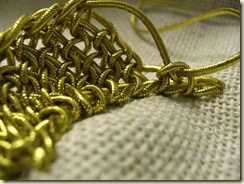
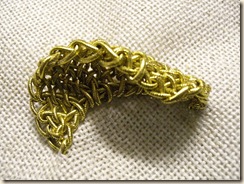
Below is the fun part.  Here’s I’m using my own solution to not having any Milliary Wire.  First I whipped the edge of the petal with gold.  Then I went into the top of each Whip stitch and added a Trellis stitch.  You get a neat knobbly effect like that, especially so with this particular twisted foil (Anchor).  I love Milliary wire and can see in the *book I’m reading that this type of wavy-edging idea  was used around the motifs on some Elizabethan curtains, using green silk thread.  It’s not Pekinese stitch, from what I can make out, but the image isn’t clear enough for me to say for sure how they did it, so here’s my stab at it anyway. 
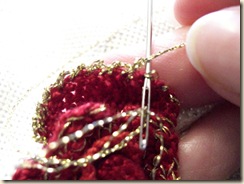
CIMG3635 CIMG3636  CIMG3638
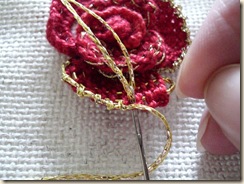
The rest of the embellishing is just whatever took my fancy really, bit of elastic, bit of Knotted Buttonhole, bit of straight Buttonhole…
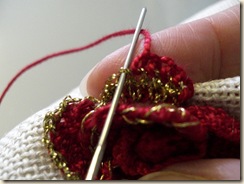
CIMG3639 CIMG3640 CIMG3642 CIMG3643 
Now you might wonder what on earth this thing is doing here, well, this is how the rose centre puzzle started out. 
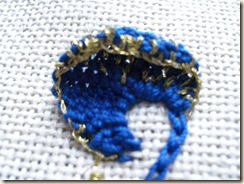
CIMG3651
For the second attempt, you can see I kind of gave up and just did some Tent stitches with gold knitting yarn for the centre.  The weird thing I made below served to show me I really needed to consolidate my aims but the good thing is that the gold Tent work does manage to cover all the linen well, so that’s another type of flower centre solution up my sleeve…
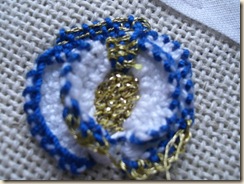
CIMG3652 

contemporary rose 1
g2g !

* Mrs Archibald Christie ‘Stitches & Samplers’ 1920
* The Victoria & Albert Textile Collection – Embroidery in Britain from 1200 to 1750. 

03 May 2010 - I'm doing further work on this idea.  I'm not happy with the way this trial version turned out.  I've also deleted the comment I made about Taxidermy because on further consideration, its not exactly what I meant.  
 
I don't like the look of the rose I made on this post and have considered deleting this post.  It looks too much like crochet and that is not what I'm after, at all.  I've been doing further experiments and basically I'm aiming for a Hybrid Tea rose but I've ended up with a Cabbage rose.  Now this is not a bad thing, because Cabbage roses are Old English roses and I like the way my latest version turned out much more than this one. 

Ideally I would like to delete this post, but I think it contains some useful information.  I don't like the title either, as it suggests something really modern-looking when that wasn't my aim.  Really all this post deals with is the unfurled central cone, a lot of the rest I've recently changed my mind on.  
B.L. 

Sunday 18 April 2010

Gold Flower Petal Pattern mounted into a video


I decided that my last few posts have been a tad verbose.  Thank you for not pointing that out to me but anyway (lol)... 
I’ve received a couple of emails enquiring about “needleweaving”, so in an effort to clarify matters, I thought I would get a little video out there and some decent piccies. 

For newcomers: The needlelace I’m working with here is not needleweaving but a particular type of needlelace as seen on Elizabethan embroidery.  Italian needlelace is white, Elizabethan is colour.  Italian needlelace uses a cordonet or a small frame and the work is later cut away and joined to other pieces as free standing lace.  Elizabethan needlelace however, remains in situ and is used predominantly as ‘filler’ stitches with vibrant colour referred to often as ‘raised embroidery’.  Furthermore, as on the swetebag I’m looking at here, this English type of needlelace stitching branched off and became even more dimensional or ‘flying’, for example as seen with the flower petal interpreted below.  The stitch I’m using here is called (corded) Detached Buttonhole.  The Venetians called this ‘Cloth Stitch’.  With this amazing stitch you can create tiny pieces of made-to-measure cloth that you can gradually build into complex multi-layered flowers and other very appealing motifs.


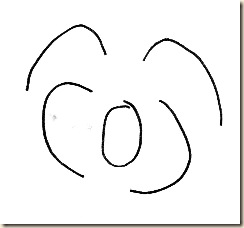
Ok, this is the drawing you make on your linen.  Forget the oval in the centre for now, as that will need to be dealt with separately.  If you are keen to complete it though, all I would say is, you make 5 chain stitches at the top and then make an oval flap to fit the shape underneath.  It will curl a lot, see end of this post for an image of that.

flower diagram

In the spirit of brevity, here are some pictures of how to do the basic petal of the blue flower.  I’m using metallic covered elastic for this so you can really see what I mean, I hope.  Skill rating: EASY!

1.  You do your chain row, regular chain, not reverse.

  Petal Pattern 1

2.  Do your first regular buttonhole stitch BUT with the needle pointing towards you and go into only one half of the first chain stitch.  For first-timers: do not go into the fabric for all stitches after the chain row!

Petal Pattern 2

3.  Do another stitch in the same way right next to it, when you’ve done that,

Petal Pattern 3

4.  Nip across into the FIRST buttonhole stitch you made and make another buttonhole,


Petal Pattern 4


5.  See the needle going BACK into the first stitch above, these 3 stitches will now be your first row.

Petal Pattern 5

6.  So above you can see the first 3 plain buttonhole stitches = your 1st row

Petal Pattern 6

7.  Now do a straight stitch return row in the normal way but take the needle under BOTH loops of the next chain stitch

Petal Pattern 7

8.  Loop the thread round in the normal way to do your FIRST ‘corded’ buttonhole, from now on the needle will be pointing away from you

Petal Pattern 8

9.  Very easy isn’t it?

Petal Pattern 9

10.  When you reach the end of the row you are going into the last space.  It must be the last one, learn what to look for because when you get your speed up, its easy to miss.  See below for close-up of last space.  (Note how the return row straight stitch recedes to the left and crosses with the last stitch of the previous row)

Petal Pattern 10

11.  Here you can see below that things are finally starting to look neat.

Petal Pattern 11 Petal Pattern 12 Petal Pattern 13 Petal Pattern 14

Petal Pattern 15

11.a.  Below you can see that I’ve reached the end of the row but I nip back into the last stitch of the previous row, to increase the height of this row using a regular buttonhole stitch, I think I do this only a couple of times on here, when you come to do it for yourself, you will see you pop another buttonhole on the end to add height on a visual assessment of what’s needed but as you come closer to taking the corner, you don’t need anymore height.  (That was the mistake I was making before, or else I would have finished the flower a lot sooner.)


Petal Pattern 16 Petal Pattern 17 Petal Pattern 18

12 After about 4 rows of perpendicular Detached Buttonholing, the petal will start to curl or stick up.  This will be the same for whatever thread you are using, including cotton.

Petal Pattern 19 Petal Pattern 20 Petal Pattern 21 Petal Pattern 22

This curling you can see has nothing to do with stitch tension, these stitches are not tight at all, its entirely to do with stitch formation.

Petal Pattern 23 Petal Pattern 24 

This is a picture of the back of the work

Petal Pattern 26  Petal Pattern 28  Petal Pattern 30

El Fin.


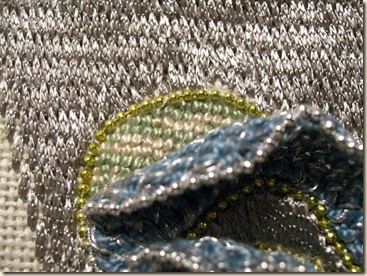
I should mention that behind the petals are tiny tent stitches in light shades of green and neutral. 

CIMG3565

Above you can see I found a glossy silver yarn for the Gobelin stitch mock-up.  It’s a French, non-metallic, but very glossy grey knitting yarn called Bergere.  You can see it covers all the linen really well (25 count).  I like using that stuff, its very tactile.   


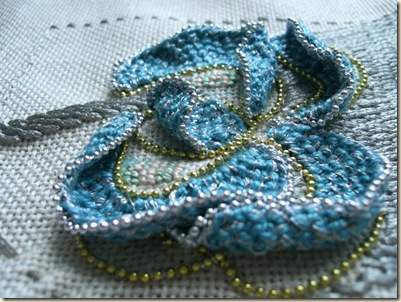
None of the petals you can see below are wired, they curl because of the nature of the DBH stitches.  Notice the one in the centre here in profile, because its so small, it curls to the max to reveal the tent stitches beneath that are the same colour as behind the other petals. 

Smack in the centre of that outer flap is a gold spangle - yet to be added.

side view

Just other night I noticed something new on the bag image, I could see they had used black to differentiate between two tonally similar colours, like around the tent stitch rectangles inside the flower. 


In making this flower I found that I agree with what  Dorothy Clarke suggests in: ‘Exploring Elizabethan Embroidery’ and that is that the stitching can be best completed in the hand; no hoop or frame. 

………………….

Been extremely busy, working ahead on about 5 posts now.  Ran into a bit of bother with the mini-book in that I underestimated how long those finishing touches would take, especially the ones where you have to rip it out and do it again (and again). 

I now have my much anticipated inter library copy of Jourdain’s:  The History of English Secular Embroidery (1910), so far, it refers often to a well known embroidery Quarterly that really makes me want to visit the British Library. 


The sun has finally ‘got his hat on’ round here!