Saturday 14 July 2012

A sentimental ‘little something’ in its first design stages

Oh goodie, new followers!  Welcome new friends!

To everyone else, this post started out as a short one, but would you just look at what happened??…

Pipeline Design Idea

I don’t usually do this, but I decided to show you what’s in the design pipeline, as it were. 

I’ve been thinking about creating a little maritime scene made completely of Corded Detached Buttonhole (DBH) miniature shapes.

Especially as I’m on an extended ‘Bag Break’ and because I’m still in the proverbial ‘boxing ring’ with Stem Stitch, Satin Stitch, Radial Opus Plumarium and Bokhara Couching.

Incidentally, I think my next (little) video will be about Bokhara Couching because I just realised, I do mine differently to everyone else.  I relate it to Buttonhole, in a funny kind of way.  With my version, the rows of laid cords seem to fit closer together (?), but most importantly, because I’ve compared both methods closely, its my personal opinion that with my interpretation you achieve much smaller Couching stitches, as they do not unravel the thread as you work.  This however, may not be to everyone’s taste, as the couching stitches do form a ‘secondary pattern’, after all.

Anyway, on to the business of the (very wet) day.  A lot of the techniques for making the little elements for this piece are similar to later, well known crafts, such as Tatting and Crochet.

Finger Looms

If any of you have had (a lot of) ‘fun’ making Tatted Cluny leaves, the next set of images will not come as a surprise.

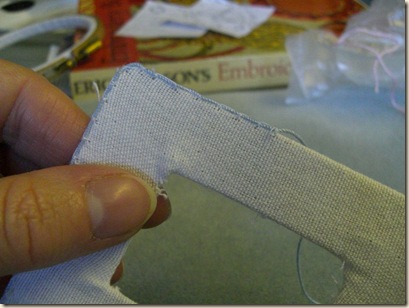
The first thing I did was to cover some stiff card with thick muslin-type fabric, that I found in a skip.  I kid you not!  Virtually the first thing they tell you to do when you get to Art School (to study painting!) is to go out and raid skips.  Picasso (himself!) was very good at that, and made incredible sculptures with ‘found objects’.  Well, my found object is a pair of abandoned, perfectly good, Ikea curtains that are very nice to embroider with!!!

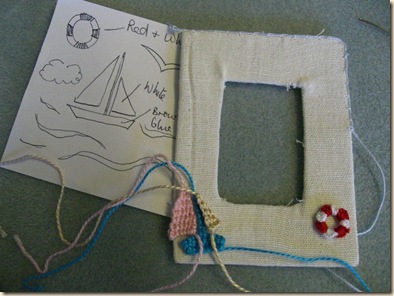
Border of Photo Frame

In the picture above, you can see I’ve made the frame and am now constructing the foundation on which to anchor later rows of DBH.  To do this, I’ve simply couched down a cord row of blue (crochet) thread with very small white (hand-sewing thread), stitches. 

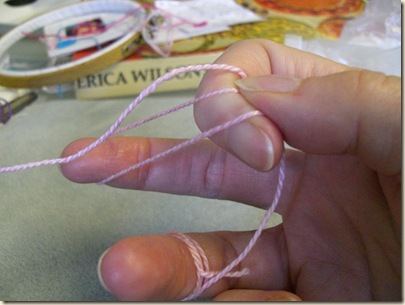
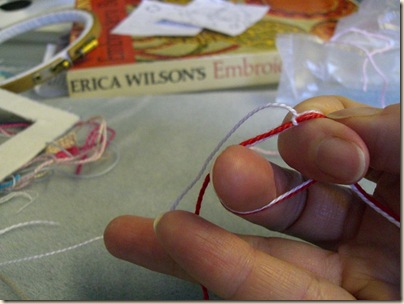
Postion of thread for 3-d DBH in the hand

To make all the little bits and bobs for this project you need to be able to make DBH independently of any fabric.

The very first stage in this process is to rig up your thread around your fingers in this way. 

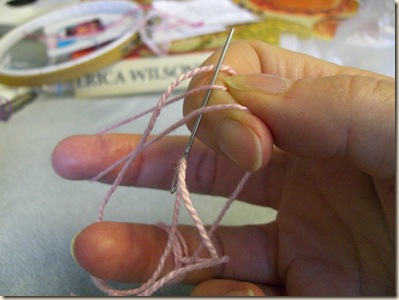
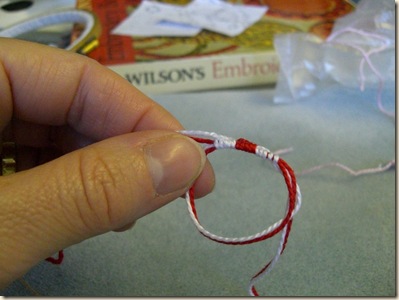
Position 2

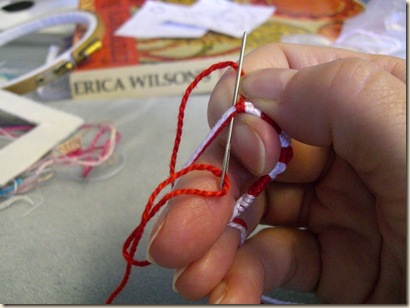
Then, with everything in position, you start stitching…

Eventually I made this inch long sail boat.

Design Stage of Maritime Scene in DBH  

To make the mainstay mast, you embroider a Chain Stitch band.  The exact instructions for how to make Chain Stitch Bands can be found in any good set of instructions for Puncetto and is exactly the same principle as Crocheted Chain Stitch, but made with a tapestry need.  If you recall, I was researching Puncetto when I was working out the whys and wherefores regarding Trellis Stitch, which resulted in another of my little videos for YouTube (link at the top of this page). 

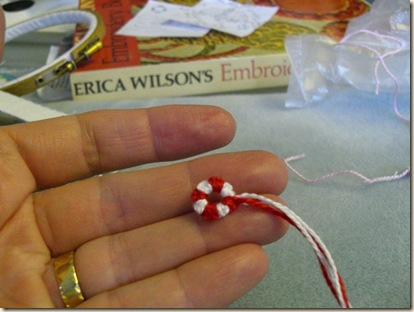
Then, after making 3 boat-shaped components, I went on to make the tiny lifesaver...

Lifesaver 1

Using 2 colours formed into a ring, (more similarities to Tatting), I stitched Buttonhole Stitch over the 2 cord rows and switched colour after every 5 stitches.

Lifesaver 2

As with Tatting, you will be able to close the ring at the end and weave in the tails. 

I got the idea to make this piece while making the Stumpwork Daisy Brooch (see earlier post). 

Lifesaver 3

Voila!

CIMG6272

If you would like to make your own cute little DBH shapes - and there are many possibilities with this technique - it might be helpful if you were to think about purchasing my research document – see link to Etsy above – which explains the concepts of even-shaping and basic shape-making.  

Gotta go ppl!


Tuesday 10 July 2012

Stem Stitch compared to Outline Stitch

This is a ‘not-so- quick post’ (okay, its a whopper) just so that the blog can keep up with what I’m doing at the present time.

During a visit to my LYS, I was chatting to the owner, Cathy,  about the knitted pieces she has  for sale and she remarked that one of her customers had said of her own knitting, that she considered herself not that great, technically, but because she uses really expensive pure wool, people always comment on how wonderful a knitter she is.  This view of materials over skill can be contrasted to the work of my Great-Aunt, who always knitted using cheap acrylic yarn but her technical proficiency took your breath away….

*****************

Excerpt from below:

In Erica Wilson’s Embroidery Book she illustrates how Stem Stitch can turn into Satin Stitch. 

A little detour of discovery

I learned something new (and exciting) the other day  that has, kind of, changed my entire perspective on embroidery, because of a connection I was able to make to something I’d been struggling with. 

Many stitches are very similar to other stitches, with their essential difference being only orientation.  Mrs Christie wrote in Stitches and Samplers: “All embroidery stitches are derived from 7 main stitches”.

Accidentally, while considering the main differences between Stem  and Outline Stitch, it struck me how similar they are to Satin stitch (and Long & Short Stitch), but worked vertically.  Because turning the work for these four stitches results in the same action: the thread emerges from one side, you loop it round and come back up, next to the last stitch made, very closely, without bunching up, by keeping your thread well out of the way.   

The truth about Outline Stitch

In contemplating the fundamental difference between Outline and Stem Stitch, I’ve always believed that because Outline Stitch creates a narrower, less elegant line, it must surely be tightening the twist in ‘S’ twisting thread?  And that it was a compaction of the thread’s intrinsic nature that gave Outline Stitch its character? 

Then I discovered that, on the contrary, Stem Stitch preserves the ‘S’ twist of the thread, while Outline Stitch actually UNRAVELS it!

- I’ll give you a moment to absorb that, because it’s one of the most significant things I’ve learned about embroidery so far, and it’s NOT mentioned in any of my vintage books.  Indeed, even the modern ones seem to indicate that Outline must tighten the twist, as I had believed. 

To simplify this even more, the direction in which you stitch, especially if the element is vertical and you are taking horizontal (or diagonal) stitches across the shape, either going upwards or down, dictates whether you should hold the thread above or below the work. 

This is the practical, working difference between the two, (often confused) stitches.  However, when working vertically this translates as: whichever is your dominant hand, you will see the thread behaves differently, depending at which end you start, especially for these types of ‘spiral’ stitches, where the thread repeatedly turns over in an unbroken looping action

Indeed, if you look around the internet at what people are making, via a Google Images search, you can see that some people who are particularly proficient at Satin Stitch, seem to be aware of this little known fact, but in a kind of instinctive, unconscious way?

So just knowing this tiny, scientific fact, means you can alter your entire approach to so many situations and techniques.

Now you might be thinking: ‘well you know, I don’t do a lot of Stem Stitch’, or ‘I prefer Outline Stitch actually’  or ‘interesting, but so what?’.

Fact is, you can use this difference to change the way you tackle Satin Stitch and Long & Short Stitch.

In Erica Wilson’s Embroidery Book she illustrates how Stem Stitch can turn into Satin Stitch.  Hence, I made a video about that, recently posted on YouTube.

But more importantly than that, is once Stem Stitch becomes Satin Stitch, the rules for Stem become more important, not because of the ‘concealed exit’ (see last post) but because of ‘mirroring’ the direction of the work to achieve surface harmony aka Radial Opus Plumarium (ROP).  

Surface harmony is something I wasn’t quite able to understand before, because my threads always seemed not to lie flatly enough. 

For those of you who will skip a whole chunk of this article and jump to the end, I will say that I believe Long & Short and Satin Stitch look better if you stitch them in only one direction.  This means you would have to move around the work.  Historical images of slate frames and treadles support the view that the embroiderer could work in this way.  Whether you move around the work or turn the work in your hands, the effect of smoother stitching can be achieved if you stitch in only one direction with certain stitches, where the surface harmony is paramount.      

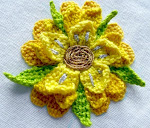
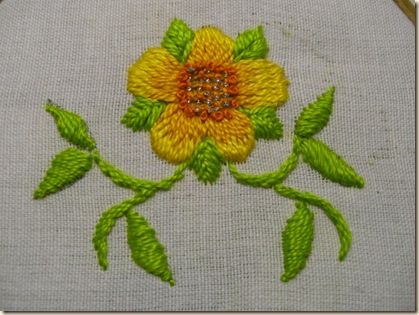
So, to arrive at that personal conclusion, first, I ventured into my own experimental campaign to try and sort out some Satin Stitch ‘directional’ oddities and came up with this doodle cloth version of a Briar Rose with tendril-like off-shoots.

Long & Short Stitch Briar Rose - Yellow

As you can see, understanding that Outline Stitch unravels the thread has impacted significantly on the direction in which I choose to work now.  

For instance, the Briar Rose’s petals are made with Long & Short Stitch in Outline Stitch orientation throughout.  This means that I only worked in one direction and carried the thread behind the previous stitches to begin again on the same side.  This meant that my L&S turned out to be much smoother than before because I have taken full account of the ‘S’ twist in the thread and chosen to work against it, to add fullness to the rows.  Eventually I realised, I needed to create fewer stitches that were in fact longer, because they were smooth from the word go.  The overall effect is more convincingly shaded but without splitting the thread very much, if at all.  I was using cheap cotton throughout btw.         

The sepals, however, were made with Raised Fishbone Stitch which is a nice, quick way to make proud little leaflets.

Rose centre - laid work

The centre of the rose is made with tawny coloured thread made into square-shaped Laid work.  Then I added silver Couching stitches.  Finally French Knots were placed round the edge.  Rose centres, in fact ALL flower centres, are a major point of fascination with me.  There is so much information in a flower centre to simplify and abstract, but you still have to end-up with something suggesting its original complexity.

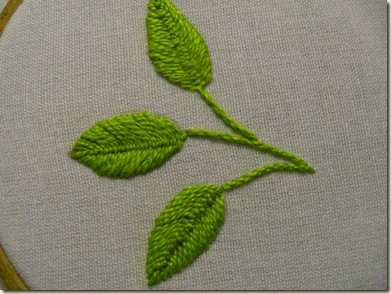
3 leaves - 2 Cretan Stitch and one fly stitch

Oh, before I forget, here’s an image of the three leaves I made for my YouTube videos.  They are quite small. 

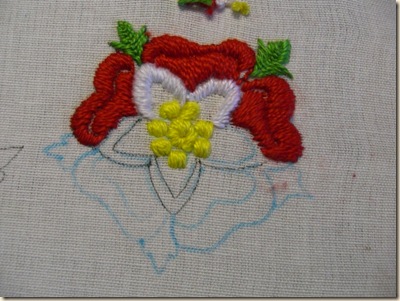
Then I threw myself into another quick doodle-cloth classic Tudor Rose motif, this time to work with Satin Stitch and apply what I’ve recently learned.

 Tudor Rose WIP 2

As that was going quite well, I became really impatient and went back to doing some more L&S, you’ll have to excuse the ‘spin painting’ influence on colour choices here, we had just returned from our favourite restaurant which has a lot of spin paintings on the walls!!!

Long & Short Stitch Flower - stitching in only one direction against the S twist

This exotic interpretation was stitched in one direction only, without under padding or split stitch outline. 

Gotta go ppl !