Thursday, 29 April 2010

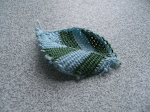
Contemporary red rose inspired by techniques learned so far

So I thought I would use some of the techniques I’ve learned so far to work on my own contemporary rose pattern.   
contemporary rose 1
I come back to this motif often using different methods and this time I wanted to devise a workable solution, primarily, for the conundrum that is the rose centre.  I’ve been looking at ways to try and achieve a more realistic centre because if you look inside a rose you can see at the centre there’s always a tightly wound coil of new fresh petals about to open. 
Ideally I would have preferred this practice version to be much smaller but I was using some cotton perle and that’s a bit chunky for my grandiose ambitions.  What’s interesting here  is I can see several things happening that simultaneously encourage me and give cause for concern.  First off, even though it’s completely embroidered it does look a lot like a crocheted or maybe Brazilian rose. 
The other thing is that, like The Orange (see earlier relevant post) it is very Spanish.  I should explain that I’m partly of Iberian extraction and you know I never realised until now, since dipping my tentative toe in with using gold metallic thread, how much all that Spanish decorative input has subliminally informed my aesthetic appreciation.  Ruby red and gold combos are big in Spain; jewellery; bull-fighting costumes; religious iconography, especially the heavily gold-worked robes on the statues of Saints. 
Contemporary rose 2
Now the idea of anatomically realistic embroidered rose centres is a bit of a challenge.  You can either suggest it or conceal it but to really describe it, you need to go dimensional. 
Last year I decided I wanted to try and find my own way of somehow building-up the central stitches.  Often to find solutions to a particular problem its good to look outside, at other disciplines.  In this case I found it helpful to look at the simplified ‘code’ captured so well on jewellery and porcelain designs, like here:
 CIMG3568
This is a very clear simplification of a 3-d rose.  I love this potholder and I especially like the way the edges of the petals fray out, just like the real thing.  Well, I wanted to get that idea down with a bit of thread.   I didn’t sketch any preliminary drawings or anything, I just picked up from where I left off last year, but on a larger scale.  
From what I’ve discovered so far about perpendicular Detached Buttonhole (DBH) is that it curls in a particular way however, Single Detached Buttonhole – Brussels Stitch - because its mesh/lattice is that much finer, produces an even more delicate petal rendition.  Now I quickly discovered that if I make petals using both types of stitch, structurally, they complement each other really well and that’s useful for shaping. 
Perhaps its an exaggeration or maybe not, but I do think that when you work with thread in this 3-d way its a bit more than sewing and has a lot to do with the discipline of soft-sculpture…for me anyway…
So I decided to use Brussels stitch for the two central areas, then some DBH, then some more Brussels.
You’re watching for the way each kind of petal bends and you add, either a not-so-curly one next time, or a thicker one, so it just grows, organically, like real roses.  If you notice real rose petals are not uniform in the way they break out.  By making some petals thick and some thin, I can ‘sort of’ mimic that natural formation.  I should add, that I agree a lot with watch *Grace Christie (writing as Mrs Archibald Christie) said all those years ago, that even when you are sewing life-like objects, “the sewing should always show through”.      
Here’s the basic pattern:
Contemporary Rose Pattern
I didn’t sew all the chain stitch foundation rows in the beginning, just the centre and 3 outer rows, then I filled in the gaps with more petals.  Here’s a diagram of how the centre should look:
Contemporary Rose - centre
Now unfortunately I don’t have any photos of the first all-important stage because it was, after all an experiment and I was surprised when it worked, because last year I tried it and it went a bit funny.  The improvement I made this year, which I learned from The Bag’s blue flower, is to use just a normal chain stitch foundation, then after that, its very easy to work with. 
I should add, to fully understand this post, you might find it useful to see my recent video on Single Detached Buttonhole, (you don’t have to but), it explains that if you take the orientation of this stitch into account, then you can use the concept for a lot of things.  Now in the video it shows you that when working flat, if you want Brussels to ‘behave itself’ you turn it upside down and bring the thread to the front.  Well, for 3-D Brussels, the solution is to simply ‘turn the work’ on each change of row, so that way: ‘left side will become the right and visa versa’. 
Now the other thing to remember about working in this way is that unlike ‘needle weaving’ you’ll need to support the work as you go along, in such a way so as to temporarily create a ‘loom’ idea with your fingers.  That might sound difficult, but really it isn’t as all you’re doing is putting your index finger BEHIND the stitches as you go along to give them something to rest on.  This part needs to be explained because if you don’t do that, then you might just pull everything too hard and the structure kind of collapses. 
This is how I started:
CIMG3625
Here is the index finger behind the work...
          CIMG3629 
Below you can see I’ve pulled the stitch through and I’m nearing the end of that row.  The petal will spring up when you’ve finished, especially due to the fact that AFTER the last stitch, you PEG it down into the fabric.  This detail adds to the definition of the curl  and pulls the whole thing forward.  I’ve discovered, Brussels stitch fans-out much more than perpendicular DBH and the pegging down part really adds to its final shape. 
CIMG3631 
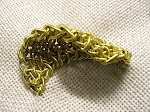
Below is the fun part.  Here’s I’m using my own solution to not having any Milliary Wire.  First I whipped the edge of the petal with gold.  Then I went into the top of each Whip stitch and added a Trellis stitch.  You get a neat knobbly effect like that, especially so with this particular twisted foil (Anchor).  I love Milliary wire and can see in the *book I’m reading that this type of wavy-edging idea  was used around the motifs on some Elizabethan curtains, using green silk thread.  It’s not Pekinese stitch, from what I can make out, but the image isn’t clear enough for me to say for sure how they did it, so here’s my stab at it anyway. 
CIMG3635 CIMG3636  CIMG3638
The rest of the embellishing is just whatever took my fancy really, bit of elastic, bit of Knotted Buttonhole, bit of straight Buttonhole…
CIMG3639 CIMG3640 CIMG3642 CIMG3643 
Now you might wonder what on earth this thing is doing here, well, this is how the rose centre puzzle started out. 
CIMG3651
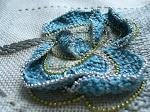
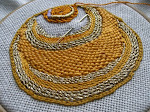
For the second attempt, you can see I kind of gave up and just did some Tent stitches with gold knitting yarn for the centre.  The weird thing I made below served to show me I really needed to consolidate my aims but the good thing is that the gold Tent work does manage to cover all the linen well, so that’s another type of flower centre solution up my sleeve…
CIMG3652 

contemporary rose 1
g2g !

* Mrs Archibald Christie ‘Stitches & Samplers’ 1920
* The Victoria & Albert Textile Collection – Embroidery in Britain from 1200 to 1750. 

03 May 2010 - I'm doing further work on this idea.  I'm not happy with the way this trial version turned out.  I've also deleted the comment I made about Taxidermy because on further consideration, its not exactly what I meant.  
 
I don't like the look of the rose I made on this post and have considered deleting this post.  It looks too much like crochet and that is not what I'm after, at all.  I've been doing further experiments and basically I'm aiming for a Hybrid Tea rose but I've ended up with a Cabbage rose.  Now this is not a bad thing, because Cabbage roses are Old English roses and I like the way my latest version turned out much more than this one. 

Ideally I would like to delete this post, but I think it contains some useful information.  I don't like the title either, as it suggests something really modern-looking when that wasn't my aim.  Really all this post deals with is the unfurled central cone, a lot of the rest I've recently changed my mind on.  
B.L. 


Sunday, 18 April 2010

Gold Flower Petal Pattern mounted into a video


I decided that my last few posts have been a tad verbose.  Thank you for not pointing that out to me but anyway (lol)... 

I’ve received a couple of emails enquiring about “needleweaving”, so in an effort to clarify matters, I thought I would get a little video out there and some decent piccies. 

For newcomers: The needlelace I’m working with here is not needleweaving but a particular type of needlelace as seen on Elizabethan embroidery.  Italian needlelace is white, Elizabethan is colour.  Italian needlelace uses a cordonet or a small frame and the work is later cut away and joined to other pieces as free standing lace.  Elizabethan needlelace however, remains in situ and is used predominantly as ‘filler’ stitches with vibrant colour referred to often as ‘raised embroidery’.  Furthermore, as on the swetebag I’m looking at here, this English type of needlelace stitching branched off and became even more dimensional or ‘flying’, for example as seen with the flower petal interpreted below.  The stitch I’m using here is called (corded) Detached Buttonhole.  The Venetians called this ‘Cloth Stitch’.  With this amazing stitch you can create tiny pieces of made-to-measure cloth that you can gradually build into complex multi-layered flowers and other very appealing motifs.


Ok, this is the drawing you make on your linen.  Forget the oval in the centre for now, as that will need to be dealt with separately.  If you are keen to complete it though, all I would say is, you make 5 chain stitches at the top and then make an oval flap to fit the shape underneath.  It will curl a lot, see end of this post for an image of that.

flower diagram

In the spirit of brevity, here are some pictures of how to do the basic petal of the blue flower.  I’m using metallic covered elastic for this so you can really see what I mean, I hope.  Skill rating: EASY!

1.  You do your chain row, regular chain, not reverse.

  Petal Pattern 1

2.  Do your first regular buttonhole stitch BUT with the needle pointing towards you and go into only one half of the first chain stitch.  For first-timers: do not go into the fabric for all stitches after the chain row!

Petal Pattern 2

3.  Do another stitch in the same way right next to it, when you’ve done that,

Petal Pattern 3

4.  Nip across into the FIRST buttonhole stitch you made and make another buttonhole,


Petal Pattern 4


5.  See the needle going BACK into the first stitch above, these 3 stitches will now be your first row.

Petal Pattern 5

6.  So above you can see the first 3 plain buttonhole stitches = your 1st row

Petal Pattern 6

7.  Now do a straight stitch return row in the normal way but take the needle under BOTH loops of the next chain stitch

Petal Pattern 7

8.  Loop the thread round in the normal way to do your FIRST ‘corded’ buttonhole, from now on the needle will be pointing away from you

Petal Pattern 8

9.  Very easy isn’t it?

Petal Pattern 9

10.  When you reach the end of the row you are going into the last space.  It must be the last one, learn what to look for because when you get your speed up, its easy to miss.  See below for close-up of last space.  (Note how the return row straight stitch recedes to the left and crosses with the last stitch of the previous row)

Petal Pattern 10

11.  Here you can see below that things are finally starting to look neat.

Petal Pattern 11 Petal Pattern 12 Petal Pattern 13 Petal Pattern 14

Petal Pattern 15

11.a.  Below you can see that I’ve reached the end of the row but I nip back into the last stitch of the previous row, to increase the height of this row using a regular buttonhole stitch, I think I do this only a couple of times on here, when you come to do it for yourself, you will see you pop another buttonhole on the end to add height on a visual assessment of what’s needed but as you come closer to taking the corner, you don’t need anymore height.  (That was the mistake I was making before, or else I would have finished the flower a lot sooner.)


Petal Pattern 16 Petal Pattern 17 Petal Pattern 18

12 After about 4 rows of perpendicular Detached Buttonholing, the petal will start to curl or stick up.  This will be the same for whatever thread you are using, including cotton.

Petal Pattern 19 Petal Pattern 20 Petal Pattern 21 Petal Pattern 22

This curling you can see has nothing to do with stitch tension, these stitches are not tight at all, its entirely to do with stitch formation.

Petal Pattern 23 Petal Pattern 24 

This is a picture of the back of the work

Petal Pattern 26  Petal Pattern 28  Petal Pattern 30

El Fin.


I should mention that behind the petals are tiny tent stitches in light shades of green and neutral. 

CIMG3565

Above you can see I found a glossy silver yarn for the Gobelin stitch mock-up.  It’s a French, non-metallic, but very glossy grey knitting yarn called Bergere.  You can see it covers all the linen really well (25 count).  I like using that stuff, its very tactile.   


None of the petals you can see below are wired, they curl because of the nature of the DBH stitches.  Notice the one in the centre here in profile, because its so small, it curls to the max to reveal the tent stitches beneath that are the same colour as behind the other petals. 

Smack in the centre of that outer flap is a gold spangle - yet to be added.

side view

Just other night I noticed something new on the bag image, I could see they had used black to differentiate between two tonally similar colours, like around the tent stitch rectangles inside the flower. 


In making this flower I found that I agree with what  Dorothy Clarke suggests in: ‘Exploring Elizabethan Embroidery’ and that is that the stitching can be best completed in the hand; no hoop or frame. 

………………….

Been extremely busy, working ahead on about 5 posts now.  Ran into a bit of bother with the mini-book in that I underestimated how long those finishing touches would take, especially the ones where you have to rip it out and do it again (and again). 

I now have my much anticipated inter library copy of Jourdain’s:  The History of English Secular Embroidery (1910), so far, it refers often to a well known embroidery Quarterly that really makes me want to visit the British Library. 


The sun has finally ‘got his hat on’ round here!

Friday, 9 April 2010

Announcing my new video and the first sketch of the Second Flower made of corded Detached Buttonhole

Well I managed at long last to post my next video on YouTube today.  I promised I’d make that video some time ago.  Quite honestly, I got fed up of waiting for the brighter weather to help with the lighting, so instead I made it in the dark using gold thread.  The video deals with “badly behaved” Single Buttonhole and how a little consideration as to the orientation of the tiny crossed arms of each loop means you can make the stitch look as if you had in fact worked it spirally, when you hadn’t,  without wasting precious thread on a straight stitch return row.  

Here’s the link:


Now, there’s a long story behind the gold thread I use in that video…what if I told you it was made in 1930 and it came from Java !  Um, I wasn’t around then of course, I acquired it 12 years ago.  Its the best gold thread I’ve ever seen and really cold to the touch when you put it against your cheek…ooh mucho oro tio!

On the general subject of videos can I say that I’m pretty shocked that there isn’t a decent video out there of Tent stitch.  The only video I could find on it ages ago, and its still the case, is of a mid 1960s retro style clip where a woman with platinum-exponential-back-combed hair is stab method tent stitching a piece of canvas with a picture of a camel printed in primary colours without any close-ups!

In fact, may I say, what I find strange about Tent stitch generally is a lot of people give up on it and do half cross stitch instead or they do Tent stitch with the stab method.  This is very regrettable as Tent stitch does things half Cross Stitch cannot do, e.g. its very thick on the reverse side which means its very heard-wearing for things like chairs and dear old footstools and if done properly its very fast and hypnotic!  I think I’m going to do a video of Tent stitch… 

Permit me to digress a little here to tell you why I decided to make these videos.  First off, I don’t make a video of something that there is already a good, clear, all- encompassing and unequivocal video of  out there.  I make videos because I was stuck and I hated being stuck.  Added to which, I will never forget that a few years ago, when I was going through my knitting phase, I got a very informative book out of the library, it called itself an encyclopaedia (of all things) and I sat there diligently working my way through it until  I reached a section that I was desperate to master but found to my utter consternation that the instructions of how to do that particular procedure, which  they had illustrated, were completely and utterly wrong.  Since then I have had a healthily critical appreciation of instruction manuals.  I will never forget how it felt to wander around being utterly confused and very annoyed with that book until a dear video on the very subject put me, finally, on the straight and narrow once again. 

Ooh, on the subject of cool stuff on YouTube, I’d like to mention that you might like to take a look at the ‘Viking Knit’ videos that are on there.   

If you recall I spoke in a previous post about Viking and Anglo Saxon art being the inspiration behind the plaited and coiled designs so favoured by Elizabethan decorative taste, especially in embroidery, well, in case you hadn’t heard of Viking Knit (I hadn’t), interestingly enough, you will notice it has exactly the same formation as Plaited Braid Stitch. 

I’ve always wondered as to the provenance of PBS, its such a complicated stitch to just pop up, I often ask myself: ‘from whence did it hail?’   Well it turns out Viking Plait was originally worked with thin silver wire and was actually used by the Vikings as their form of currency, which they used to cut up into little bits.  Indeed, lots of Vikings are buried with tiny sets of personal weighing scales, so they could work out how much all these little chunks of silver weighed when they exchanged them for goods.

So, as complex as Plaited Braid looks to us, in Tudor times, it was just ‘in the blood’ as they say…In my view, this ancient reverence for a plait made of precious metal must have been the inspiration behind the cultural predilection of the Elizabethans for fabric to be embroidered in gold plaits once the gold thread was easier to come by.

Now before I wander off,  I must show you my first quick sketch of the next flower motif on the swetebag.  Again, its made exclusively out of Detached Buttonhole constructed in 5 glorious layers…..can’t wait, as this flower is one of the main reasons I wanted that bag!! 

Second Flower Motif of Detached Buttonhole  

My next post incidentally will be about Slanted Encroaching Gobelin stitch, worked vertically, as on the bag.

So pleased to reveal that I managed to finish the Stumpwork Mini Book and I shall devote an entire post to its construction after encroaching Gobelin.

Spring is here, finally, warming the soil and the tiny chests of the tweeting birds!

Friday, 2 April 2010

Creating curl with Detached Buttonhole 3-D flower petals

Detached Buttonhole Blue Flower

Well I finally sorted out my problems with curling Detached Buttonhole petals; the type of curl and the extent of curl, hence the hiatus.


_MG_0757(1)

In this picture you can see me unpicking some of the ‘compensation’ stitches I’d made with slanted encroaching Gobelin stitch.  The background of the bag is completely covered in this stitch using silver thread.  What’s interesting about this is that the stitches are worked vertically, as I can  see clearly from my museum image, and not horizontally, as is the modern method.  More about that later, as I just want to concentrate of the ‘curling’ concept this time. 

I know that last time I said I would produce a diagram pattern for the basic petal of this flower, but alas that will have to wait until next time, as I really need to explain my experiments with the curling. 

First off, as you’ll recall, I’d been using a reversed chain stitch base line.  I really like that way of working, it gives you a firm base from which to start and very even results. 

So I proceeded in that way but I quickly ran into difficulties and I have to admit, they became increasingly worse as I tried to complete the flower.  To my horror the resulting petals looked like this:

1

As you can see, they were much too curled, too malformed and very disappointing indeed. 

With the usual pressures of time, I hoped I could just maybe tweak them into shape but when I returned to look at them the next day they’d stubbornly flipped back into their mutant shapes.  So then I thought it was because I’d not combined them with metal thread and I made another one with it here:

CIMG3564  

Again, you can see its better but its still not curling as its meant to.  Its curling in a more controlled manner at the outer edge but what’s even more disconcerting is that although this time I’ve used metal, you can see its lying flat against the ground fabric and not looking raised enough.  This was a big problem.  I concluded it  lacked some inherent ‘springiness’.  Its hard to explain but it just wasn’t lifting up off the fabric as I can see it should from the image. 

Now I could have left it at that and just plodded on, especially as it takes so long to sew one of these things as you can’t use very long thread as it tangles with the metal.  If you recall I’m using several strands silver lame.

I really could have accepted the petal pictured above but I still felt I could improve on it.  After all, I wanted to be as faithful to the image I was working from as I possibly could.  I didn’t want a  ‘modern  interpretation’ vaguely based on an old flower design.  So, with all this frustration I realised for the first time just how accurately I want my reproduction to be.  I think I mentioned before, I don’t want the bag to be an all-consuming head-banging passion but I want it very much to look ‘right’.  

We think of Elizabethan embroidery as a domestic art movement but I believe this bag was made professionally and in all likelihood it was produced by The Worshipful Company of Broderers, which was given its royal charter in 1661.  I wont tell you too much about them at this stage just that in those days, they used to sell their wares not far away in a covered market.

The fundamental errors I was making with the petal  eventually made me realise I was stuck.  So I left off stitching anything for a few days to put my thinking cap on. 

Then I received an interesting email from a reader which turned out to be extremely germane.  In it I was asked what I’d discovered about the base line.  That got me thinking... 

I came to realise that I was making increases where I didn’t need to.  It intrigued me as to why I was doing that, then I realised I was in crochet mode.  In crochet the concern is to keep the work flat on turning a corner, so you naturally create more stitches.  However, the aim here is to do the reverse and make the work stick up, or curl.  If you think about eyelashes for instance, they are spaced evenly along the edge of the lid but ‘appear’ wider apart or to have less lashes in the middle.  This is an illusion as all the eyelashes are parallel, if you were to flatten the eyelid out into a straight line.  So, I concluded that the base line needed to allow for this movement of the stitches and give the illusion that at that mid point there are less stitches.  See here:

Eyelashes

To be fair to the museum image, it does show all of this but I cannot tell from it what’s supporting the first row of DBH. 

Well, with that thought I decided to scrap the reversed chain start as it was too tight to work with in this instance and it had itself too many stitches as I was looking for less  for this purpose and I needed to explore other methods.  I was primarily looking for a base line that was looser but not too loose, and most importantly would allow room for the DBH stitches to lift upwards, so in a way I needed a base line that would also allow for the ‘rotation’ of the first row stitches, as the reversed chain was making them peg down too firmly. 

After working a couple non-starters I realised that I needed to enlarge the image of the bag to its max and try and see the solution therein.  What I can see from that is, that whatever foundation/base line they used, they stitched over the entire thing, in other words there was no row of remaining stem stitches, which is what it looks like if you use only one side of a reversed chain foundation in the usual way.  

So then I:

  • Made one with backstitch – terrible, too difficult to control.
  • Made one with chain stitch regular – again, terrible, too difficult to control.
  • Made one with reversed chain stitch BUT THIS TIME, I used both sides of the stitch and it looked like this:

2

As I hope you can see, by doing it this way the entire petal just totally flipped right over like a swissroll! Although this proved they couldn’t have used this method on the bag, I am actually very pleased I did this because this odd formation could be really useful when it comes to making modern 3-D type flowers….more later.

  • Then I made one with a normal chain stitch, not reversed BUT THIS TIME I used both sides of the stitch and this is what I got:

3

At last, this is exactly the same orientation of first row stitches as on the bag itself.  Hope you can see but they are loose and slanted as compared to the subsequent rows that are straight.  Finally the petal is lifting up from the ground fabric as its does in the image.  

Here’s a close-up of the finished thing and it looks  extremely similar along the base line as it does on the image of the bag itself:

4

From this I’ve concluded that if you grab both sides of the chain stitch:

a. it creates a thick/padded first row which is a firm base without being too tight and is loose enough to allow rotation of the first row of stitches built onto it.

b. it doesn’t have too many stitches or is too tight, which would cause the petal to flatten out as they are basted down permanently in one position.

b. by grabbing both sides of the chain stitch, it lifts the thing away from the background which is further enhanced by the subsequent stretching of the outer edge of the completed petal.

Supplies Update:

My gold and silver supplies are on their way to me.  I’m excited but also worried.  Apart from anything else, if the Lurex is what I should go with, it may be that its so thin I need to get 40 count linen.  For sure, the silver will decide the scale of everything else.   

Until next time!


W.I.P.

1.  Have to finish the mini book by 8th April

2.  Working on ideas for making the orange into a ‘slip’ and attaching it to something else, like green velvet…

3.  etc etc etc