Sunday, 29 August 2010

Update & idea for an embroidered ring

Aemilia Ars Renaissance Lady

(This is an especially long post – I wish I could cut it down, but such is life…)

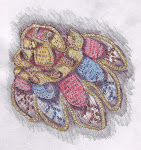
Here’s a quick sketch I made with Conte pencils of what I think the Aemilia Ars lady would have looked like fleshed out.  As you can see, she had to have been very young,  and reminds one of a mystical figurehead from an ancient ship.  I once did an extended art project on sacrificial images, specifically looking at all the figureheads stored in the hull of the Cutty Sark.  Its such a shame those artefacts have perished.   (More about this W.I.P. further along). 

Important matters to be addressed
Due to finally getting the chance to experiment with several serious issues concerning the repro bag, I have decided that I may have jumped to incorrect conclusions and now find evidence to the contrary.  My recent discoveries make life kind of easier but in turn present new challenges. 

The three things are:

  • Acorns on the bag
  • Diagonal migration of DBH
  • Trellis stitch using only metal thread.

First off - Diagonal Migration of DBH.
As you know I am left-handed and I start DBH the opposite way to right-handers.  It was recently brought to my attention by an EGA teacher (guess who) that diagonal migration for DBH is a red-herring (Thank you, I appreciate it). 

I have not yet had the chance to find out exactly why this happens, but the Aemilia Ars lady proved to me that if I start at the other end, then I don’t get that weird visual data. 

In other words, I may have to rethink where I start motifs in order to negate the diagonal tendency e.g. when I started the Ars lady from the neck I got the diagonals but when I started from the forehead I did not.  (I think it boils down to the old ‘flip and rotate’ conundrum for us lefties.)   

I will spend some time working out ‘what is what’ on this topic, but I just wanted to say for now that, even though I am left-handed, if I can, I prefer it if my work doesn’t betray that.  (I know; why be ashamed, blah…its not really shame, its about wanting to be mainstream.)  

Next: the Acorns
The acorns and the cords have given me more cause for concern than anything else on the bag.  It was so interesting to meet with Bill Barnes recently (he of Golden Threads) because of his own volition, very kindly pondered the cords for a long time and actually offered to ask a contact of his to make them if I didn’t feel I wanted to take that on, as well.  Its nice to know I have a back-up plan, but my view is, the cords ‘go with the territory’. 

Acorn Nitty-Gritty

Now I need to rewind a little here: If you recall, when I received the image from Florence (The Bag was made in England, it’s stored in New York, and the image came from Florence) I was struck by what first appeared as  tightly worked reverse-side Trellis stitch they had used for the acorns.  I think I mentioned, that it appeared to me then, that they may have been worked in 2 sections, then sewn together to produce firm little cylindrical forms.  Here is a mock-up of what I thought I was seeing:

Trellis Stitch Acorn 

See how from a certain distance, the chevron rows of Trellis merge in the eye, to become neat pairs of crossed ‘arms’ and those appear as regular columns, if you do as I have done here, and let the mini-fabric curl naturally.   

Tight Trellis Stitch mesh impossible with metal thread

Well, because I couldn’t find fine silver thread that would form Trellis knots without ‘jamming’, I went to see Bill Barnes in the hope that he had something better suited to the task.  (Going to see him was a cost-saving exercise - I keep telling myself - even though it cost quite a bit to get there and devote the time – still it was very kind of him to see me, as he  doesn’t usually meet with customers.) 

However, now I have had the chance to really sit down and try and sort out which of my three versions of Lurex is best suited to the job, one is from abroad and the others are English.  

I’ve thoroughly tested all three and concluded that basically you can only ever make a very loose-looking reverse side Trellis with silver Lurex thread, which is the finest metal thread available today.  Try as you might, it will never take on the appearance of the tightly worked chevrons on the acorns of the bag. 

This prospect was very disheartening.  I kept asking myself, ‘if I’m using foil and the Elizabethans used real silver, surely the foil could work up more tightly than the silver, not less so?’  On the contrary, Lurex will only go so far in completing the little knot, then it jams and if you continue to pull it, you just get the dreaded splitting and unravelling. 

So, with that, I returned to look at the image on the computer, but this time I didn’t look at the acorns and instead took a wander halfway down to examine the body of the little blue butterfly which  had been worked using similar methods but much more loosely. 

You might think ‘well why didn’t you notice that before’ and I have to admit there is an element of ‘not seeing the wood for the trees’ but you have to understand, the tension used to make the acorns is much, much tighter than that used for the thorax of the butterfly, so much so, I honestly thought they were different stitches. 

You might also be right in wondering  if I established the presence of  the characteristic lower knotted area that would identify it as Trellis stitch, truth is, even tightly twisted silk (and we do not know exactly how tightly the Elizabethans twisted their silk) does untwist with time and from the pieces I have seen where this has happened, the Trellis knot does appear looser and smoother.  The distance at which the image was taken was also confusing me.  

Ceylon Stitch Butterfly

This butterfly has worn a little loose because it lies exactly where the bulk of the bag would have protruded.  Hence, I found this had exposed the connecting thread between two particular stitches and those stitches were larger as a result.  This enabled me to really see that they were made not by knotting the thread, but by looping it, as you do with Ceylon stitch.

We also have to remember that the image I have is medium definition (£32 all in) perhaps the high resolution (£110) would have cleared up the confusion a lot quicker but I found that price tag to be prohibitive.

To support this updated opinion, I’ve gone back and looked at lots of other examples.  This means, in my view, that Trellis stitch still appears to be one of the network buttonhole stitches that was not worked historically using metal thread, either blended with silk thread, or on its own.  To summarise, they had the same problem then as we have now.  (I have mentioned before GST is not suited to it either – please see relevant discussion on that topic here.)

2-Sided Cylindrical or spiral working of Ceylon Stitch?

If I am now to consider making the acorns out of spirally worked Ceylon stitch, it begs the question of what inner support the structure has?  This whole topic is very interesting because in my view, The Bag is not exactly Stump work per se.  It anticipates, later Stuart Stump work, but is about 60 years earlier.  Textile scholars have given this type of embroidery the name ‘Elizabethan Flying Needle Lace’. 

If you would like to see a really good video that discusses a famous Stuart Stump Work casket in detail you should click here.  The sound quality is below par but the close-ups are excellent.  To quote from it: “In 1660 there was an explosion in decorative arts as a result of the Restoration of the monarchy."

Historical Context Notes

The construction methods  of Elizabethan 'Flying' Needle lace * ‘follow on directly from what they had learned from the tradition of embroidered Book Binding.  Wherein they discovered that the embroidered bindings lasted longer if metal thread were added (and blended? with) the silk’. 

This also makes sense in terms of Swetebags and clothes, as they would have to undergo a certain amount of abrasion.

* Paraphrased excerpt from Erica Wilson’s Embroidery Book, 1973 Pub. Charles Scribner’s Sons. 

From what I saw at the V&A recently, later 'Stump work' for the most part abandons the custom of blending metal thread with silk and instead utilises wires to support the 3-d structures.

Back to the Acorns

I can see that the lower stitches are wider than the top half and that the foundation stitches are many and elongated.  My initial guess is that they used a backstitch for the base line.

Did they use a rolled-up inner support?

I made a tiny support by rolling up some bias binding and using one strand of silk and one strand of gold Lurex and kind of turning the work as I went along.  It proved a very difficult exercise and I was not happy with the results and figured out that Ceylon really needs even markers at the sides for it to pull up correctly, so now I come back to my initial understanding that is, it had to have been made in two halves and not spirally.  

So now I’m going to try working it along one half of the supportive padding, using evenly spaced edge stitches, then doing the same for the other side, like this:

Acorn diagram

It remains to be seen if I leave the little supports in there because on the historic acorns the shape is flattened out somewhat.  Next time I’ll use some folded over linen instead.      

_________________

We’re hoping to visit Florence soon – hence my enthusiasm to complete the Aemilia Ars piece. 

Just to say that, you may have been able to spot from the images I posted last time that I made a mistake quite early on there (and it was a dreaded biggie).  It only became apparent when I came to work the chin.  Pleased to say I’ve corrected that now, more later…

_________________

We’ve just returned from a blustery Brighton.  I love that place it for the creative ideas it gives you. 

This time I was particularly struck by all the amazing costume jewellery rings made into yummy flower motifs, like chunky moulded leather roses and ethereal electrical- wire flowers. 

So taking the Elizabethan lessons of ‘making embroidery more durable and thereby able to withstand a certain amount of abrasion’, I’ve decided to embroider a ring using those techniques.

It might turn out to be a bit more Baroque than Tudor, but I don’t mind.  The important thing is to get these old ways out and do things with them!

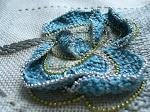
Here’s the craft shop ring I intend to use.  This one comes with a handy ‘sieve’ which will be great for anchoring all sorts of stash-busting embellishments…

CIMG3937

One of the things I intend to do with it is this:

CIMG3939

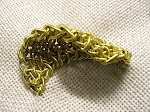
Can’t say I’m a huge fan of Lurex but doubled-up as it is here, I find it much more workable.  This is a fingernail- sized piece of trusty old 3-d DBH. 

Not sure yet if I’ll sew the DBH petals directly onto the sieve or use a tiny piece of linen then attach that to the sieve?  One of the things I have to keep in mind is to watch out that the little prongs will still be able to grab over the increased bulk.  It’s still at the drawing stage but I’m getting my materials together, especially some of this Pearl Purl that is now going spare… 

I’m making it as a gift and the recipient prefers silver.  So, to get some more Elizabethan jewellery ideas I visited this cool lady’s website: Alyxx.  (Btw, if you go about two thirds of the way down the page there, you can see the reticulated pattern she chose for the Partlet, it’s the same as the one I chose for the Girdle Book.)    

Oh, and look what arrived from Paris after they had  their customary 2 weeks of August shutdown…

CIMG3913 

I don’t want to say how much this little lot cost, just that the red is wrong but I can’t bring myself to return it.       

Below is a comparison with a better red from Silk Mill, but I do love the lustre of Silk Perlee

Red Soie Perlee

Without your own colour cards, the disparity between screen colours and printing ink must make silk suppliers a mint, don’t you think…

Just look at this divine blue!

Blue Soie Perlee

cya!

P.S.  The colour references are from The Victoria & Albert Museum Textile Collection – Embroidery in Britain from 1200 to 1750. 

Saturday, 24 July 2010

Detached Buttonhole Faces

A final word on my (long) post about DBH circle shaping

I hope like me, you derived some useful insight from that jumbo 2-part post and all the links included therein. 

I would just like to clarify that the collection of stuff included in Part II primarily dealt with flat and loosely worked Uncorded Detached Buttonhole and only related to DBH in so far as the expanding net idea.  

You’ll also be pleased to know that for the purposes of Elizabethan embroidery, you don’t really need to go into all that complicated stuff, as they tended to use the more stable needle lace stitches, and simply take the succinct advice I received from the author of stitchingwithkittens where she very kindly summed it all up by saying:

“Either way works but if you have gaps at the margins of your DBH stitching, that means you are not pulling the thread tightly enough OR that your thread is too thin for the fabric”. 

She also added to:

“view DBH as a grid”……

(If you haven’t already done so, you should wander over to that blog and look at the quality of her stitching in close-up…)


And there you have it, sometimes you’ll hear something that makes you think about a certain thing again in a whole new light – so with that clearer way of looking at DBH I decided to revisit the specialist blog Italian Needlework and obtained kind permission to show you a gorgeous example of a particular type of DBH lacework called Aemilia Ars:

AArsWoman 

Aemilis Ars

This is an example of Renaissance Aemilia Ars needle lace.  I’m sure you’ll agree, its an amazing piece of work and pushes the virtuosity of DBH to new limits. 

Surprisingly few stitches go into making up this complex design and if you really study it, you can see its not actually that complicated. 

What’s especially interesting about Aemilia Ars is the way they lay the foundation cordonnet.  For this they use a simple loose whipping stitch over a backstitch which is comparatively flexible and is further enhanced by the addition of a series of  special tensioning ‘spokes’ that enable you to create naturalistic curves as well as sharp points and even right angles. 

What all this has to do with me

So, as a way of testing out my new-found-‘flat’ DBH clarity of purpose, I’ve set myself the challenge of making this doily. (I call it a doily because I’m going to stick it on my dressing table eventually.) 

Gauge

From the photograph you can tell that in Renaissance times they used quite a fine thread and of course a large part of the fascination is how small they managed to make this design.  I’m not, however, considering miniature this time round, as I have quite enough problems with scale in relation to my main project. 

Instead I’ve chosen to use the modern, readily available medium weight crochet thread.  I think I will learn a lot from setting myself this task and regard it as a worthwhile precursor.  As it happens, I don’t have any books on Aemilia Ars but coincidentally I came across the wonderful work of a fellow member of a forum I belong to.

Patricia Girolami

Before I continue I should explain, Aemilia Ars lace has always been shrouded in mystery but it just so happens I recently came across the work of Patricia Girolami who makes Aemilia Ars lace.  Patricia is a British lady living in Italy who is also a graduate of the Royal School of Needlework and now teaches Aemilia Ars.  She has kindly posted a fascinating set of sequential photographs on how to work typical Aemilia Ars techniques. 

She is also about to publish a book on this art form stemming from her dedication to uncovering its closely guarded working methods.  Like me, she feels keenly that we have a duty not to allow these historical, wonderfully creative ways with thread to die out. 

You can find Patricia Girolami’s work here, if you scroll down the page and look at her photos you can find the Aemilia Ars ‘how-to’ sequence.   

More Links to Aemilia Ars

If you would like to see more examples of Aemilia Ars you can also take a wander over to The Textile Blog, where you can see lots of examples of Historic designs.  I think you’ll agree with me, its proof that with ubiquitous DBH, really ‘anything goes’….


Repro Working of the Profile view of an Aemilia Ars Lady

So, down to work:

2

Above is my first toe-in-the-water type sketch.  Getting to know the main contours and the unusual profile.

6   What really struck me about this face is not so much that it’s done in DBH, but if you look closely you can see that the lines of stitching follow the contours of the face.  This idea is what attracted me most, because the stitching becomes similar to direct ‘drawing’…

3

Above is my stitch plan.

I realised after making 2 smaller attempts, that I would need to make the design much larger as my thread is comparatively chunky, so I made a print of the image and did a simple tracing.

The hair looks massively complicated but actually its not (famous last words..).  I’ve done that stitch before, its a very stable knotted back and forth commonly used in Elizabethan embroidery and all those sticky-up bits are basically whipped cords (more about that later) and buttonholing over 2 laid threads.  Again, the needle lace stitching of the windswept hair follows the meandering contours. 

5 

Here you can see my trusty paper template idea over the image to check everything.  It looks nice e.g. I’ve preserved the prettiness of the face but I found out later that you cannot sew directly from that shape. 

It needs to be exaggerated first, so that you don’t lose the important definitions when it comes to the final stage of buttonholing the edges and then (hopefully) everything shrinks back into place.

4

Here I’m checking the hair and the junction where both sections overlap. 

I’ve decided to make this piece in 2 sections and stitch them together from behind because I think that’s how it was originally made (?) and if it wasn’t, then I know my limitations…

8

Whipped Cordonnet

Here’s the ‘flexible’ whipped ‘cordonnet’ on my ‘cartonne’ (cardboard).  You need to make the holes first, by working straight down with the needle, use a thimble and protect your work surface.  Then you backstitch the whole thing. 

Next, with a single long length of thread you whip the whole lot.  When you reach the spokes, you need to do something slightly different by just hooking the thread round them, using them as anchors.  Notice the smooth curve of the chin that you can achieve using this system. 

The spokes used to tension the corners of the lips and nose, are added last of all.  Notice I have not tensioned the very tip of the nose but rather the lower edge.  Refer to the original image to see why I did this. 

The ‘flexible’ aspect of this foundation thread is very important when you come to do things like stitch the nose, because as you can see further along, when the rows of stitching that makes up the nose meets the corner of the eye, the thing pulls together so you achieve the vital contour of the bridge of the nose.

8a

Because the first one I made was so unsatisfactory, I felt I had to keep re-checking all the angles and relationships of the features very much as you would a drawn portrait.

Oh, I should mention, I now realise that I’ll be able to replicate this procedure on the Repro Bag, as I found out when I went to visit Bill Barnes, that the Museum’s website image – that’s the one available for all to see at the publically accessible website (the link is at the side here) - can be printed out and it emerges pretty well life sized!

9

Above you can see off I go and Thankfully, the nose now has a bridge!

When I first started stitching, I began from the opposite end but quickly realised the lines of stitching would never behave as I needed them to round the eyes etc.  So this time I started from the top left hand corner of the forehead and watched very carefully where I was supposed to go next by following the line map of DBH.  

The eye as you can see, is very large.  I worked out that it would need to be so,  in order for the final eye to be the right size, as that too will shrink back with the whipped edges. 

It was so revealing to follow the line map of DBH like a little maze, as only then did I really understand all the choices the stitcher had made to suggest the modelling of the face.

10

Now on this image you can see things start to get interesting. 

I needed to come down to the bottom edge of the top lip in order to join the lip to the nose, instead of gradually working my way down.  The reason for this is you want clean inside right angles, as well as outside. 

If you look closely you can see, I’m about to go under the cordonnet, then simultaneously under the return row, which is wrapped round the side, at right angles, in order to catch the apex of the top lip. 

I knew I could do this from my earlier experiments with 3-d type DBH.  This manoeuvre is a very significant one because it means you can extend DBH outwards, anywhere, anytime, flat or 3-d!

This is what I really love about Aemilia Ars, because you can create good straight edges as well as curves,  you can probably stitch virtually anything you can draw…..how exciting is that !

11

Here I’m well into the top lip by now.  It looks too big for sure but the end result will be much reduced after the buttonholed edge is applied over 2 laid threads….

13

On this row, above, you can see that soon I’m going to need to make several stitches into the lower eye lid in order to join up with the next row of stitching.  This looks wrong but if you look at the original image you can see this is exactly what they’ve done.  It means you get to very cleverly suggest an eye socket, as opposed to just a hole for an eye, e.g. you suggest the contour of the top of a cheek bone at work underneath!  

14

Just to check that its going OK and that it looks like a lady…

16


Have a great weekend!

g2g cya !


Tuesday, 13 July 2010

Kentwell Hall, Suffolk & Fingerloop Braiding

Oh Gosh it’s so hot and I’m terribly behind with everything…  Between the day job, La Familia, La Casa y El Jardin my head is spinning….

To digress a little from what I’ve been looking at for the last couple of weeks, I’ve been on a few what you might call, field trips:

1.  To visit The V&A

2.  To meet with Bill Barnes of Golden Threads

3.  To Kentwell Hall’s Tudor Re-Enactment Festival.

This post is purely about Kentwell Hall Tudor Re-Creation Festival in Suffolk.

1

Well I dragged my DH along (under duress) the day after their Great Day, when up to 4oo Tudors from around the country walk, ride, dance, craft and eat about the place.  On the Sunday we were there, there were only about 150 Tudors left.  

2

If I can explain, the owners of the house are themselves Tudor re-enactment buffs and have faithfully restored the fine building and outhouses.  The house is stuffed with original features and all the rooms, that we saw, are exactly as they had been 500 years ago, can you believe that!  It was really quite eerie how time has stood still in this corner of the Suffolk countryside.  

We managed to get a little lost on the way there, that is surprising as its really quite straightforward to reach.  So we arrived after lunch, which was a shame because they’d all had a marvellous open air feast - as we found out later on from the Potager cook who we bumped into as he was playing his hurdy-gurdy under a tree. 

First things first, after buying our tickets (not cheap but worth it as the house was the genuine article) we were directed towards the ‘Time Tunnel’ from which we were told we would emerge 500 years back in Tudor Times.  The tunnel was really dark and I tripped, nothing to do with the flooring, but a lot to do with my heels,  so as a ‘psychological journey’, I hadn’t managed to really concentrate. 

When we came out the other side we could see an amazing house with its grand mullions and beckoning quadrangle, surrounded on its approach by various little cream ‘tents’ for want of a better word.  The first of which housed Braid Makers and of course, you know that that was my main reason for driving the 65 miles!

As we made our way across the lawns towards the Braiders, we were greeted by a man in a doublet with very red cheeks who said ‘Good day to you Mistress, fayre thee well’ and nodded….DH replied ‘Good day’.  I turned to DH and realised he had read the programme in the time it had taken me to change my shoes and find my way out of the Time Tunnel and he was already speaking the lingo.  Meanwhile I was taken aback by the Olde English greeting and found myself tongue-tied with the beginnings of an existential crisis (who am I, who would I have been back then, would I have been a bare-footed character? - my toes recoiled at the imagined physical threat)..

Braiders

Their costumes were amazing, hair in white coifs, lots of cleavage spilling out (I looked across at DH who didn’t look so bored after all !!!).  Immediately I was given a one-to-one tutorial on how to make a multi coloured flat braid on a medium sized wooden loom.  I enjoyed watching the process very much but my attention was really on the Mistress rocking back and forth next to a tree watching us, who happened to be working THE LONG AWAITED FINGERLOOP BRAID!

Between them they explained that there are about 40 different patterns for braids.  They went on to say that whether you’re making a flat braid or a cord, you need to make the WHOLE thing in one sitting as the tension can never be precisely replicated (!).

I watched the fingerloop braid being worked for about 10 minutes and I’m pleased to say that it brought to life all the illustrations I had seen and I could tell it was actually quite straightforward but like all things that are done really well, they look so easy; until you try them yourself…

I was also able to clear-up my own confusion as to whether to make the cords on the repro bag in Lucet cord or fingerloop.  It was explained to me that although Lucet cords can be as long as the ball of yarn, the Fingerloop braid can only be a set length.  They explained that for lots of different colours to be included in one cord, you need to work Fingerloop cords and not Lucet.  The Bag itself has 8 colour change cords if you recall.  So that means only my thumbs will be free…

The house was really amazing and as I said, it’s virtually intact.  I have never seen a house with so many Tudor details, I’d only seen castles.   There are heaps of Tudor houses that have faithful exteriors but unfortunately they tend to have undergone drastic Victorian makeovers, as they did with the churches then.   This one had somehow resisted that imposition. 

While we were speaking to the Master of the house, who was sitting at a long oak table with his DW and DD greeting visitors, I actually managed to turn away briefly and deftly tilt the outer edge an historic embroidered bed hanging into the direction of the light for a tiny moment in order to examine more closely the methods they had used for edging the motifs.

This bed hanging was similar to those I had seen at the V&A recently, that are covered  in needlepoint ‘slips’, the designs of which had been taken from that famous book of herbals that we read about so often. 

I probably wasn’t meant to touch it but I just couldn’t resist as I’d seen lots of these embroidered slips at The V&A and I couldn’t quite make out how they had edged the canvas plant motifs down so cleverly without a single canvas thread poking out and maintained realistic curved shaping.  At the V&A I could see the stitches they had used were so minute that and they must have been executed with an eye-glass as they were virtually invisible to the naked eye. 

These  slips, aka Appliqued motifs,  are so beautiful when stitched onto crushed velvet but on this particular example of a bed hanging, the slips were stitched onto plain neutral coloured linen.  The V&A slips were finished off by laying down a cord around the outer edge and couching it very carefully with silver thread using satin stitch.  The slip I handled was couched with a black fine twisted silk cord that was left black.  The work was on a par with what I had seen at the V&A in terms of minute stitching, except no silver had been added.   

We learned that the long bed hanging had recently been brought downstairs for airing as the insects had been trying to get at it. 

This led on to them explaining that for instance, in order to eliminate lice, one has to hang clothes in The Jacks (lavatories) as the ammonia in the atmosphere there discourages lice. 

While in the same reception room, I also managed to surreptitiously let my finger run underneath the outer edge an ancient chainmaille vest – ooh!  It was incomplete but extremely stained and worn.  I was transported by that experience, I can tell you, it was incredibly weighty. 

We saw the Still and spoke to the apothecary (?) person who was pounding herbs and generously offered us a rhubarb concoction for Summer intestinal discomforts ! 

We also tried some rather flat ale from the Brew House and walked in the herb garden and heard a lot of good humoured Elizabethan vocabulary in regard to the battle of the sexes and how to ‘run your house’. 

The sewing room, which is in the Moat House that you get to once you pass the Dovecote, has a gorgeous large window for working at but the embroidery there was not as exciting as I would have liked.  They were mainly using Tent Stitch and there was no gold in sight, but for a tiny piece of gold highlighting pinned to the wall.  They explained that they were replicating the designs from a Cathedral in Norfolk at the time.  I didn’t quite feel able to talk about myself or my little bag, as I felt too awestruck by the whole time-warp factor.  The room was very tranquil however, as was the low level moat walk, nearby. 

The thing that made the profoundest impression on me was the floor of the Brew House.  I noticed it immediately as it was so uneven and yet very solid.  I looked down and could see it too was an original feature.  I was honestly transported in time walking on that ancient floor.  (If you can imagine a sort of indoor cobbled street idea.  There aren’t may cobbled streets left in London, the last truly old one I saw was in Edinburgh.)  The window was wide open on the dark cavernous room with its musty smell of old casks and fermentation.  I became motionless and let myself drift off, imagining all the many pairs of feet  from olden days walking across those proud elongated Tudor brick tiles and just kept thinking that the floor had felt the weight of so many generations of now dead people who had served the house, it was almost as if I could still, just about, hear their distant chattering…

_____________

cya!


Friday, 25 June 2010

Detached Buttonhole Circles Part II and shaping generally

(This post continues on from the last where I discuss my investigations into shaping etc…should mention its also pretty lengthy!!)

Before I resume what I was saying, quite by accident I found this quote from the King James Version of the Bible, Isaiah, Chapter 19, verse 9, states:

'Moreover, they that work in fine flax and they that weave networks, shall be confounded',

On a blog I found here.  Rather fitting don’t you think!

Networks

Detached Buttonhole (DBH) is indeed a network.  A single stitch of DBH is simply a buttonhole stitch but put four of them together and you have the basic pattern for the complete stitch, or lattice.

Taking the term ‘net’ as my starting point I went back to look more closely at 3 excellent sources that discuss this subject online.  They are:

1. Tricia Wilson (Plimoth Jacket) who has produced a very detailed free pdf file concerning how to construct and shape DBH, that you can find here:

2. Herritage Shoppe is a site dedicated to embroidery that offers essays amongst them is a detailed discussion about single Detached Buttonhole that you can grab here.  You can download the whole thing or just relevant sections.  I’m looking at the sub-heading ‘Graphical Representation of Needlelace’.

3. Antique Patterns Online has uploaded vintage instructions on Battenberg that includes Point Lace (Needle Lace) instructions.  The section I’m looking at for this post is the one called ‘Network Stitches’ which can be found near the end of the booklet and you can grab a copy here.

If you recall, I said last time that to really try and understand what I was doing wrong with corded DBH circles, I said I felt I needed to ‘go back to the drawing board’. 

To do this I realised pretty quickly that I would really need to temporarily disregard the straight stitch return row, and just look at the formation uncorded DBH takes. 

The reason for this is that all the books tell you to start with the uncorded version of the stitch as crucially its referred to as the ‘basis for understanding all needle lace stitches’. 

Its a difficult stitch to work with and as we all know, its comparatively unstable, but essentially it holds the key to heaps of confusion and distortion.

The first article I found helpful was Tricia Wilson’s reference to the notion of “the expanding net”. 

If I can paraphrase this idea, the way I understand it it’s like this.  Because DBH forms a diamond shape and no two stitches sit side by side; there’s always another stitch between them, its tricky to maintain even sides because in normal working of the stitch, you end up making 2 stitches from every single stitch, like this:

one DBH stitch makes two on next row 

So it follows that the edges of, say a DBH square, will never be completely flush, (hence you need to frame the shape with some kind of outline, when working flat). 

Unlike knitting, for instance, where you go into a loop proper each time, with DBH you’re not doing this but rather into the spaces either side of it and so it will always appear staggered, like this:

DBH square diagram simplified

Because of this inherent characteristic this presents us with the opportunity of making two stitches for every one or to put it another way ‘an extra stitch’ each time, hence the net would widen out like this:

widening net

In order to correct this, Tricia Wilson’s suggest that: “To alleviate this problem for a square shape, the second row should drop two end stitches and then the third row would add the two end stitches.”

I found this explanation most helpful, however if you actually count the stitches in her accompanying diagram you see there is a starting row of 7 stitches, followed by a row of 6 stitches.  I simplify this notion for myself as needing to work the rows ‘odd and even’. 

Now here is where my confusion started.  If you “drop the two end stitches” as she directs, then why is only one stitch actually being lost on a count?  Obviously the “two dropped” stitches are not in fact whole stitches but two halves of one stitch, or ‘partial stitches’, that are split and ‘shared’ at either end….

So I continued with my experiments using this advice and ended up, unfortunately with gaps at either edge of every other row.  The other thing I noticed was that the gaps were not all the same size, in fact one of them was considerably larger than the other and most disconcertingly, it kept popping up in an unpredictable manner.

This made me decide to look more closely at what was actually happening with this ‘net’ idea and I saw for myself that the end stitches on the rows with gaps, did not actually constitute two halves of one (dropped) stitch after all, but rather ¾ of a stitch at one end and a ¼ at the other.  See diagram below:

alternating three-quarter end stitch

To demonstrate that characteristic more clearly I’ve blown it up below.  Now all of this is still looking at things from the ‘back and forth’ perspective of this uncorded version of DBH but even so, it does begin to explain why the end stitches of the corded version also need to be ‘shaped’ correctly. 

Another thing that’s worth noting at this stage is that as you can see below, the 3/4 stitch moves down the network of stitches in a predictable pattern on alternate rows.  So, what I thought had been stubbornly erratic turns out to have a sense to it within the context of the mechanics of this stitch.  More about that later…  

06

So then I recalled that on the website Herritage Shoppe there is another essay pdf file that looks further into the strange seemingly unpredictable behaviour of these ‘partial stitches’. 

If you go take a look at that file yourself and see the last 2 pages of the long explanation of how to do Needlelace you will see a section headed ‘Needlelace – A Graphic Representation’.

On that sheet you will see a detailed diagram of a large DBH network, into which a circle has been sketched. 

Essentially that article suggests that you need to understand squares thoroughly before you can even begin to understand how to make circles!  And their advice on how to make squares differs to that of Tricia Wilson. 

But the other important contribution I think the Heritage Shoppe essay makes is that it introduces the idea of looking at DBH not so much as a network of thread manoeuvres that you have to control in a dictatorial manner, but rather as a network of spaces within the thread units and that those spaces form very important shapes, according to whichever particular needle lace stitch you are making.  Furthermore, it explains that you have to try and maintain the ‘shape’ of those spaces in order to achieve the desired shape.

I found this exciting as I hadn’t really thought of needle lace in terms of spaces before.  I’d always been concerned with stitch mechanics and stitch length, it never occurred to me to look at spaces between stitches as a positive contribution to overall neatness, of course now I can see how imperative that is.

To demonstrate: the space between DBH stitches is like this:

shape of spaces in DBH

Its a kind of diamond or goblet shape.  What its called doesn’t matter, what matters is that all the spaces look the same and especially when the reach the margins and are partially gobbled up by them. 

In short, when you get to the edges these spaces have maintain their integrity and suggest that they are continuing, beyond the grasp of the greedy margin.  In other words the partial edge spaces have to look convincing! 

Then I remembered a very good set of patterns that are also available free on the internet from Antique Patterns Online, an educational website that has uploaded a whole heap of stuff about historical stitches.  

If you download that booklet you’ll see that apart from containing an exhaustive list of all the classic needle lace stitches (!!), most importantly, it too discusses how to handle the ‘widening net’ or lattice in a different way.

In that article, conversely, it does not tell you to drop any stitches on alternate rows!  (Yes you read that correctly, it shocked me too!).

antique pattern

If you count the stitches in those diagrams you see a first row of 6 DBH stitches that’s then followed by another row of 6 stitches and yet it maintains its square shape.  Although the diagram is quite small, if you look closely it demonstrates clever wrapping techniques (More about that further on).

So after reading all of that I had to stop and leave everything for a while because really, my head was pounding…. of course the old brain is working away at these conundrums in the background all the time.

When I came back to them I decided I needed to make my own diagrams of DBH and that’s when everything I had read started to slot into place.  The challenge with this stitch is how to shape the space, as already mentioned, so that it looks in keeping with the rest of the design.  That leads on to a critical understanding of the position the needle should be in at the end, and then the start, of each new row.  See below for what I’m trying to explain:


This is my diagram:

alternating three-quarter end stitch

Here you can see rows of plain DBH going off in their peculiar way.

I then decided to impose even sides on them by drawing two vertical lines at each end and placing them at a point where I think I should start each row, if I were to stitch it.

With this deliberate nitty-gritty diagram I found not only that I could properly identify for myself all the problematic end stitches but also to identify all the partial stitches and notice the unique shape of the spaces when anticipating the end of the row. 

This is when things finally started to become exciting.  First of all if you notice there are 4 stitches and 4 Spaces between stitches on every row.  (Antique Patterns was right)

So now the problem to address is where exactly to ‘expect’ the needle should go.

Here is a set of sequential diagrams that hopefully explain exactly what I’m referring to.  I started from the left hand side by the way:

01

Consider the entry point of the needle at the first stitch.

If you see how I took the very first ‘stitch’ in that row, by that I mean the stitch that you have to imagine begins outside of the margin, the needle would have to  emerge from the fabric at about roughly half-way up the length of the first stitch.  Simplify that to mean, you ‘start the first row near the top’.

  02

Now here is the breakdown of what I’m trying to explain.  At the end of the first row, on the right above, you can see that the needle ends quite low down, lower down than the very first stitch.  This action maintains the shape of the ‘expected’ space, or how it would look if the edge were not there. 

Then, if you see the little note explaining what the needle does next, you will see it actually doesn’t travel at all, you emerge from just below where you ended the previous row and take the first stitch of the next row.  This action ‘closes’ the empty space and suggests that the next stitch happens just beyond the margin and continues for infinity.  

04

In this diagram the loops are further along, adopting exactly the same procedures as the preceding two diagrams.

06

Here’s the finished diagram. 

You’ll be pleased to know I’ve stitched this exact pattern, but alas I ripped it out as I was so excited I went on to do more complex stitches that I’d always wanted to do.  I’ll show them to you soon, as there’s a lot happening right now with regard to the repro bag.


Once I had finished the diagram above, I went back to the antique patterns pdf file and decided to try the thing again starting from the other end and this is what happened.

05

What’s interesting about the diagram above is that it proved to me that: had I started the square from the opposite end, the right hand side for instance, then I would certainly have had to make lots of wraps around the boundary line to get the needle back down to where it needed to be to start the next row. 

How fascinating!  This would suggest, in that case, that wraps are actually optional.  I would prefer not to use wraps but if the thread is very thin for instance and the end result you want is for it to be very lacy, then maybe that might be necessary, who knows, but at least I’ve worked out for myself that if I start the right side, I don’t need to make wraps.  I also realise now that wrapping doesn’t exactly solve the gap problem, it merely moves the needle down to where it should be.  Consideration for the exit and then entry position of the needle comes way ahead of wraps. 

I’m aware that wrapping can also suggest the position of last  stitch nearest the margin that is sometimes too cramped to be taken, but as you can see above, where there are wraps in this example, if that were their purpose, then they would imply extra stitches that would incorrectly bisect the all important suggested ‘space’.   

So I bet you’re wondering if all this groundwork helped me in the end…

CIMG3818

I think it did, but as you can see, the last row has a  mistake in that because I was rushing there is one too many stitches - oops.  Also the start is a bit flat but apart from that, you can see I felt confident enough with what I was doing to keep my return rows nice and loose and thereby ensured that the horizontals remained true.  Oh and um, as you can tell, I abandoned the hexagon restraints, I prefer circles.

________________

Can’t wait now to try some of the more complex needlelace stitches again (the conventional white thread variety) ….


Exciting things to report

I had a meeting with none other than Bill Barnes himself!  Yes people, the man behind ye olde Gilt Sylke Twist.  He was so helpful but alas he doesn’t really meet with people face to face and had made a special concession because I put it to him that “it remains to be seen if the bag can be reproduced faithfully with modern silver & gilt threads”. 

He was extremely helpful and encouraging.  The first thing he said was that the Lurex I had bought in England (£20) was not a good silver colour and looked too much like aluminium.  He gave me some Tambour stuff that was of equal thickness and I must say the colour is a lot nearer the real thing.  My main concern, as I explained to him, was not so much the colour but if it could form Trellis stitch as tightly as the Historical bag.  I showed him my experiments so far and he could see what I meant.  Its so nice to meet with someone that knows exactly what I’m talking about.  I came away with a darling goody bag that I can’t wait to try out.  Another thing he pointed out to me that I hadn’t quite spotted was that the motifs are not in fact edged with pearl purl, but rather with Lizardine, as the tops are flattened not curved!  TG for Bill Barnes! but now, whatever shall I do with £24.00 worth of pearl purl?  

I shall reveal more about our tete-a-tete on another occasion as I’m totally whacked out and I have to drive a long way tomorrow to get to Kentwell for their Tudor re-enactment weekend.  Apparently they have an embroidery section and I really need to meet up with people that I can discuss bag cords with. 

cya!  


Wednesday, 16 June 2010

Detached Buttonhole Circles

Although the construction of this next flower looks simple, on a closer inspection I found it to be deceptively so.  (See previous post for image).

If you notice the head is stitched with Detached Buttonhole (DBH) working conventionally in horizontal lines.

Its lying flat on the linen not ‘flying’ and I can just make out that unlike the previous flower, they’ve not used a  chain stitch foundation but a simple back-stitch to anchor it in place. 

First thing was, it occurred to me that I hadn’t come across DBH used for circles before.  I thought that Elizabethan circles tended to be worked using spiral Trellis?  But as with the other circular motif on The Bag  of grapes, they’ve actually used horizontal DBH.

So off I went, happily making my first practice version in my favourite light blue crochet cotton.  (Its my favourite for working out any new techniques as it’s very easy to work with and I know it so well - they stopped making it, but now they’re making it again - that I can instantly see any tiny differences that I need to understand more fully.)

In my experiments I maintained the security of using a chain stitch foundation to hook everything over.  Need I say that, pretty soon things started to go horribly wrong, hence this post is so long!!

Detached Buttonhole Circular Shaping

To fundamentally understand DBH circular shaping, I decided that maybe I needed to lay the DBH shape over the base line, instead of into it, so that I could really see what was happening at the sides, because its at the sides that errors become apparent.  A lot of books advise you to bury the thread in the sides at the end of rows; in an effort to stabilise the structure.  I decided not to do this and just confront what on earth I was doing wrong?…

As we all know, usually you’re told to whip round the inner loop of the base line and pull your rows in to even them up, this is fine, but it’s also a place where you can mask your mistakes! 

Circles Mutating into Hexagons

Very soon I realised that the circles were becoming distorted.  Distortion with DBH shaping can be a bit of a problem, whereas smoother shaping always enhances your work.

So I made (yet) more circles but  incorporated incremental changes each time only to conclude that it’s virtually impossible to make smooth DBH circles as the resulting shape will always ‘pull’ in a certain direction and look odd. 

The problem seems to be down to the intrinsic nature of horizontal DBH, which can be summed up as ‘squaring the circle’.  So what you end up with is more like a hexagon…  

To compensate for this distortion I inadvertently made  more stitches to smooth out the hexagon effect. 

Then I decided perhaps I needed to take a closer look at Reticella work.  This piece is Italian and the figures are mounted on Hollie Point.  It’s housed at the V&A. 

Untitled-Scanned-01

Reticella Work

As you can see above, there aren’t many examples of circular DBH on here but where there are, they’re actually hexagons.  With this I went back to the image of The Bag and could see that yes, they had indeed stitched a hexagon and smoothed it out with Pearl Purl, which is what had confused me. 

But in researching all of this, always at the back of my mind is my enduring quest to improve my understanding of needle lace techniques generally, especially shaping.  So I decided I would ‘go back to the drawing board’ with everything I knew about DBH, because maybe my problem was the decreasing and increasing aspect? 

Diagonal Lattice of DBH

The main thing to remember about DBH is that it works up in a diagonal direction, which means that at the ends of every other row, you have half stitches, which sometimes look like ugly gaps. 

A lot of stitchers, including myself, will compensate for these gapping holes by making another stitch.  This seems the right thing to do as you’re go along, because after all its a filling stitch and you’re ‘filling’, right? but horror of horrors at the end you’re faced with disgusting ‘bunching up’ as seen here:

CIMG3815

The example above shows how not to increase, unless you were trying to make a potato shape!!!  It also demonstrates my beef about the optical illusion of a diagonal migration. 

From what I know now about lattice/stretching/staggering/whole & partial stitches etc, I can see exactly where I started to go wrong, but of course, I didn’t at the time.

You can see at the sides that as one new stitch emerges at the beginning of a row, another disappears at the other end, however, the diagonal pattern lines take your eye from top to bottom, rather than across.  In other words the DBH is actually ‘stretching’ out to fit the shape you make in an all-over manner.  This means that at the margins there is a predictable pattern of full, half and partial stitches. 

In a nutshell, what all this means is that when evaluating if the work is going right or wrong, I’ve found it helps a lot if you understand the diagonal pattern and watch it as you stitch. 

Now I need to break off at this point and point out that I always stitch DBH upside down.  That doesn’t mean I start from the bottom of a shape and work my way up, it means I literally turn the work upside down and have the needle pointing away from me.  The exact opposite of how the diagrams instruct us.  The end result is exactly the same as everyone else's but a hellava lot easier.   

I used to work it as we’re told to in stitch diagrams and all the various books but I visited the Needle Lace Museum in Alencon in France in 2007 and saw a fascinating demonstration given by a retired lace worker and the FIRST lesson she taught us (in French) was to turn the work round and point the needle away, so that you can work needle lace stitches faster and more easily in regard to the position of the wrist.  R.S.I. of the wrist is to be avoided as much as possible, whenever possible.  Wrists kind of wear out!  Apart from it being faster this way and less awkward, I also  found, much to my delight that,  instantly my needle lace stitches were neater and more consistent.

Now I read recently that Mediterranean knotted needle lace makers have ‘the needle pointing away from you’.  If that’s the correct distinction, that’s fine because all I know is I have to save my wrist and I also have to work fast or else I get bored.

The other point I should mention (because I deleted that post and have to expand on it before I can put it back on here again) is this: 

IF YOU ARE RIGHT HANDED YOU SHOULD WORK BUTTONHOLE STITCHES FROM LEFT TO RIGHT.

IF YOU ARE LEFT HANDED YOU SHOULD WORK BUTTONHOLE STITCHES FROM RIGHT TO LEFT.

ALWAYS!

The reason for this is the ‘S’ twist of the thread.  If you work this way it means your buttonholing will be smooth and silky.  If you go against this idea it means your buttonholing will never look smooth and be a bit lumpy and unstable.  What you are aiming for is a smooth rope-like edge at the top of regular close-buttonholing.  It works exactly the same for Brussels and Detached Buttonhole stitching, all of it improves vastly if you start the right side!  Try it and let me know what you think….


OK, this post is now getting a bit long, so I shall break off and just say: To be continued………

cya!


Saturday, 12 June 2010

Colour Drawing of Second flower

Watercolour pencils, Metallic gel Ink & Graphite

The last time I did a colour drawing I was aiming at a kind of stitch diagram, whilst simultaneously stressing  all the gold and silver threads and wires with gel inks.  I cannot impress on readers enough just how much The Bag sparkles. 

For this second flower however, I decided to take a different approach.  As I’m not permitted to show you the actual image, I decided to make a different kind of drawing for each motif, and so, hopefully, if you put them together in your mind’s eye you can sort of imagine what it looks like.

Chromatic values

So with this next one I’ve tried to describe the overall tonality, which is rather dramatic as the flower is so complex, with 4 main sections, including a middle curling set of petals and finished off with 5 tent-stitched outer petals.  What’s interesting about those is that they exhibit the same veining technique as used on leaves elsewhere on The Bag.  

Colour drawing of Flower 2

These next pictures, I hope, show off the gold and silver threads more clearly.CIMG3861

In terms of colour combinations this flower is really quite simple.  The top is a brick-red surrounded in gold pearl purl.  On to this are 3 mid-toned ‘sandy’ coloured mini petals that are pegged down and edged in gold Bullions.  Then you have a row of very frilly, again ‘sandy’ petals, edged with gold pearl purl.  After that there are 5 long petals, alternating between brick-red and indigo.  Finally you have another 5 petals, this time tent stitched and edged in gold pearl purl. 


Tent Stitched Petals

What’s interesting to note about these is that you can see they’ve tried to describe their shaded placement using darker tones of the same colour.  However, for the red petals they’ve translated that as 2 shades of brown. 

Renaissance Modelling

In modern painting methods you would indicate shade by incorporating complementary colours or making a particular colour ‘cooler’.  I’m going to be using the terms ‘warm and cool’ more often from now on as I’ve been trained to do and for those of you that don’t understand those labels just remember it as: ‘cooler equals bluer and warmer equals yellower’.  These terms are partly psychological and partly scientific as regards our understanding of colour.   

The Bag doesn’t exhibit those modern colour codes, of course, and so that’s why I’ve made these drawings in keeping the Renaissance way of looking at colour, which would be to use lots of browns and vibrant under-painting for modelling.  


CIMG3863

Here’s the same image with a sepia filter.  Isn’t it a dramatic design!

CIMG3867

As you can see, again, the middle sections of the flower are made of 3-d Detached Buttonhole but this time the stitching takes the conventional direction of back and forth coming down horizontally from the base line. 

Circular Detached Buttonhole Flower Head….. (to be continued,..)

_________________

This post turned out to be really long, so I’ve decided to chop it into three.  The other two parts will be looking at Circular Detached Buttonhole, which leads onto Detached Buttonhole increasing and decreasing technical nitty-gritty. 

_________________

I visited the V&A Museum today (I wish I’d worn more comfortable shoes).  It was truly AMAZING! 

Thrilling and daunting in equal measure.  The last time I went there they charged me £17.00 to get in, thankfully its free now.  You’re invited to make a voluntary donation of £3.00. 

I looked at everything on the second floor dating from 1500 to 1760.  The Margaret Laton Jacket is NO longer on display. 

One member of staff told me that was due to it being restored.  But if you read the note in its display case it says its been removed to ‘reduce fading’?? 

They’ve put another jacket of the same period on display in its place, under the portrait of Margaret Layton (they use a ‘y’ over here).  It’s obviously not as nice but still extremely good, even though its been taken apart.  The front was apparently altered by adding a ton of spangles topped with beads, to wear to masked balls.  Funny, I thought masked balls happened a lot later than that but there you go..

Oh, and I saw a Girdle Book there too.  Two inches big just like my version from last month. 

*The thing that struck me most about what I saw was the extremely thin silver and silver gilt threads they used for all that stuff.  I was going to buy Silver Passing Thread Number 4 for the repro bag but I think I shall have to rethink that.  Now, all the Lurex I have doesn’t seem quite so thin after all.

________________

FOR MINI-BOOK FANS:  I’ve been working on the designs for 2 more mini-books.  I have the materials for both of them but I just need to think through some construction details. 

I’ve just returned from an excellent little holiday with my DH in Brighton.  What a great place that is.  In case you don’t know, Sussex University runs a very famous design course.  As a result of that, the whole town is really arty.  I just love all their cute shops along Kensington Gardens, Sydney Street and Upper Gardener Street.  I got 101 more ideas for what to make out of DBH down there, I can tell you!!!

cya