Wednesday, 27 June 2012

Stem Stitch analysis of concave and convex corners

What a scary title hey !!  Don’t worry, this post is about the most addictive stitch of all…

Broad Stem Stitch

Broad Stem Stitch G

Recently I was having a discussion with an internet chum about the most addictive embroidery stitch on the planet?  For my part it has to be Stem Stitch! 

When you study historical embroidery, the thing that repeatedly strikes you is, how well they understood their stem stitching and of course, 16th Century Redwork is comprised mainly of Stem Stitch.

Then, when you look at later vintage embroideries from say, 1920s and 30s, you can still see fantastic virtuosity with this stitch.

Its a very elegant stitch that works with the direction of ‘S’ twist thread and shows it off well.  Its formation is essentially a spiral and has a lot in common with Satin Stitch.  The main difference between the two is something that enables it to be stitched much more quickly and directly, without the need for outlining or under-tramming, and that is the very clever, concealed exit.  That means the needle will always emerge from inside and beneath the last stitch formed.  Not to be confused with Outline Stitch, which conversely unravels the ‘S’ twist and produces a completely different effect.  

Personally, I also think that Stem Stitch forms the basis of understanding a lot of other embroidery stitches. 

As we all know, there are 3 ways to work Stem Stitch:

a.  Lined up along a line, with no gaps

b.  Along a line with small scoops of thread, leaving largish gaps

c.  Broad stitching, which looks a lot like Stem Stitch for canvas work but with one fundamental difference (explained further on). 

Changing direction, you will find however, is a bit of a controversial topic.  A lot of stitchers believe that to get out of ‘difficult situations’, you should switch to Outline stitch.  Personally I don’t agree, because Outline Stitch is completely different.

I like Stem Stitch for two main reasons:

1.  Its very fast and easy, hence totally addictive.

2.  Its basically a diagonal spiral, like Satin Stitch, but because of the cleverly concealed exit hole, its much more forgiving and hence, easier to work.

You don’t have to under-tram or outline it first, but you do have to remember that it looks best if the stitches remain diagonal e.g. the entry point of the needle must always be lower than the exit hole, which on a straight line, translates as a back stitch action.  

For left handed stitchers you stitch from right to left, holding the thread above the work.  For right handed stitchers, you do the opposite. 

When it comes to working vertically, the same rules apply, except that for left handed stitchers, you work from top to bottom. 

Any deviation in the way you hold the thread, means you will produce Outline Stitch, (which in my view is wrong).  So then the big question is, how do you change direction?

Well, I found that because the stitch is so graceful, you really need to get in there with your magnifier and study exactly what is happening in those corners as you turn, because concave and convex curves behave differently.

I’ve spent quite a long time (well it was raining!!) analysing what on earth is going on down there and here are my conclusions:

First of all, to stitch a vertical line of stem stitch, then change the direction to horizontal, working from left to right, the effect you need to create is that the spiralling stitches emerge from behind the previous stitches.

In contrast, when working in the opposite direction e.g. from right to left, the spiralling stitches curve naturally the opposite way, and appear to cross over the front of the previous stitches. 

So to put it simply: one side of the work looks like its coming out from behind, the other other side looks as if its emerging from the front.  (Stitching a letter ‘S’ shows this off very clearly.)   

However, (big however) because the thread only twists in one direction, you need to compensate for ‘wrong-way’ turns.

I’ve managed to distil this process down to needing a kind of 3-point-turn within that angle.  Simplified by this diagram:

Stem Stitch Corner-  Diagram 1

or to put it another way..

Stem Stitch Changing direction

Now I could go on for a long time (!) but instead, I decided to put it all together into another of my YouTube videos:


Goodness me, I’ve have been quite busy lately, haven’t I?  

Friday, 22 June 2012

Announcing my 3 new videos for YouTube

Rushing here – thank you to my 600 subscribers on YouTube and new followers on here and anyone else that I’ve exchanged emails and talked about historical stitches with.  You’re all very kind and encouraging people and I appreciate it!

Historical Tambour Chain Stitch

I have a long post lined up on Tambour Chain Stitch because in Sweet Bags and Elizabethan Stitches the author mentions one (or two) stitches that could only have been made, in her view, with a Crochet Hook type tool.  This is very intriguing, and then I found a fascinating reference that said:

“Queen Elizabeth owned caps that were Tambour embroidered”.

More about that next time, but for now, here are the 3 videos. 


Satin Stitch Video

I made the video while stitching this quite large (upside down) leaf.  I usually work the stitch faster than I could show on film, but you have to allow for the camera and its shiny tripod being stuck, virtually under my armpits as I work…

Satin Stitch Leaf 2


Then I made a video of Tambour Chain technique, as I understand it, which I will discuss later and hope to produce another research pdf file for sale on etsy, in due course (70% completed so far).

Tambour Chain Stitch Rose 1


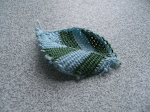
Then I made a video of the Roumanian Stitch Leaf pictured down here on the right.  The way I have worked this stitch on the video, is based on vintage diagrams of instructions, where you can see the needle is angled to produce a surface pattern that is more naturalistic for leaves and petals, say:

Roumanian Leaf


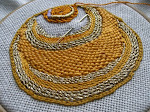
Incidentally, while making all these leaves, I decided to go back to what I understood about Wide Stem Stitch stalks and Stem Stitch filling generally.  The great thing about Wide Stem Stitch is, in certain sections, it often looks like Satin Stitch but is so much faster:

Wide stem stitch filling

I think my next video will probably bring that study together?

g2g ppl!


Sunday, 10 June 2012

Daisy Brooch Construction Tips, Stash-Buster Throw and Historical Tambour Chain Stitch

“It rained and rained from page 64 to page 123, said Piglet…”

How I made the Daisy

I said I would show you how to make the little petals for the ‘Spiral Buttonhole’ stitch daisy (see last post).

Working with woollen yarn this time to make it easier to see, first of all I secured the Cord row to my snippers.  Making sure the guard covered the blades at all times!  Then dangled it across my lap in the direction I was about to stitch.  Right to left for lefthanders and left to right for right handers.  This tensioned the  quasi warp thread and made it considerably easier to stitch over.  (I’m left wondering  if that could, possibly, be how they made the posy in historic times?)

Cord row anchored to snippers

Here’s a close-up of the first two petals and you can see I’ve also made the first half of the third petal.

Petals first row of buttonhole stitches

Its at that point that you turn the work and fold down the Cord row and go back into the tops of the buttonhole loops in the standard way.  This action is very similar to crocheting Irish Crochet over a foundation cord. 

CIMG6145

In the image above you can see how straight the Cord row remains while working in this way.

How to take the stitches for left handed

Above you can just see that I am coming to the end of the last row to make the petal.

The whole thing is easier and much more stable than you would first imagine.  You continue stitching steadily and are thus able to stack your stitches into very compact rows.

4 petals complete

And there you have 4 completed petals, with everything tensioned and curling slightly.

The completed petals look remarkably like woven picots or ‘hanging’ Cluny leaves in Tatting.  After that I wanted to see how it would look to ‘weave’ in this way over a 4th and 5th row, but unfortunately ran out of time.


Long Digression on the Tyranny of a Bulging Stash

Abandoned afghans for me tend to be due to not really having enough room or daylight opportunities to spread all the yarn choices out, to work out satisfactory colour combinations.  I can remember most of the colours I have, but combining them has to be a physical exercise, where you can see ‘colour vibrations’ happening.  So, as I was in the attic last weekend, I decided to stop using organizational tubs for long-term storage, and make use of them as portable organizers instead…

Yarn stash

But you know what, it occurred to me that I cannot be alone in thinking that what was once my humble stash, is now bordering dangerously on hoarding.  I’m not quite sure how this happened? Especially as my philosophy in life has always been to ‘travel lightly and not be a problem to anyone’. 

However,  if you watch these absurdly fascinating documentaries on ‘Hoarders’, you can’t help but notice some unsettling similarities in yarn stashing and hoarding.  Most of all, the overwhelming reluctance to throw anything away (?).

I was comforted to learn that the first piece of advice hoarders are given in finding a solution or ‘cure’, is simply to stop acquiring!

I’ve decided to take that advice for myself and de-stash my way to more space and hopefully, clearer thinking!


Roses & Daisies Throw by Melody Griffiths

It therefore follows that in an effort to de-stash in a big way, I decided to make what I consider to be the ultimate stash-buster blanket, because in it we’re instructed to use ‘even the tinniest scrap of yarn’.   Its called the ‘Roses and Daisies Throw’ by Melody Griffiths.  

I’ve wanted to make that blanket for a long time and now, as I badly need the space, its something I can add to, as and when.  Here are 25 squares, but alas a few of these will not make the final selection as they are not in keeping with the pictured blanket. 

Roses & Daisies Throw - granny squares

Its so funny how even when you start a so-called ‘stash-buster’, you end up having to buy yet more colours? 

Anyway, in short, the further I get into this pattern the more I realise I don’t want any old blanket, I want the blanket in the illustration  - oh no, hear we ago again! 

In the book version of the pattern that appears in ‘Crocheted Throws’ by the same author, we’re given a handy little watercolour chart to assist in colour planning.  I have analysed the little chart and am afraid to say, sadly, it does not correspond to the blanket that’s pictured!  This is highly disconcerting to say the least, and means I will have to sit and try to work out exactly how the designer put the colours together, because after all, the strange thing about ‘random’ is that, its really difficult to be ‘random’!  I would like to add though, that I still totally adore the pattern and put it in my all-time top 5 granny square patterns. 

The daisy squares take me 30 minutes to make, including cream border and the roses about 35.  I plan to speed up once both patterns are firmly memorized.  Choosing the colours takes the longest time and as that is a daylight task, I have only managed 25 squares so far.  Each side of a square should have 16 stitches, including the corner stitch.  

Tambour Chain Stitch Bud

Tambour Chain bud

Next time I plan to talk about Tambour Chain stitching, or rather: where historically, crochet meets embroidery to form a very addictive union!

Gotta go ppl!

Wednesday, 9 May 2012

Stump work Jewellery

Well, you’ll be pleased to know I didn’t catch a cold after all, in fact, I’ve been unusually busy,  fermenting my little ideas…

Believe it or not, this post started out being quite short….

Those of you following this blog from the beginning will know that the main reason I wanted to decipher how they made ‘The Sweetbag’ was to learn news ways to make flowers, and most of all, tiny flowers.  I’m pleased to say, I think I’m finally reaching my goal and each new discovery just seems to spark another….

Textile Brooch Using 2 Historic Techniques

I made this very small Daisy Brooch by combining two historic techniques and adding 6 modern sepals and a calyx.

Stumpwork Daisy Brooch

Last time I mentioned that I made the centre with ‘Spiral Corded Buttonhole’ like this:

Spiral corded buttonhole flower centre

Note: If you’re right handed, you would be buttonholing from left to right.

The technique is described fully in Sweet Bags and since I visited the Ashmolean Museum and photographed those tiny needlework posies, I’ve been keen to try that way of working out for myself. 

I already posted that I made the first row of 8 petals, using tiny 3-d needle lace method.  The whole thing is worked in the hand and the right side of the work faces you at all times.  

Tiny needle lace daisy - 3-d

Then, as I had decided that I was going to turn this into a brooch, I realised it needed to have another layer of petals.  Plus, I figured I wanted to try something different this time, because my main aim was to try to introduce the idea of ‘movement’ into the piece. 

Curly Elizabethan needle lace is wonderful for creating that illusion, but my first row of back and forth Corded Buttonhole (DBH) appeared to consist of too few stitches to curl very much. 

So I wandered off for a few days to ponder the problem, then decided to simply continue using Spiral Buttonhole method and see where it took me?

Quite soon into my miniature journey of discovery, I realised that once you give the cord row its final tug, the completed little petal has a charming way of twisting on itself and that could be advantageous !

Time to get technical

In these next two pictures you can see how the first petal, now complete, has duly twisted.  Followed by a close-up of 3 completed petals. 

Next time I’ll show you how I set up my ‘miniature loom’, because after all, if you think about it, by tensioning the Cord row, you end up with a classic warp thread but rigged-up horizontally, this time.  Remember I discussed the Elizabethan’s love of working over horizontal warp threads, when I investigated Soumak Weaving, the technique they used typically on Sweet Bag formers.

Corded buttonhole Daisy petal construction

3 daisy petals

The petals worked-up very small, as you can see, each is the length of my thumb nail !  

However, I was still left wondering if I could maybe make them even smaller?? 

Also, notice how if you work multiple rows of buttonhole like this, the surface patterning is virtually exactly the same as for Cluny Leaves in Tatting, or Woven Picots in embroidery.

For now, I will say that in terms of construction method, I found it to be most akin to Irish Crochet, where you turn the work and fold the foundation cord down to start the next row... (more next time).

Eventually, I made these 9 petals:

Corded Buttonhole Daisy Petals

Deciding that the curly layer would remain uppermost, I placed them over the earlier layer and sewed the two together with fine sewing thread, like this:

Two layers of petals for daisy

Then I needed to think about sepals?  To speed matters up and because I wanted the tips to come forward once in place, I decided this time to simply crochet some tiny leaves, using my own pattern that I include at the end of this post.

Daisy sepals

All that remained after that, was to think about how I would finish off the back and position the leaves?  After a few mock-ups, I made one more leaf and produced this:

Reverse of Daisy

The brooch pin will fit nicely onto this sturdy base and you could even extend the calyx and create a slender stem, maybe?  Earrings to match would be nice too…

Crochet Digression

Then, as I had all this lovely DMC ‘Forest Green’  crochet cotton out, I decided to finish off something else I’d been working on…

Its going to be another gift, this time for a very nice lady who takes in orphaned hedgehogs from the forest near her house.  (As cute as this sounds, they are very demanding little creatures and in need of a lot of flea powder, I’m told!!!)

This really cute design for rose and leaves is from Crochet Bouquet, by Suzann Thompson. 

Crocheted Rose leaves

The wonderful rose pattern is called ‘Shelly’, to be found on page 68.  As far as the leaves go, (page 114), they are the most life-like that I’ve seen in a crochet pattern.  Perhaps its little wonder that the author was able to achieve this design, because as you delve into her book you realise she has a very thorough grounding in the fabulous floral tradition of Irish Crochet.

Crocheted Rose corsage with 6 leaves

I should add, the rose incorporates an ingenious assembly technique, involving lots of ruffles and tacking stitches.


Beth Lea’s: Sepal Pattern (U.S. Terms)

(Makes One)

Ch 9

Sl St into second ch from hook

SC in next ch st

HDC in next ch st

DC in next ch st

HDC in next ch st

SC in next ch st

Sl St into each remaining ch st (2)

Fasten Yarn leaving a long tail.


Gosh, is that the time already?!

Monday, 30 April 2012

Tiny 3-d Needle Lace Daisy & a crocheted choker

I think I might be coming down with some kind of chill?  My throat feels a little dry, and my forehead is getting clammy but - who cares !!

Finally, here’s a little ‘on topic’ creation for you…

Tiny needle lace daisy - 3-d

Because, very close after my (total obsession) liking for Roses, comes tiny, unassuming daisies.  I’ve wanted to make a 3-d needle lace daisy for ages, so I’m pleased this little try-out worked.  Its 1 1/2 inches. 

If you’d like to make one, first you’ll need to understand how to create stable, miniature 3-d fabric in this way, so you could perhaps, think about buying my research file? that you can find here.    *wink*

Here’s the reverse...

Reverse of tiny needle lace daisy 3-d

Its totally 3-d, by that I mean its made in the hand and I learnt a lot from trying it out.  Like for instance, there is no need to knot the thread for each new petal, you simply stitch over its tail, as you would stitch over the standard Cording, for the rest of the shape. 

How did I make it?  First off, remember those needle lace brooches I took photos of at the Ashmolean Museum?  Well I made the centre of this flower in the same way, that is, by Cording Buttonhole in a spiral journey. 

Let me tell you, starting the shape off took some thinking through.  That turned out to be the easy part!  In the end I worked out that its far easier to control the emerging shape if you place some kind of weight on the Cord row and tension it vertically, by dangling it under your work as you stitch.  You end up stitching a little sideways, perhaps, but that’s when the stitching gets a lot faster! 

For the tiny petals I used Corded Detached Buttonhole with a blunt tapestry needle, snaking upwards from 3 loops off the yellow centre.  I made a couple of little mistakes, as its so hard to see where your next loop is at times, but not to worry, because the overall effect makes it look more handmade – which is what I was after! (That’s my story and I’m sticking to it !!)

I hope to make a little daisy brooch with this, eventually.  I’m still working out the design part. 

I didn’t just make the daisy from ‘nowhere’, first I took a trip down memory lane... 

And I ended-up making this very clever (free) crocheted choker pattern that you can find here.

Crochet Rose choker 

Crochet Rose Choker 2

As roses go, this Briar Rose pattern ticks virtually all of my, personal boxes.  The central area is complex, the overall design is balanced and the 5 petal formula is a classic.  I used Baby Bamboo in Toybox Red for the rose and DMC Petra crochet cotton No.3 for the choker in Forest Green.  Do I love that colour! 

The red is much better in the flesh because its always really hard to photograph.

The green is also far richer than the image and a very natural, unbiased colour green too.

Then I made up one of Astri’s fabulous Rose Granny Squares – can you believe this pattern, it simply has to be the best rose granny I’ve ever seen!

Spectacular Granny Square

Its so deliciously complex and yet really easy to make.  (The wonderful) Astri has even made a video about how to do this, that you can find here.   You can also watch the little video on her blog page, in a smaller format.  


Must dash ppl!

Wednesday, 25 April 2012

Not on topic but a bit of crochet and knitting for new followers

Ooh goodie, new followers! I’ve noticed that some of you are crocheters and so considering I haven’t posted any for a while, here goes..

Well this post isn’t on topic and nothing is really finished but I had to tell you about a new, neat little book and point you in the direction of a wonderful free crochet rose pattern plus tell you about an amazing new knitting technique that I came across, that links in with earlier stuff about Viking knit.

So after I bought Nicky Epstein’s Knitted Flowers book, I just had to buy her Crocheted Flowers edition.  Below is a pattern from that book that I’ve mistakenly altered (slightly) by switching to a smaller hook for the last 4 petals, but am quite happy with the results because those petals became the start of the spiral formation and nestled down nicely to suggest the central cone (that I keep referring to).  As you can see this is a really good classic rose pattern. 

Unlike the formula for say a classic Tudor Rose, you can see this little darling has a central formation of 3 petals that hug the all-important central, coiled (supporting) petal.  Then there are four outer petals that are cupped.  Finally, there are 5 more outer petals, that are much more open. 

crochet rose

I find that when you come across a pattern for a strip rose, how you assemble the petals while sewing it together, is very important.  In my opinion, the formula of 3 (+1), 4, 5 is the one that creates most balance in this context.

Beth Lea pattern for crochet rose

Then I decided to go back to my own design for a crocheted rose.  I’m not absolutely happy with this version yet, because even though the petals are shaped the way I like, the whole thing looks a little too chunky?  It reminds me a lot of an Afghan rose, that perhaps would be better suited to being framed within a Granny Square or something?  What I will say for it though: is it’s turned out looking quite ‘vintage’.

Speaking of wonderful patterns for an Afghan rose, take a look at this blog of beautiful creations and happiness!Apple Blossom Dreams.  There is a link on there to a fantastic vintage crochet-a-long rose Afghan.  If you delve into the history behind the discovery of  that pattern, you will be on the edge-of-your-seat.  I love provenance stories!

So, after that I had a look on ‘Google Images’ for a good free crocheted rose pattern and found this on the Crochet Spot website.  This one is available for free but I see the designer is also selling another very good crochet rose pattern.  As you can see, I haven’t finished sewing it together yet, but will be adopting the 3,4,5 formation mentioned above.  I think there are more petals on this one, but that wont alter my approach. 

Crochet Spot - rose

Then, after all that crocheting, I decided to go and knit something from a cute book that I had in the bottom of a drawer that I found the other day when I was looking for something else. 

Jean Greenhowe’s Bazaar Knits is full of very cute things that you can make quite quickly and sell at garden fetes and school Bring & Buy sales.  This is the pattern for her dainty floral brooch.  They’re tiny and would really suit keyfobs or children’s clothes.  I don’t know yet what I’m going to make with them?

Jean Greengrows Flower brooches

Then I made this very interesting specimen!  This tiny petal will form part of a Periwinkle – I know, its the wrong colour, but I was getting quite carried away by then, you understand!! 

In case you can’t really tell what’s going on down there,  what you’re looking at is the tiniest ‘knitted envelope’ that’s made in one journey and results in no seaming!  Its completely different to construct than an i-cord and you make it on 2 standard needles.

Periwinkle petal

It’s an ingenious technique from this cute little book that I really love – I think I mentioned it before?   The pattern is listed in the front as ‘more challenging’.  I really like that because the thing that fascinates me most, is always to be learning cool new techniques.

Knitted Flowers by Susie Johns

Then Amazon sent me an email about another new of fabulous knitted flowers book called: Noni Flowers

Knitted Flowers

You can read more about this terrific book here.  What’s different about this offering to the world of textile flowers is that each knitted version is photographed in context, that is, on the stalk or branch of its botanical master copy.  On top of that, the treatment of the centre of each flower is unlike anything I have ever seen.  I think I shall have do a proper review of this book in the near future because this offering surpasses the legal limit of cuteness - lol.

The best website I’ve seen about knitted flowers is The Knot Garden.  I think the author may be on a blog break at the present time.  She’s a very nice person and her blog is wonderfully sweet.  Her basic advice: ‘to use smaller needles than the pattern states’ is a golden nugget.

Oh dear and I said a while ago NO MORE BOOKS but you have to agree, you can only go on for so long on any diet, before the inevitable ………. RELAPSE.

Sunday, 8 April 2012

More Knitted Roses and other stuff

Recently I took a look over all my ‘unfinished projects’, in their neat transparent wallets and was a little dismayed.  How could I have accumulated so many??  Astonishingly the one, or two “distractions”, have turned into a couple of arms full.  This is not a situation I can accommodate for much longer, as the drawer is now too full to close properly.  There are multiple, groaning half-loved creations, fighting their way into the daylight again….

Being bright April once more, when everything is really waking up from the long Winter, I had to whip up some pronto gifts.  Reluctant to start something too fiddly, I decided to rustle up a bag charm and corsage.

The patterns can be found in Nicky Epstein’s Knitted Flowers – a favourite book of mine that I like to  pour over when my brain is on overload.

But first, here’s a picture of the smallest shape I have made so far using the ‘Bordered Turns’ technique described in Elizabethan Stitches. 

Oh, by the way, if you have a copy of that book already, I’d (um) like to direct you to the acknowledgements page at the front – it makes for very interesting reading….(cough, cough)

Bordered Turns - small motif

Although this orange petal is just a small doodle cloth rendition, notice how you can achieve a finer tip, that tilts slightly to the right.  Now that I have gotten the hang of what goes where, I can see that this is a much faster way to work.

When I return to the Peacock motif, I look forward very much to using this technique to stitch his tiny beak.  On the subject of the Peacock, unfortunately I had a little accident with his neighbour and to cut a long story short, I needed to do this:

CIMG6089

Yes, a highly disconcerting mishap to say the least!  Never mind, its not the end of the world.  Perhaps, when I was a tad younger, I may have just thrown the whole thing in the bin but instead, I’ve decided to use this section of the design as a slip and shall be stitching it to another piece of linen.  The difficulty with that trick is, that the white ground fabric will, in all probability, poke out from somewhere or other.  So I decided to obviate that threat and simply couch a black outline all the way round with fine gold thread, as I have seen done at the V&A.

I want to keep this post short, so let’s talk knitted flowers !!

First, I made this bag charm…

Knitted Rose bag charm 

I had a little accident with that too, in that after stitching it to the backing, it started to buckle.  Again, this was not the disaster you might think, in that by doing that, it means the piece is much more 3-dimensional than usual.  Because usually, all the weight is at the front and it tends to pull forward after you have attached it to the handle of your bag.  Thus, the backing becomes very visible.  This tendency is most annoying, so instead, this serendipitous buckling, means you can appreciate the design from above as well – OK, that’s my story and I’m sticking to it !!!

This is the back…

Back of Bag Charm

As you can see, I made the back a little shabby chic.

Then I made this little single rose…

Pink Knitted Rose with three leaves

It’s very small and involves the ‘360 degree left needle manoeuvre’.

For the backing, I used leftover interfaced floral fabric (see Kindle Cover) then a quick round of blanket stitches, completed with a brooch pin..

Back of Knitted Rose Corsage  

Gotta go ppl !

P.S.… I hope to have some further news on my Plaited Braid Stitch research soon….