Thursday, 11 August 2011

A 3-d Calyx and a 2-d Borage

I haven’t posted for a while, so as a consequence this one is, erm………………..you guessed it !!

3-d Calyx

Detached Buttonhole Calyx

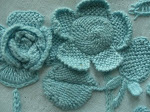
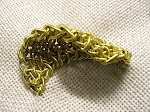
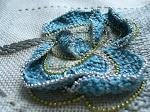
This is a 3-d calyx I stitched and attached to a doodle flower that’s similar to one of the motifs on the Bag.  It was made in a strip, like the ruffle row of petals made earlier, and pulled together to form the collar, as they have on the historic Sweetbag.  This post starts off discussing the construction of this flower component but ends up looking at 2-d embroidery issues.

___________

The book is virtually finished – well at least its out of my hands for the time being.

The DIY is going quite well, a new power tool helps, but the rain certainly doesn’t.  Still, we badly need rain, so far be it from me to complain.

And we just returned from the ancient city of Pompeii.  What an amazing place that is!  Can you imagine walking round a genuine archaeological dig that was once the holiday town for rich Romans, with its gymnasium for general citizens, more than 25  fresh water public fountains, hot baths, a steam room, a fish and chicken market, countless shops selling hot and cold wine and incredible mosaics galore.  I might do a post about it??

______________

Detached Buttonhole Shapes continued

I’m not quite ready to post ‘the pattern’ yet, as it’s going to be quite involved (picture heavy, text light) and has given rise to a whole new set of questions I am asking myself which have, um, distracted me…

3-d Triangles and Circles

Meanwhile, I have been practicing more shapes to put the pattern through its paces:

CIMG5476

As you can see, these triangles deal with ‘extreme’ increasing and decreasing.  Unlike knitting, the stitches held on this convenient little wooden needle, represent the starting row. 

Then, in an effort to leapfrog to a point of better understanding, I set myself the task of embroidering a circle.  Anyone reading this knows that I always select circles as a way to really work out if things are going as they should.  As with drawing, a circle is a good thing to practice doing to help you improve shaping techniques.

2

Made from counted increases, then 4 rows of even-shaping, followed by counted decreases.

One thing is for sure, whatever shape you want to make, it’s essential that your straight stitch return row, or cord row, is as loose as you can make it because if it is too tight, the shape will pucker very quickly in your hands.

All these little shapes are quite difficult to photograph incidentally, as they quickly become very curly, like this:

CIMG5347 

Another Way to Embroider Flowers

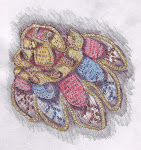
I should mention that the flowers made on The Bag are unlike the flowers on this delightful embroidered posy c.1750 – 1850, that I managed to photograph at The Ashmolean recently:

CIMG4908 

These were made using a curvy-linear technique that is similar to couching with Detached Buttonhole, whereby you are constantly turning the work to change direction.  Later on, this technique was adapted by the nuns in Ireland, who had seen Venetian lace, to produce their famous Irish Crochet. 

In contrast, The Bag I’m looking at is made with a straight stitch return row that means you do not need to turn the work at all and yet all the stitches are facing the same way (slightly left, if you are left handed or visa versa for right) .

In the book Sweet Bags, the author discusses this curvy-linear technique in detail but she does not talk about Detached Buttonhole (DBH) stitched back and forth very much, except to say that the Elizabethans worked the stitch ‘away from themselves’.  (She does however, discuss corded Trellis stitched back and forth.)

One of the main differences between the two techniques is that with DBH as worked on The Bag, you can create sharper points than you can with the curvy-linear style and that means a greater variety of shapes.

From Triangles to Spears

So, the various patches of practice triangles made me impatient to see how effectively I could alter the shaping to produce a more complex 3-d Calyx, of which there are quite a few on The Bag and most of them are very elongated.  I chose a wide one to start with (pictured above) and experimented with its shaping, using a wide crochet cotton.

Understanding how they made the Calyx was quite straightforward.  Basically you stitch it in a strip on a long tack stitch, that is then removed and gathered to form the collar.  This is then folded into place to show off the collar or suggestion of it, but the two outer points are flattened out and stitched into place.  That was the easy bit… 

Defining the narrow central spear correctly proved much more difficult when I switched to finer thread.  Its the last part of the design and has to be made long enough to be placed over the underlying petals and hold them in place, as I have done in the demo.     

The solution in evidence on the bag is to do this:

Counted decreasing for elongated triangle

To form this flower:

Flower with calyx - type A

As you can see, working with a width of 7 tiny 3-d stitches stitches in your hands was very awkward and I could see I would need to come down about 10 rows. 

From 3-dimensional problems to 2-dimensional solutions

Then it struck me that perhaps the central spear was not in fact made 3-d after all, but stitched after the collar was in place, directly over the underlying layers of DBH mini fabric, as a way of securing all the applied shapes and also to enable one to make that section of the flower component completely made-to-measure, in situ?

So I made another central spear in isolation but this time I stitched it directly onto the fabric, it can be seen below on the left hand side of the image.  Its a lot wider than it needs to be but it got me thinking……

Sharp points of caluyx

I then decided to try and see just how narrow I could make the shape by stitching DBH flat and came up with this:

Sharp point made with flat DBH

You might be thinking what is so unusual about this shape? 

In short, it has no preliminary framework e.g. a cordonnet of chain stitches, reversed chain or even back stitches.  Nor does the one above.  So from 3-d I made a transition to 2-d with what I know now about 3-d, if you know what I mean, and it worked.

Personal Research made of 2-d Historical Embroidery

Then I remembered something I had noticed on some digital close-ups of historic needlework that made me wonder back then, that perhaps they did not have to use a framing shape before stitching everything in those days, after all??  Or maybe some shapes were and some weren’t, depending on the required shape??? 

Now this is quite a controversial idea, to say the least, but it links in with my own recent, better understanding of what you can and cannot do with DBH, that I’ll go into further when I discuss ‘the pattern’.

Dilemma of Pointed Tips on Flat Work

To put it another way:  when the shapes we need to make are more slender or pointed that the usual types, a framework can be seen, perhaps, to add unnecessary bulk to inner corners, where the shape would need to decrease to a very fine tip?  Also, we need to think about when the pointed shape ‘bends’ in one particular direction, like this shape:

leaves with curved points

Watching the direction of DBH rows on Historic Examples

If you study historic examples, when the shape turns or bends, the lines of stitches remain straight, whereas if you stitch into the inner loop of say a chain stitch, the horizontals of DBH turn with the shape.  But something else is happening….

Cordonnets Use Up Valuable Space

Its not so much that you cannot make a cordonnet into this type of shape, in my view, its that the number of chain stitches on either side of the pointed section cannot fit comfortably round a sharp angle and simultaneously accommodate many lines of DBH stitching within it, without inadvertently smoothing the point out into a curve.  In short, points can be lost!  If points are lost then, in my view, a whole chunk of aesthetic appreciation of this type of work might be lost too…

The Stem Stitching Convention

So I went back and looked again at the close-ups of extant items and found evidence of stem stitching round completed shapes and examples of other shapes without any stem stitching, that are left ‘unframed’. 

To say that they stem stitched round completed shapes is not unheard of and I have seen it mentioned in authoritative descriptions of historic work.  

Do All Shapes Actually Need to be Smoothed Out?

To our eyes, perhaps, you would need to do something to the outer edge of most shapes to bring the design together and smooth out any uneven lines of stitching? 

However, on one particular Coif I have been looking at, the DBH work is so small they have left the shapes ‘unframed’. 

Evidence of Tiny Legs Could Indicate Shapes that are made without a Preliminary Framework?

There is another reason why I think they used stem stitching in this way, and that is to conceal the tiny legs that can result from stitching directly. 

These ‘little legs’ (they are hard to see but are there) might even be seen as  proof that they worked in this way?  In contrast, in a modern context, when we use a chain stitch framework, there are never any little legs visible.

There are other differences between both methods but I cannot go into more than a few at this stage, save to say,  by its very nature, stem stitching is more ‘linear’ than chain stitching, which is very curved and I see it most often used on leaves and more complex flower motifs.  

An Important Difference Between Elizabethan Detached Stitches and European Classical Needlelace

The point I am making is not so much how and when they completed their stem stitching but dare I say, do we actually need a preliminary framework of stitches at all on which hinge this type of DBH work?? 

The purpose of a classic cordonnet is to define and hold a shape in place while it is being made, so that when you cut it away it will maintain its shape.  In this way, the needlelace rests on the top, to be cut away later. That way it will become a new layer of freestanding and independent fabric.  Elizabethan embroidery is not cut away like this and the two layers remain related.   

Furthermore, if the cordonnet is basically a kind of ‘mini loom’, thereby stretching and holding the stitches in place, the tension the slate frame produces itself is already providing that foundation…

Examples of Working in an Alternative Way

So far I have seen examples of stem stitching around  finished shapes that are:

  • carried out in a different colour. 
  • Other times its used to frame metallic DBH work that was stitched directly into the fabric. 
  • At other times its used when creating shapes with various colour changes.  
  • The stem stitching can be seen most clearly on shapes that have little legs poking out, and I suggest the little legs could well indicate that the DBH was stitched directly, without a framing shape made first.

_________

Now with all this in mind, I go back to the notion of creating pointed shapes and simultaneously  investigate how they might have close stem-stitched round them.

My Own Experiments with Both Methods

Here are some pictures of my first attempts to compare both methods of working:

the very small surface stitches needed

Above are 3 ways to make this kind of pointed shape.  Already you can see that the stitch length on a row of DBH is greater than the length of an individual framework stitch (on the right), yet if you made them the same size, the structure would not tension correctly.   

Yellow Petal

The yellow petal has been framed subsequently with stem stitches.  Notice how this gives the appearance of the outer ‘ridge’ of stitches being the ‘higher’ row, while the rest of the work remains flat.  The shape is also stuffed full of stitches.    This shape too, was made without a cordonnet, having pierced the fabric only at either end of a row.

The Green Petal in the middle

The green petal in the middle, has no stem stitching round it yet.  This shape was also made without a cordonnet.  Fabric pierced only at either end of each row.

Green Petal on the Right (above)

This shape represents the usual way to make DBH shapes and consists of approximately 39 tiny back stitches.  I chose back stitches as they add least bulk. 

Now this is where things take a different turn.  Below you can see the cording row will rest above a line of stitches and be incorporated into the next row of buttonholing, in the usual manner, but the problem is that, at either side it turns and rests on the surface, thereby restricting the available space for more stitches.  This peculiarity means that it adds significantly to the overall size/moulding of the shape.

even narrow framework uses a lot of available space for DBH 

The result is, in my personal view, that in practice, it is quite hard to make finely pointed shapes with a preliminary framework of back stitches, even though back stitches are the smallest foundation stitches you can make, because the turning thread rests on the top of the work.  Here it is completed:

comparison of framed shape to one stitched directly

So my next experiment was to try and work out how they might have stem stitched so closely and consistently round the edge of the finished shape?

First thing to consider is the piercings that DBH makes in the fabric:

Piercing Path of DBH

As you can see above, the rows of DBH ascend in tiny pairs that are not absolutely parallel because the cording row sits higher one side than the other.

So I concluded that the closest edge of stem stitching you can create, is to actually go into the sides of the pairs of DBH rows themselves and this is what it looks like when you do this:

Stem stitching into DBH stitch anchors

I stem stitched into the 2 little feet of DBH rows all the way round.  The points were easy to find if you pull the stitching down and out of the way a bit.  This means that the stem stitches remain as even as the work.  This is another similarity that I can see on historic pieces.

comparison of framed shape to one stitched directly

The other thing that’s significantly different about working this way is that you can work A LOT faster! 

So with these new observations I decided to make a ‘pointy’ Borage:

CIMG5547

DBH Borage - no cordonnet

I’ll discuss this some more next time….must dash !

Saturday, 11 June 2011

Detached Buttonhole Shaping: Close Analysis – Part I

I am virtually at the end of the book…however, I now have some urgent DIY jobs to complete.  So this post is a quick round-up of recent investigations, to be followed by fuller explanations in the near future..

As you can see, I decided to use wool for this next phase and a double pointed needle to support the work, as it’s much easier to see the tiny pattern sequences created with DBH.  (I’ve inserted this just in case anyone coming here for the first time thinks this post is somehow about ‘mini-knitting’ !!!)

Flower 2 – Large Petal Shaping

The next 5, large 3-d petals on Flower 2 are embroidered repeats of a single template which is this shape:

large petal diagram

It’s particularly interesting because it’s more geometric than others on The Bag which seem more ‘organic’ (or leaning) by comparison e.g.

organic 3-d DBH shape

I am able to clearly see two-thirds of the pattern applied to this petal shape because unlike it’s neighbours it happens to be virtually uncurled. 

The first third of the shape however, is in the shade of the earlier ruffle made of a row of smaller ‘organic’ petals:

9

It has been difficult for me to work out how they made this more geometric shape because no sooner did I start working on it, than I realised I would need to abandon many of my previously held assumptions about Detached Buttonhole (DBH) shaping (!).

Pleased to say, I think I have finally worked it out and it rounds up almost 18 months, on and off, of close analysis.

Detached Buttonhole decreases for large petal

This is an essential area of  progress and it means I am now in a position now to forge ahead with the more complex shapes. 

I have  started to think about Flower 3 (I think it’s a Honeysuckle) because I now understand why DBH behaves in the way it does and how best to ‘counteract’ its stubborn tendency to lean to one side.

I have a long post lined up that explains what I did to arrive at my conclusions and it contains the pattern for working this way.  But time is short and so I thought I would just post a synopsis for now.

Basically, to make the DBH shapes that I need to make, I first need to be able to stitch evenly.

But before I could do that, I needed to work out how to make good right angle corners.

The corners eluded me until I managed to work out the relationship of the ‘corded’ return row to the rest of the work, especially at the start of a row.

I have since worked out that the return row:

a.  Should be counted as the first stitch

b.  Should be made as flat as possible, with no knots!

c.  And to note that as it is shorter than a normal stitch, thus technically it represents  a ‘partial stitch’.  Which means it adds a building block to the start of the row but not enough height.

d.  ‘Stitch height’ is a very important consideration in lace-making generally.

Lot’s more later !

For now though:

My even shaping investigations resulted in this:

Detached Buttonhole with even shaping

They were then followed by investigations into decreasing precisely, as they did on The Bag, like this:

Detached Buttonhole decreases for large petal

then increasing:

CIMG5326

I’ll tell you next time exactly what I did to get there...


Must dash !


Wednesday, 11 May 2011

So much to do and so little time

I’m still working on that book I mentioned…it’s taking forever to complete, I have 4 more chapters…this post is pretty well on topic…

Jewellery and Plaited Braid Stitch

I haven’t had the chance to do anything further regarding Plaited Braid Stitch, other than a couple of quick experiments relating to the embroidered ring idea. 

 PBS Circle

I made this swatch to see how tight I could make PBS take a curve, because The Ring is going to be made out of PBS if you recall. 

As you can tell, I was aiming at a circle, with an invisible beginning and end. 

I have to admit, I rushed it because I was eager to investigate one specific technical issue, and that was if I could make the join invisible. 

I need to think about this a bit more and work out how to  ‘Graft’ or ‘Kitchener Stitch’ the two ends together, like you do say, to join 2 rows of live stitches in knitting. 

When I made the 3-d PBS braid I realised just how flexible this complex embroidery stitch can be.  I think that opens up a lot of possibilities, hence the idea to make a ring.

It’s an idea that hasn’t withered on the vine exactly, but it’s in limbo because I had misplaced a huge bunch of stuff and feared it had all been thrown out in one of my big pre-Christmas clearouts.  Thankfully, I found it the other day, along with some other little goodies I had stored up (see further on here).

Before I do write anymore about PBS, I have a new book to consider.  If you’ve been following this strand of investigation, my travels are now taking me to Jacqui Carey’s new book ‘200 Braids to make’ and another book called ‘Creative Ropecraft’ by Stuart Grainger.  

Embroidered Ring Idea

I think I’m going to need to get my soldering iron out after all.  I don’t like the experiments I’ve done so far with silver coated cheapo wire.  I bought three sizes thinking that would help, alas, as usual I want the overall design to be smaller and finer than my materials will allow.  I used to make jewellery, well earrings actually, so I still have all my tools.   

Anyway, I borrowed this wonderful book to help me and needless to say, its so amazing that I became a little lost in it and awestruck by the contents, especially the 16th Century Spanish necklace pictured on the cover.  Don’t you just love the way it looks like it was made by human hands.  Call them imperfections if you will, but I really think, by comparison, modern jewellery looks too machine-made and ‘clinically’ perfect.  Speaking of very vintage jewellery…

 Jewelry - from antiquity to the present

I particularly like the early chapters relating to pre-history, late Bronze Age, early Iron Age items.

I’ll be talking more about that at a later date because it fits in with tracing the origins of a style, and the origins really do begin in the Bronze Age, when Wales and Cornwall were being mined for copper and tin, to be used as currency in the wider international Bronze Age world. 

If you can’t wait for more information about that, just take a wander round to ‘The History of the World in 100 Objects’ a website run by the BBC in conjunction with a major British Museum exhibition.  If you are able to, I suggest you listen to the podcast (15 minutes) of a mini lecture on the 4,000 year old ‘Mold Gold Ceremonial Cape’ found in a grave in North Wales near the huge Bronze Age copper mine called The Great Orne.  This magnificent golden item of clothing is a thin as paper and was beaten from a single sizeable gold ingot.  The workmanship and decoration is breathtaking.   More about that later…

Incidentally the wonderful Neil Oliver, archaeologist and documentary-maker, recently covered this very significant mine in his series of programmes on Ancient Celtic Britain.  Archaeology is a very exciting field these days and Neil Oliver is a particularly effective communicator.   

Book of Kells

Then a funny thing happened, as I was rummaging through some drawers (looking for The Ring sketches) the other day, I found a W.I.P. I had begun over the holidays but couldn’t continue for one reason or another. 

CIMG4519 

After investigating the 2-d knots in the Book of Kells for ages, I was inspired to embroider a primitive-looking little Celtic angel.  The more I did in preparation for that idea the more I realised it was going to end up looking like my interpretation of Opus Anglicanum work. 

Untitled-Scanned-02

Here is a rough sketch I made taking a template from the book called ‘Compendium of Celtic Crafts by Search Press. 

Well of course I would really like to get into something like that, but I need to be honest with myself about how long it will take. 

I suppose the thing that made me want to try it more than anything was going to Florence last summer and when I returned, comparing how close to the truth these diagrams were…

CIMG4505

CIMG4506

These are from Mrs Christie’s 1920 book, she may not have been great at guessing how Plaited Braid Stitch was executed in historical times, but she certainly knew her Opus Anglicanum stitchery. 

It was going to be a small piece, that would grow exponentially, as I believe a lot of that kind of artwork was carried out. 

But somehow it ended up larger than my frame and the whole thing became a little head-achy.  However, around the angel I did manage to incorporate some Saxon knotwork patterns that I found on sword handles.  I was excited to find ways to incorporate this kind of embellishment and as you can see, I have temporarily couched the metallic cord down, whilst I make sure all my overs & unders are correct.  If you notice also, the knot pattern is of particular relevance, as its exactly the same as the central area of a Turks Head Knot.   

Saxon Symmetrical knot

I liked how this was working out, mounted on rich green velvet.  I was going to stitch the angel onto linen first, then cut it out and attach it as a slip to the velvet. 

However, to refresh that idea, I now have a good set of photographs I took at the Ashmolean recently of Opus Anglicanum embroidery. 

Its not a very big piece but in extremely good condition and quite astonishing for its complexity, as every single tiny bit is so intricately worked.

CIMG4901

CIMG4902

CIMG4903

See how all the wooden beams, bricks, stones and flanks are each given a different treatment.  The gold thread they used was staggeringly fine.

Brighton Treasures

Anyway, we went to Brighton and I bought some more bits and bobs… 

CIMG5200

You can see a lovely tin flower brooch (I collect them), a sweet little bird whose gold has rubbed off in parts.  I’m not bothered about that because I intend to go over him with a gold permanent marker that’s good for plastic, glass and metal.  Then there is that lovely little blue stone that goes really well with my eyes. 

I bought the bird because I think the design works really well and reminds me of the Saxon bird motifs, with his fiery ruby-red eye, which you cannot really see in this image.  Saxon birds always look a bit aggressive and ready to strike, I liked the pose of this little fellow. 

CIMG5201

I didn’t mind that his tail feathers were a little bashed up – I unbent them when I got home.  I look to check the eye and beak are intact and I also make sure the clasp is in good order.  It’s a wonderful design for a little goldwork embroidery….(oh no, there I go again!!) 

These tin flowers always look a bit weather-worn but I think that’s nice.  Again, I had to do some very delicate unbending when I got back…

CIMG5202

The miniature ballet shoe is my own creation, it’s only a prototype at this stage because it too was a sketch that had been hitherto mislaid.  I was pleased the design finally worked out.  It has cardboard in the sole to support it and is 1 inch in length.  I think its hard to make things smaller than an inch because you can’t really get your finger in there to shape it.  When I make it next time, the insole will be white and the upper will have a facing or another slither of card to add definition.  To make it I used exactly the same technique you would to make a life-size ballet shoe.  I found a good internet tutorial of how to do that.  I’ll post the link.     

CIMG5204

I buy all these things from the same lady stall-holder who seems to love all the things I do.  I asked her this time for ‘good coloured glass and good fake pearls’. 

I suppose I am one of her ‘regular customers’ you might say and here is another brooch I bought from her last year…

This delightful thing is not a million miles from the Saxon designs of old, as seen in the pictures beneath it (especially the blurry one).  I don’t necessarily buy these things to wear them but just to stare at them and be transported…

CIMG3986

CIMG4930

CIMG4936

CIMG4941

Oh dear me, I have been knitting again!….I don’t know, it seems I just cannot put my needles down.  So thinking about Saxon birds and wanting to explore the possibility of translating a cross stitch pattern into knitting, I decided to make this using stranded intarsia technique..

Knitted bird - Misse Moeller cross stitch pattern 

He’s unblocked and there are a thousand stands to weave in on the back but somehow I like this little chap.  Cross Stitch patterns being basically digitised can be translated into knitting or beadwork, as we know.  The trouble with knitting it though, is that you need to work the pattern stitches on the purl side too, which feels a little weird  but my solution was simply turn the pattern upside down.

cya !

Thursday, 5 May 2011

Sweetbag Flower 2 decoded & My Own Design for A Knitted Rose using Short Rows with Wraps

(This is a very, erm, long post….)

This long post sets out in 3 stages, how I solved the particularly difficult problem of shaping Sweetbag Flower 2 (Main Project).   

Flower 2

To say this next motif gave me a lot of headaches is an understatement.  In fact, my first efforts were so disappointing I dared not share them.  Its clear to me now why that was the case.  Its construction utilises a technique that I had not considered within this context before,  because it is very straightforward and normally applied to clothes.

Mysterious Technique

Let’s remind ourselves firstly, that still,  so little is  actually understood about how these incredibly complex high-relief embroidered motifs were constructed.

In fact, if you visit the Ashmolean’s textile gallery, you can see a super-enlarged image of the top half of a complex Stumpwork bird that has been x-rayed in various ways in an effort to decode its construction methods. 

What’s especially noteworthy about Elizabethan ‘flying needlelace’ is not only that its 3-d and embroidered in mid-air but most importantly from the perspective of technique, that they did NOT use the European method of working within a Cordonet.

Construction without Cordonet

I mentioned before, a Cordonet not only supports the work, but it also provides a way to disguise uneven shapes because at the end of the needlelacing you pack close-buttonholing round the edge of the shape and that way force them to be ‘better behaved’..

The Elizabethans did not do that.  They edged their shapes with Lizardine metal thread, afterwards, as a decoration – which also happens to  add support, especially if you stretch it out a bit. 

On historical pieces where the Lizardine has come away, you can clearly see the edge of the work did not include a Cordonet or buttonholing.

So how did they do it?  Well, from all the books I have, we are told they worked a base line of chain stitch/reversed chain  /backstitch into the fabric and then worked up from there.  And that is how I made the Blue Flower.

Then Jacquie Carey’s book Sweetbags came along and offered us new and revolutionary ideas based on extremely close examination of artefacts.  In contrast, she suggests that the 3-d elements were constructed ‘away from the embroidery surface and applied separately’. 

She actually proves this by showing us a picture of a bag where a flower has dropped off.  You can clearly see that the section of linen ground underneath  was totally un-worked.

When I read this, I was kind of thrown out-of-kilter because as they did not use a Cordonet, how did they hinge and move everything across easily afterwards, because chain stitches are fixed down? 

I suppose I just needed time to absorb this new evidence.  Needless to say, after much toiling, I totally agree with Carey’s view, after my own experiments with trying to get the shape right.

If you recall when I made the Blue Flower, although in the end I said it looked a lot like the one on the actual bag, there were problems, e.g.   

a.  It took a very long time to achieve the correct shape and curl

b.  Maybe this was because I had to be very careful not to pull the fabric too much and my hands were restricted by working in such a small area?

Little did I know then that there was another, fundamental difference in construction which makes shaping curly organic forms much much easier…

However, I concluded at the time, that historical Sweetbags were so plentiful (some people had about 20) they had to have known faster methods of working…

Thoughts on adding extra dimension to flat knitted fabric

So my journey here is in 3 stages, but the theme running throughout is ‘Shaping woven fabric to create extra dimension and curl’. 

Well, you know I was supposed to knit the Royal family figures and I bought the Royal Air Force blue wool for Prince William’s jacket (you can always source the exact colour and shade within the large range of Tapestry wools) and was going to make a start (the night before the Wedding!!) but alas I could not (not such a bad thing because he wore a completely different uniform and colour on his Big Day) because I found my favourite pair of No.11 knitting needles had this W.I.P. hanging from it.

Miniature Dungarees

These shorts are a little unusual because they include 2 cool concepts, one is Short Rows with Wraps and the other is mid-row, cast on, Gussets. 

The pattern is from a really cool book of luxury knitting patterns for teddies and perfecting my ‘invisible’ Short Rows was my quest.  (If you knit you probably agree with me in that, if Short Rows are causing you problems, its mainly due to not slipping the stitches correctly.  If you slip them the correct way before you turn the work e.g. knit to knit, purl to purl, blah - then you don’t end up with holes.)

Small Teddy Dungarees

Short Row with Wrap

Teddy Shorts with Gussets

So, considering I had put so much time into these shorts and the pattern was the best I had encountered, I decided to make William wait (more than 30 seconds!) and finished off the knitting and confronted the task of weaving in my loose ends.  Well, as you can see, I have a fair bit of work to do in that department…

Weaving in Threads

Moving swiftly on…

Knitted Rose made with Short Rows with Wrap

All of that led me to think again, but this time with restored heath (TG), about knitted roses…

For a long time I have toyed with the idea of improving the shaping of a classic rose pattern with ‘Short Rows & Wraps’ because that way you can make ready-made little cupped shapes.

My knitted flower session was in limbo after all, because I was still hunting for a near-perfect rose pattern.

Then most fortuitously, a set of notes and diagrams I had made a couple of years back of a dissection I carried out on the innards of a real rose, fell out of my ‘Knitting Answers’ book and set me thinking.

I always wanted to either knit or crochet a rose made from diagrams of botanically accurate petal shapes and I was pleased that I could translate my detailed little drawings into knitted petals.

So here is my own knitted rose design… (when its finished I hope to sell it on Etsy as a pdf download).

1

As you can see, Short Rows are a neat way of creating exaggerated ‘curl’ and adding dimension to otherwise flat knitting.  The technique is mainly used for sock heels and busts.  

2

Then I knitted a small Stockinet square to stuff the central cone.  

3

Next I got to work sewing everything up in the same way a real rose spirals out, with overlapping petals. 

I wanted my sewing to be as invisible as possible so tried hard not to split the yarn..

5

7

Below you can see how the base forms into a neat triangular shape.  This is how a rose in nature actually grows and interestingly when you see abstract rose designs, say for shoe decorations, they often use a shorthand triangular design to suggest the essence of the form.   

8

Well, I need to make some more petals, I tried some larger ones but that didn’t work and in so doing, decided to discreetly sew each petal in position to maintain the overall design especially if I attach it to a bag.  The central cone is maybe a bit large but we will see what happens in the next stage.  I have to do the calyx, i-cord stem and a few leaves next.  I might make the calyx with DBH, 4 DPNs or Crochet?,  I haven’t decided about that yet.

Pink Knitted Rose


Then I made a ‘biggish connection’ with what I had created and what I had read. 

I suppose, actually working with the problem of ‘gathering’ fabric in my own hands made me think more clearly…

Sweetbag Flower 2 – how did the Elizabethans attach their DBH 3-d elements to a separate piece of ground fabric?

One thing remains certain, the base line is the only point at which most of the elements are anchored to the fabric.

So, taking this idea I began to think that the only way this could work is if the base line were a moveable feast, e.g. a single couched horizontal thread. 

We are told in books to make sure our first row of DBH is always a regular row of buttonholing.  I decided against that and also corded the first row.  Don’t ask me why, I just had a kind of vague notion that the two threads needed to be working together, somehow?

So whilst working,  I was simultaneously observing how to improve the design and only for the last part did I finally solve the mystery…

Flower 2

First thing was to make a DBH circle-type shape.  (Not wonderful I know, but I was in a galloping rush)  Please disregard the colours for now. 

1 

First Mini Petal

As you can see, I made the sand coloured petals on a separate piece of fabric, by couching the base line then removing it and applying it with a few tiny stitches. 

It felt much easier to work in this way as I had more space to work and see clearly, unhindered by any concerns of pulling underlying work out of shape. 

2

Then after I made two such petals I noticed that the line from which they sprung was too straight.  I thought that I needed to make it more curved ‘somehow’ next time, by bringing it down a bit, say?

Anyone that has worked with Vector diagrams will know that to achieve a naturalistic curve, you will be there forever trying to make point-to-point connections appear smooth.  Its much easier if you simply use the ‘Curve’ tool.  So I suppose I was looking for a ‘curve tool’ idea that could be brought into embroidery…

That’s when I realised that the whole line of petals should be made on  the same horizontal thread and that what I really needed was to use the contra action of the first row of cording in conjunction with this base line to create a ‘draw-string’ device to ‘gather’ the line of petals and that simple solution would solve two problems: it would exaggerate the curl by further compacting the stitches and create a naturally curved base line to apply to the work.     

Fresh Thinking

This is what I made next: two threads for the anchoring and couching were applied in a way that I could detach them easily and yet provide enough tension.  After this, I laid down the first row of cording and attached it to the fabric loosely at one end in the same way. 

6

Here is the completed next line of larger petals.  There are 3 or 4 straight rows, before you make each individual petal.  I was working away from myself, outwards and supporting each section with my fingers as I went along.

3

Here I am detaching the new length of DBH fabric away from the ground.

4

Below you can see how it looked after I pulled the draw-strings and created a lovely delicate kind of ruffle…how ingenious, don’t you think?

5

Then I remembered I had one more single petal to do and decided to finish it the correct way by leaving its threads attached…

 7

Here it is free from the fabric and about to be gathered up.  You can clearly see this effect would work much better if there were more petals on the line. 

8

Finally, you can see 2 layers of petals being applied.  This can be done quite invisibly because you peg down the draw-strings with evenly spaced vertical stitches…

9

As you can see, working in this way means you can cram many more stitches into a given area than any linen count could possibly accommodate.  This is the main reason why the ratio of linen count to stitches always threw me..

10

And here it is the right way up, looking virtually the same as the one in the image from the museum.  It needs 5 larger petals, again I am going to make them together on a draw-string and then 5 more tent stitched petals…and of course, oodles of gold and silver. 

11


cya !