Tuesday, 15 February 2011

‘Valentine’ Birds - Book Bag

This post is not ‘on topic’ but has little bits and bobs connected with some ideas on those themes – and a day late I’m afraid.

Recently I caught a repeat showing of Treasures of the Anglo Saxons, which was wonderful and full of good close- ups.  The discussion spanned the early pagan period right through to the conversion to Christianity, looking at jewellery and manuscripts.  I was most interested in the pagan motifs of the early phase, especially their treatment of interlace, as compared to the Celts. 

Written and presented by Dr Janina Ramirez, an art historian  specialising in this period, who is presently writing a book on bird motifs in Anglo Saxon art.  Can’t wait till that’s published, as birds are my second favourite after flowers, of course.

I have secretly toyed with the idea of copying (or at least studying) another sweetbag that’s covered in bejewelled birds at the V&A.  You are permitted to download that image free from their website here.    Its *high definition but not as high as the one I have for The Bag.  But I know that vague idea  is a long way away, as this present sweetbag is so extremely intricate.

* I don’t have the accession number to hand.  You will need to sign up to this service first and acknowledge you have read their Rules & Regulations, as they don’t allow these images to be reproduced and distributed.  

Canvas Bags

Added to which, for a long time I have wanted to decorate one of those plain canvas bags that the charities send out.  I have quite a few now!  And, if I do this for someone else, I know I will finish it within a reasonable period.  If I make it for myself, however, it could take a lot longer.  I think perhaps there is ‘something’ in this realisation not dissimilar from a reluctance to put myself first??

One thing is for sure, lately I have realised something very important about myself: I have a lot more patience than I have time.  Because of this I admire work that masterfully comes up with ‘quick’ solutions, especially when the results don’t look quick and make use of clever modern materials. 

But my eye is always magnetically drawn to the things that I know took forever to make.  I read recently that in medieval times it took a group of 4 women a whopping  26 years to complete a set of embroidered vestments (15 approx) that were sent to Rome.

This led me to think about all the books I had been buying recently and I concluded that I think that when I buy a book, I am really buying a desire for more time…

Then I read that someone, who knows someone, has a collection of 3,000 quilting books, so I stopped brooding and felt a whole lot better – lol ! 

The seasons are really changing now and the sun is just beginning to warm the soil and the backs of the tiny birds in the tree tops. 

1930s Vintage Embroidery Pattern

So with birds everywhere, I decided to sew something ‘birdie’ that would decorate a canvas bag.   

Would you just look at this little cutie having his bath time…aah!  I tell you something happens to me when I see a little bird like this, I must have been a bird in a past life or something?…

Wet Bird   

So creative cogs turning, when I got the chance, I ran a quick search on Google images for ‘little birds’ and found the most wonderful interpretation of a vintage embroidery transfer, circa 1930.  I had to contact the needlewoman responsible for this terribly cute piece of embroidery at Modern Ma’am’s blog .  Modern Ma’am has very kindly granted me permission to show you on here what I got up to with that pattern. 

I decided early on I would appliqué the design. 

Still curious about Elizabethan Slips

At the back of my mind I was still really curious about exploring the Elizabethan ‘slips’ idea for myself.  Both from the working method perspective and the notion of making small detachable/re-usable appliquéd motifs.

If you recall, I think I said something like ‘how did they manage to create such wonderful curves with fabric that frays so much?  Because all the books tell us to avoid fabric of that type for appliqué.  

When I went to the V&A I looked really closely at the fine black cord they had attached to the edge of the slips, which in turn was couched down with tiny gold stitches.  I have since found out that Erica Wilson’s Embroidery Book has a description of how to do thisThat explanation made a lot of sense to me as quite quickly into this method of working, I could see for myself why and how they would edge the slips like this…in short it was to accentuate the curves and protect the tiny appliqué stitches from wear and tear. 

For this purpose, I decided to edge the design with Stem Stitch and make it as a detachable panel, so that when the person tires of the bag, they will be able to remove it and attach it to say, a cushion?

From Inking to Sewing

So anyway, off I went with my inked up pattern and got to work…

  Transferred vintage embroidery pattern

Here’s the design on the light box with a thin piece of vintage cotton on top. 

I was using soft vintage fabric for the background and the birds themselves.  The cotton I used for the birds was incredibly soft and easy to manipulate.  I really enjoyed working with that fabric, so much so that I decided to appliqué the whole thing, flowers as well !

You probably think that was a very ‘strange’ idea because I was going to sew it all by hand – no ‘Heat-n-Bond’ !

Slip Stitch & Blind Stitch

I used lots of notches for outside and inside curves to enable smooth shaping and reduce bulk.  I cut the top of pointy parts straight across taking care not to cut too close to the mark..  I used two kinds of stitches, Slip stitch and Blind stitch.  Blind stitch for the longer smooth areas and slip stitch for the tight ones.  Blind stitch is my favourite and even though the books say both these stitches are ‘virtually invisible’, I find Blind stitch to be truer to that description.

1

I do blind stitch in two moves.  I find this makes for smoother curves.  Most importantly, at the end of the given section e.g. top of the hat, I gently tighten the thread to make all the tiny stitches almost disappear under the edge.  The picture above was taken just before I did that.  The design itself won’t be ironed afterwards, as moulded curves are my aim. 

2

The pattern is printed A4 size.  Here you can see I’m doing several things at once.  I’m working round the bird’s tail, cutting notches as I need to, tucking under, blind stitching and deciding how to tackle the next section.  The cotton was so fine it would fray like anything but I wasn’t put off because its so nice to work with.

I’m taking a blind stitch here but I’m approaching a tight-ish corner for which I will have to turn the work.  There is a lot of turning with this kind of thing and its all worked in the hand, no hoop, in the same direction.  I took great care not to over-stretch any single element.  

4

I go in behind and just underneath the edge of the motif to take up a couple of threads from the denim ground fabric.  I’m not pinning first, just finger-pressing the edges with a bit of needle-turning for the smaller areas.  Your hands have to be very clean and dry, and you have to have a lot of patience but I think the results are well worth it.  

5

6

Here it is, 2 radio plays later….lol

CIMG4634

I kind of knew this design would work because as you see, the flowers join the leaves; to join more flowers.  So apart from the tiny legs, the design is not impossibly fiddly.  The pointed tips reveal loose threads but they will be neatly stuffed under the appliqué and enclosed by line stitches.

CIMG4652

Not sure if this little fella’s wing is going to stay like this?  I’ll need to look at the whole thing in daylight to decide about that.  I’ll also need to make sure this metallic blue thread doesn’t snag on stockings, as even though its a shoulder tote bag, it will be carried from the hand at times.   

I want to keep the idea of a ‘line drawing’ apparent as the effect of the whole thing is quite floaty and subtle.  So I’m going to use a variety of small stitches instead of colours to mark out different textures.

Anyway here they are with their tiny hats, scarves and fragile little legs…

CIMG4651

cya !


Friday, 28 January 2011

Books & My Other Loves

(Before I can continue with the Plaited Braid Stitch discussion, I’m waiting on a couple of books.)

Gardening with Silk & Gold

Not sure if I mentioned this book before?  It was in the County Town library.  A gem to be sure.  Great pictures – not high def but very crisp, loads of information on textile techniques & history.  Really good section on Elizabethan pattern books.


General Update

The Ring

Since the experiments with  florists wire, I’ve decided I’m going to make the Ring out of very fine silver pearl purl.  The ring falls into the category of ‘Memory Jewellery’.  Memory rings are a very old tradition in England dating from Medieval times right up to the advent of the photograph.   

The Bag

The bag (not forgotten but a tad neglected) needs to be made on 35ct linen, so my next step was to see if I could successfully work ‘Ground Stitch’ with Smooth Passing No.4 silver thread over it.  So far, not so good.  

So, I began my journey with the blue flower (if you recall) being the easiest motif, then out of a growing sense of anxiety, I next dived into the most difficult, being the acorn.  Since working that out, I learned just how old the embroidery techniques were that were being used by the Elizabethans.  The gold acorn proved to me, that apart from anything else, the Vikings  knew that the best way to control Ceylon stitch, is to stitch it upside-down, whether tubular or flat.  

Bag Tassels

The ‘Sweet Bags’ book has further confirmed another really old Saxon/Viking technique was used on the tassels of these purses, known as SOUMAK WEAVING or brocading.

This is a very exciting fact and totally fits in with my further reading.  Soumak is Near Eastern in origin and apart from proving once again how far the Vikings travelled to trade their goods, it also illustrates how clever they  were at copying these cool items.  Soumak is mainly used for carpets and small durable saddle bags, the Vikings however made theirs into wall hangings (Oseberg).  Its so interesting to note another direct link the Elizabethans had with much earlier Medieval culture. 

To my mind, Soumak weaving  is one of those developments that bridges the gap between weaving and embroidery.  Added to which its basic components consist of  a series of needle-woven KNOTS  that form and enclose the weft of the fabric.  Some of those knots were made into PLAITS……

Plaited Braid Stitch 3-D Braid

A reader very kindly contributed some of her expert knowledge on the comments section on my last post and pointed out to me that the PBS braid looks like a Lucet braid.

I’ve since had the chance to quickly whip up some Lucet braid, after reading the relevant section in my new book: ‘Celtic, Saxon & Viking Embroidery’ by Jan Messent.  (Soon to be discussed)

Almost Identical to Lucet Braid

Gina was  right, Lucet braid looks and behaves exactly like the PBS braid AND furthermore when I unravelled it and compared it to the photographs of the PBS braid, they were so similar I got goose-bumps. 

However, there is ONE subtle, but significant difference concealed within the inner workings which I hope to discuss next time as I continue along the labyrinthine path of wondering and exploring how and where PBS came from??

Further reading on Lucet Braids can be found at the Soper Lane website, here 

Remember, Jacqui Carey says in her book:

“Plaited Braid Stitch looks to me like a 4-Ridge, twill braid”.

(I think I mistakenly left out the “ridge” part when I originally quoted this - apologies.  Or maybe I did the first time but not the second?  Who knows, I just want to make it perfectly clear this time tho’.)


Filler Post Due to General Unspecified Exhaustion

You could say its that time of year but I fear I am in the grip of an all-consuming bout of book-buying-binges.  The snow has melted, the roads are clear and I am doing exactly as my mother used to do during the annual John Lewis crockery sales – I am bringing home my latest acquisitions and secreting them around the house away from the auspices of DH…

So far, the only one that is aware of this ‘strange’ clandestine  behaviour is D.Dog

He-Man

aka Little Mr Big, Tarzan, He-Man & Him.  This dog may be small but let me tell you, he doesn’t miss a thing!

The other person that suspects I may soon have to admit to my ‘little problem’, is DD…

me_matriculation

Taken whilst punting during Fresher's Week…(to J: xxx)

So, guiltily I am creating ever-more adventurous concoctions on my trusty 9-year old stove…

My cooker

Well, you know what, I must have been a little too enthusiastic  recently, because in so doing the handle of trusty oven door fell off and on a separate occasion I burnt my hand in two places.  (Hand & handle are now fine, Thankfully – Cooker, as you can see is spotlessly clean, but you know I can’t help thinking that if my dear mother were to visit, I’m sure she would say she could still see some dirt…) 

All of this to please the other HIM in my life…

Me & DH

(Mobile phone shot taken of us in Brighton 2 years ago – have I told you how much we love Brighton ?? – lol – its Cinemas, Museums, Flea Markets, fabric shops, memorabilia, retro chic, amazing art library, galleries, more shops, PLUS last year we saw a genuine Saxon warrior’s sword on sale in The Lanes – replete with  rusty jagged edge – for a mere £12,000 ! – personally I would prefer a solid gold warrior’s Torc, like the ones I saw recently at the Ashmole’.)

(By the way, on the topic of the Ashmolean Museum, I have since found out that they too permit photography of their exhibits, unless where expressly stated otherwise.) 

…And where do all these sweaty books end up?….. well, let me tell you, I’m finding out that, unlike the house, my little unassuming (rather chilly) shed  does have expanding walls.  This is consoling when one considers the dangers of a possible relapse !!  The English are very fond of their sheds and I am no exception. 

CIMG4477

Sheds of course are the place to store anniversary presents, such as this small cordless hedge trimmer by Bosch that I thought I would only need occasionally but in fact now use all the time. 

CIMG4456

- if you haven’t already got one, don’t waste anymore time.  I thought it would only be suited to smaller bushes, but let me tell you this thing makes mincemeat of everything except wooden flagpoles – lol !!!  Seriously, I would never be without it.  (Secretly I wanted a chainsaw but DH put me off).  The maximum width of the branches it will cut is not specified but it has an anti-blocking system “which ensures continuous cutting”.

Take heed, anything that reduces RSI of the thumb joint is a good idea and this little darling certainly does.  I had another one before that  was a whopping 1 1/2 ft and naturally unwieldy, hence I never used it.  This one is really dinky by comparison and you can replace the blades.  Always wear gloves and read the manufacturer’s safety instructions – then get to work!

oh and these…

CIMG4459

To think it took me a month to get this item out of its box and now I consider it indispensible… This is my beloved cordless secateurs, fantastic for mincing up all the thicker detritus from a good afternoon’s pruning.  The maximum cutting width is 14mm !  (Not the same for dead Rose wood tho’)  Again, always wear gloves, keep your other hand well out of the way and read the manufacturers instructions. 

Oven Handles

Believe it or not oven handles are not that difficult to tighten up and that’s what you have to do before they completely fall off.  Twood appear all oven door handles have hidden screws.  To access them you need to take the oven door off its hinges first by carefully resting it on a blanket on the floor.     

To do that you first need to release the weird hinges.  These hinges have special safety catches.  Here’s a picture of the safety catch lifted out of position. 

CIMG4587

Cooker booklets don’t tell you how to do this and I’ve seen plenty of people practically bolt their loose handles back on.   Fear not  - where there’s a will, there’s a way!  

Warning: Only attempt this after obtaining advice from the manufacturer of your specific cooker.  Oven doors with glass in them (like this one) need special care but can still be done. 

Oh, and here’s my latest ‘handbag’ essential: it’s a great 4-in-1 tool by Rolson, double sided and double-barrelled.  I don’t know why I didn’t buy this a long time ago?  Looks like a pen and means you’re ALWAYS ready!

CIMG4454

While DH sinks his teeth into the results of Chapter 15 of my ‘Cooking to Ease Your Conscience’ book, I, meanwhile am on a diet that has helped me to lose 1 stone in 6 months simply by eliminating  one item from the menu –clue: it’s not chocolate !!!

CIMG4473

So, um, all this leads me to show you my Latest Acquisition….

Textile Style 01

Textile Style 02

Gorgeous book – 70% off R.R.P, 2010 reprint !!!

And, erm, while I was walking back to catch my train, I passed this very good (had-to-have) machine embroidered silk cushion, with its price  also brutally slashed.  Not bad computerised embroidery really, they almost got it right, except for the flower on the left where the design hasn’t considered foreshortening very well…great leaves tho…

CIMG4585

(Silk cushion purchased at HomeSense: “Unique finds.  Irresistible prices”…)

cya !


Thursday, 13 January 2011

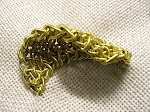
3-d Braid made out of Plaited Braid Stitch

CIMG4571

(The Bag, the Ring etc, are all on hold due to further experiments with PBS and major reorganisation of my stash). 

This post continues on from the last..

Before I talk about PBS some more I need to wind back a little. 

Exploring Plaited Braid Stitch Generally

A while ago I mentioned that I was quite interested in the provenance of PBS.  I think I posed the question: ‘where did it come from, it seems to just pop up?’ Added to which, a colleague had suggested that she felt there were strong indications of yet other ways of making the stitch.  This made me more curious about its origins, technically as well as stylistically. 

There are various theories about how it must have begun (Naalbinding +/Braid Stitch, etc) and it seems to me that, the less we know about it, the more we can speculate and investigate… 

I don’t think what you’re about to read solves the mystery, but it might just shed a bit of light, perhaps, on possible routes the stitch took to arrive at the Elizabethan’s doorstep?  It’s all purely hypothetical mind you and just rather curious, that such a complex interlaced embroidery stitch can actually be made into a 3-d braid. 

Personal Experiments with Structure of PBS

So, I carried out my own ‘experiments’ into the intrinsic nature of PBS and that’s really the substance of this post and the next. 

I suppose I feel I understand the stitch more now and these experiments certainly raise some interesting questions in my own mind about other complex stitches and their cultural origins.        

Starting point

So, taking ‘Braid’ from its name and linking it to its structure, which is essentially woven, you can imagine how thrilled I was when I received Jacqui Carey’s book ‘Sweet Bags’ to read that she likens the stitch to “a 4-twill braid”. 

As exciting as that appeared, I couldn’t begin to figure out how you get from stitched version to 3-d braid version?? 

Pretzel Starting Point

Then I realised she begins her PBS differently to that of Leon Conrad and Mrs Christie’s versions.

Its interesting to note that each of these researchers has their own interpretation of how to start the stitch.  This got me thinking…

The thing to note though, is that all three contributors concur that to start the stitch you first have to make a Pretzel shape (somehow).

However, Ms Carey’s version, being in my view, more straightforward to understand, showed me that it might in fact be possible to ‘manipulate’ the beginning of the stitch (I’ve already shown you this example) in such a way as to start it with a single chain stitch:

triquestra reminder

Silver Triangular PBS

This silver triangle is what I ended up with and intriguingly, it led me in a totally new direction, but for now I just want to pose the question: Does it remind you of anything?  If it does, hold that thought because I come back to this in the next post.

Borrowing from the Vikings

So with Ms Carey’s comprehensive diagrams I put these ideas together with what I had learned about the Viking method of making tubular Ceylon Stitch and decided to try and stitch PBS on a rod.  I kind of knew it would be possible to do this without using ground fabric, because if you recall, when I had previously cut a section out, it hadn’t unravelled.

 PBS 3-Potential

How I made the PBS 3-d braid

So, I needed to look around the (now tidy) stash for something that would support the structure but not be too thick.  So I grabbed some picture-wire and made a very quick spike by bending a length of it in half and not cutting it away.

CIMG4273

Here I’m starting PBS, the right way up, as per Ms Carey’s instructions.

CIMG4274

Crucially, from what I read in ‘Sweet Bags’, I could see that if I were to work PBS round a spike, I wouldn’t need a knot to start.  In other words, by holding it in place with your thumb you can get the thing started.  

CIMG4275

I wont be able to show you how to get the first few steps of the stitch going because I would like to urge you to buy this lady’s book for yourself… so below I jump several rows…

Here you can see that things are working up nicely and it feels comfortable to work this way... 

CIMG4277

I stitched this length quickly using thin ‘gift wrap’ wire that’s covered in silver foil - the type made for wedding bouquets and suchlike. 

front 1

Here’s the reverse..

back 2

Now this is where things get interesting…below you can see I’ve finished and am starting to pull the piece off the supporting wire. 

 CIMG4283

Below it’s totally free of the wire..

 CIMG4285

After that I decided to STRETCH the braid out… (the reason I did this is because Viking knit made with silver wire is always stretched into shape).

CIMG4286

Can you see what is happening?

CIMG4287

Correct, it’s forming quite naturally, into 4 sides of even chain stitches, or loops.

CIMG4288 

The rest of these pictures just show the 360 degree view of the thing…

 CIMG4290  CIMG4292 CIMG4293 CIMG4294

You will notice that this way of working produces a square braid with virtually identical sides.  Furthermore it is very flexible.  (I intend to use this idea on the Embroidered Ring, I just need to be able to translate it  into suitable silver wire.)

CIMG4295   CIMG4299


Dismantling the 3-d braid

Not content with this experiment, I then decided to unravel the piece to really see how its formed..

Below you can see there are, what look like, 2 chain stitches or loops that alternate back and forth.  Incidentally, one of the corners of the braid has slightly more compact ridges.  The fact that all four sides are the same surprised me because I expected the back to remain obvious, but it doesn’t because it turns itself inwards to form the core of the structure.   

From this, its my personal view that when I sew PBS, it should ‘appear’ totally symmetrical, because this braid has 4 even sides and PBS is after all, a 4-cord plait (I discuss this in more detail next time). 

CIMG4328  

The evenness of the interlace pattern, I believe, is essential to getting the aesthetics of the stitch right e.g. it should be perfectly balanced, or symmetrical.   

Finally here are the close-ups of my pulling it all out.

CIMG4305

CIMG4306

CIMG4307

CIMG4308

CIMG4312

CIMG4320

Below I’m at the end of my PBS ‘dissection’, and at this point I had another possible ‘idea’… (more about that next time…)

CIMG4324

Loop Braiding

‘Loop Braiding’ has been dated to as  far back as the Bronze Age.

In Britain, thin 4-sided braids have been found in archaeological sites in Llangorse, Wales dated to 9th Century. 

The examples found in Llangorse were used for seam edge trimmings…

“over the seams are stitched tiny braids or sennits”.

Loop Braiding was eventually overtaken by Tablet Weaving.  Perhaps this was because Tablet Weaving permits the work to be interrupted whereas, Finger Loop Braiding, aka Loop Manipulation, has to be completed in one session.  (See earlier post titled ‘Kentwell Hall’.)  

It would be interesting to see a length of square Finger Loop braid unravelled, but from what I have gathered so far, even with archaeological finds, its difficult to decipher if pieces are Loop braided or Tablet woven. 

Louise Mumford, a conservator in the Department of Archaeology & Numismatics at the National Museum of Wales has published an interesting article regarding English braiding before the 9th century, where she discusses an obscure 2-loop method of construction.   You can read a portion of her article at this site: BRAIDS.  (The relevant section is near the foot of the page.) 

I should also mention that Sweet Bags includes a how-to chapter on Finger Loop Braiding. 

_______________

For more information, simply Google ‘loop braiding’ or ‘4-twill braids’ and you’ll find lots more info. 

Interestingly, the website ‘Instructables’ has a video of basic instructions for a (green) square braid made out of 5 loops of Finger Loop.  The finished braid looks uncannily like the one pictured at the top of this post, you can find that here.   

_______________

Bag News: I’ve decided I’m going to use stretcher bars for the repro bag and not a slate frame after all because I think it needs to remain portable and not be too heavy. 

Now I know that the background silver will be made of ‘Ground Stitch’ I feel more confident that it wont take me too long to complete. 

It still leaves the question open as to ‘which’ silver wire I should use to blend with the silk for the flowers?  Ms Carey’s book proved to me that the image I bought from the museum, that cost £30 approx, was totally insufficient for the purpose of identifying which silver wire to use for the blending.  It appears from that image that its a thread, but it turns out to be a highly ‘coiled’, flattened wire or foil, so much so, that when stitched, behaves erratically. 


cya + Happy New Year!