Thursday, 13 January 2011

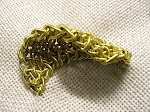
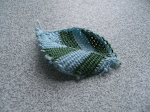
3-d Braid made out of Plaited Braid Stitch

CIMG4571

(The Bag, the Ring etc, are all on hold due to further experiments with PBS and major reorganisation of my stash). 

This post continues on from the last..

Before I talk about PBS some more I need to wind back a little. 

Exploring Plaited Braid Stitch Generally

A while ago I mentioned that I was quite interested in the provenance of PBS.  I think I posed the question: ‘where did it come from, it seems to just pop up?’ Added to which, a colleague had suggested that she felt there were strong indications of yet other ways of making the stitch.  This made me more curious about its origins, technically as well as stylistically. 

There are various theories about how it must have begun (Naalbinding +/Braid Stitch, etc) and it seems to me that, the less we know about it, the more we can speculate and investigate… 

I don’t think what you’re about to read solves the mystery, but it might just shed a bit of light, perhaps, on possible routes the stitch took to arrive at the Elizabethan’s doorstep?  It’s all purely hypothetical mind you and just rather curious, that such a complex interlaced embroidery stitch can actually be made into a 3-d braid. 

Personal Experiments with Structure of PBS

So, I carried out my own ‘experiments’ into the intrinsic nature of PBS and that’s really the substance of this post and the next. 

I suppose I feel I understand the stitch more now and these experiments certainly raise some interesting questions in my own mind about other complex stitches and their cultural origins.        

Starting point

So, taking ‘Braid’ from its name and linking it to its structure, which is essentially woven, you can imagine how thrilled I was when I received Jacqui Carey’s book ‘Sweet Bags’ to read that she likens the stitch to “a 4-twill braid”. 

As exciting as that appeared, I couldn’t begin to figure out how you get from stitched version to 3-d braid version?? 

Pretzel Starting Point

Then I realised she begins her PBS differently to that of Leon Conrad and Mrs Christie’s versions.

Its interesting to note that each of these researchers has their own interpretation of how to start the stitch.  This got me thinking…

The thing to note though, is that all three contributors concur that to start the stitch you first have to make a Pretzel shape (somehow).

However, Ms Carey’s version, being in my view, more straightforward to understand, showed me that it might in fact be possible to ‘manipulate’ the beginning of the stitch (I’ve already shown you this example) in such a way as to start it with a single chain stitch:

triquestra reminder

Silver Triangular PBS

This silver triangle is what I ended up with and intriguingly, it led me in a totally new direction, but for now I just want to pose the question: Does it remind you of anything?  If it does, hold that thought because I come back to this in the next post.

Borrowing from the Vikings

So with Ms Carey’s comprehensive diagrams I put these ideas together with what I had learned about the Viking method of making tubular Ceylon Stitch and decided to try and stitch PBS on a rod.  I kind of knew it would be possible to do this without using ground fabric, because if you recall, when I had previously cut a section out, it hadn’t unravelled.

 PBS 3-Potential

How I made the PBS 3-d braid

So, I needed to look around the (now tidy) stash for something that would support the structure but not be too thick.  So I grabbed some picture-wire and made a very quick spike by bending a length of it in half and not cutting it away.

CIMG4273

Here I’m starting PBS, the right way up, as per Ms Carey’s instructions.

CIMG4274

Crucially, from what I read in ‘Sweet Bags’, I could see that if I were to work PBS round a spike, I wouldn’t need a knot to start.  In other words, by holding it in place with your thumb you can get the thing started.  

CIMG4275

I wont be able to show you how to get the first few steps of the stitch going because I would like to urge you to buy this lady’s book for yourself… so below I jump several rows…

Here you can see that things are working up nicely and it feels comfortable to work this way... 

CIMG4277

I stitched this length quickly using thin ‘gift wrap’ wire that’s covered in silver foil - the type made for wedding bouquets and suchlike. 

front 1

Here’s the reverse..

back 2

Now this is where things get interesting…below you can see I’ve finished and am starting to pull the piece off the supporting wire. 

 CIMG4283

Below it’s totally free of the wire..

 CIMG4285

After that I decided to STRETCH the braid out… (the reason I did this is because Viking knit made with silver wire is always stretched into shape).

CIMG4286

Can you see what is happening?

CIMG4287

Correct, it’s forming quite naturally, into 4 sides of even chain stitches, or loops.

CIMG4288 

The rest of these pictures just show the 360 degree view of the thing…

 CIMG4290  CIMG4292 CIMG4293 CIMG4294

You will notice that this way of working produces a square braid with virtually identical sides.  Furthermore it is very flexible.  (I intend to use this idea on the Embroidered Ring, I just need to be able to translate it  into suitable silver wire.)

CIMG4295   CIMG4299


Dismantling the 3-d braid

Not content with this experiment, I then decided to unravel the piece to really see how its formed..

Below you can see there are, what look like, 2 chain stitches or loops that alternate back and forth.  Incidentally, one of the corners of the braid has slightly more compact ridges.  The fact that all four sides are the same surprised me because I expected the back to remain obvious, but it doesn’t because it turns itself inwards to form the core of the structure.   

From this, its my personal view that when I sew PBS, it should ‘appear’ totally symmetrical, because this braid has 4 even sides and PBS is after all, a 4-cord plait (I discuss this in more detail next time). 

CIMG4328  

The evenness of the interlace pattern, I believe, is essential to getting the aesthetics of the stitch right e.g. it should be perfectly balanced, or symmetrical.   

Finally here are the close-ups of my pulling it all out.

CIMG4305

CIMG4306

CIMG4307

CIMG4308

CIMG4312

CIMG4320

Below I’m at the end of my PBS ‘dissection’, and at this point I had another possible ‘idea’… (more about that next time…)

CIMG4324

Loop Braiding

‘Loop Braiding’ has been dated to as  far back as the Bronze Age.

In Britain, thin 4-sided braids have been found in archaeological sites in Llangorse, Wales dated to 9th Century. 

The examples found in Llangorse were used for seam edge trimmings…

“over the seams are stitched tiny braids or sennits”.

Loop Braiding was eventually overtaken by Tablet Weaving.  Perhaps this was because Tablet Weaving permits the work to be interrupted whereas, Finger Loop Braiding, aka Loop Manipulation, has to be completed in one session.  (See earlier post titled ‘Kentwell Hall’.)  

It would be interesting to see a length of square Finger Loop braid unravelled, but from what I have gathered so far, even with archaeological finds, its difficult to decipher if pieces are Loop braided or Tablet woven. 

Louise Mumford, a conservator in the Department of Archaeology & Numismatics at the National Museum of Wales has published an interesting article regarding English braiding before the 9th century, where she discusses an obscure 2-loop method of construction.   You can read a portion of her article at this site: BRAIDS.  (The relevant section is near the foot of the page.) 

I should also mention that Sweet Bags includes a how-to chapter on Finger Loop Braiding. 

_______________

For more information, simply Google ‘loop braiding’ or ‘4-twill braids’ and you’ll find lots more info. 

Interestingly, the website ‘Instructables’ has a video of basic instructions for a (green) square braid made out of 5 loops of Finger Loop.  The finished braid looks uncannily like the one pictured at the top of this post, you can find that here.   

_______________

Bag News: I’ve decided I’m going to use stretcher bars for the repro bag and not a slate frame after all because I think it needs to remain portable and not be too heavy. 

Now I know that the background silver will be made of ‘Ground Stitch’ I feel more confident that it wont take me too long to complete. 

It still leaves the question open as to ‘which’ silver wire I should use to blend with the silk for the flowers?  Ms Carey’s book proved to me that the image I bought from the museum, that cost £30 approx, was totally insufficient for the purpose of identifying which silver wire to use for the blending.  It appears from that image that its a thread, but it turns out to be a highly ‘coiled’, flattened wire or foil, so much so, that when stitched, behaves erratically. 


cya + Happy New Year!


Tuesday, 14 December 2010

Embroidered Ring – Stage 2 and PBS

(This is a longish post but lighter on text – phew!)

Suddenly things have been happening rather more quickly, however, I will need to relay them in chronological order.  So, before I talk about Plaited Braid Stitch (PBS) some more, I need to explain how I got ‘there’.

First off, I visited the Ashmolean Museum in Oxford, because I happened to be there on business.  I was primarily interested in seeing their new textile gallery and after that, the Saxon & Vikings section and on my way out I also saw their wonderful RINGS collection.  I only had an hour to spare in there, and I was jolly hot with all my de rigueur  woollies,  so my notes were pretty rushed.  I’ll talk about the visit some more on another occasion, especially as 2 (whole) weeks later I had to return. 

This leaflet is not actually the bright yellow you can see here, but the scanner seemed to concentrate on carefully picking out the central detail of this Chinese enamelled belt.  What amazing work went into that piece.  I hope the actual item is on display.

ashmolean

Museum ideas

For now I’ll say, The Ashmolean is a truly fantastic place and I especially like the way everything is set out; it makes a lot of sense for researching purposes, as you can compare artefacts from neighbouring countries easily and are able to thereby plot the progression and eventual cross-pollination of ideas very clearly.  I think what I like most about this museum is it reminds me so much of an antique shop that’s crammed full of stuff (yummy), rather than, say, a sepulchral, minimalist ‘temple’ to the high art of days of old.   

So the following weekend I managed to carve out some ‘me’ time and get a few ideas down from digging around in my stash and pouring over clippings of some gorgeous flower rings that had appeared recently in the press:

Pink flower ring

Yellow mini flowers ring

I also pulled out two new(ish) book purchases:

Tracy Franklin

I’ve yet to really study the Tracy Franklin book above, it looks utterly delicious but I have to admit, my hands do tremble a little when I dip into the feast that is: The Beader’s Floral by Liz Thornton & Jill Devon:

the beaders floral by Liz Thornton & Jill Devon

I bought this the last time I was in Brighton (did I mention how much I love Brighton ??- lol).  (Psst: don’t think about it, just get it! – not what I would call ‘a beginners book’ but who cares, if you borrow Beader’s Bible from the library and read it in conjunction, then its not so difficult – the ideas in here are the stuff of dreams !)   

Then I went to my stash of ‘visuals’ and dug out some other cute things to get the creative cogs turning; like these wallpaper samples.  They’re very clear jumbo designs that would easily translate into 3-d and notice how they feature a lot of silver:

Stash idea - wallpaper

Coz remember, the ring has to be silver…

CIMG4249

and more irresistible Brighton finds… I sourced this in a wonderful old rusty-door-handle-Aladdin's Cave-of-a- shop…very nice people, fought their way to the back for me to wrench out this man-made vision…

CIMG4269

Would you just look at this terribly pretty Chinese bead that I bought at the Covent Garden Bead shop in the Summer.  I kind of thought at this stage of my ‘rummagings’ that I would ‘maybe use this bead as a colour reference’??  Its much prettier in the flesh by the way...

Chinese bead - Covent Garden

Then I got out a piece of my freeform crochet that I did a couple of years back.  I tend to use it now as a construction-reference-sampler-thingy.  I didn’t originally use a pattern for this piece, as I was just trying to replicate an embellishment detail I had glimpsed on a lovely dress in Monsoon.  The dress was way out of my price range, but the small crocheted panel was something I had to ‘possess’… 

crochet sampler - freeform

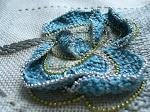
Then I got to work drawing and turning ideas over in my mind and stringing up some herringbone stitch blue and silver beads and stuff, including the sweet miniature silky leaf ribbon they sell in the scrapbooking section of my LYS:

5

This is what I ended up with, when I stopped and thought: ‘I would really like to add some PBS petals’…

Now to wind back a bit, as I said, because of what I had gleaned from Jacqui Carey’s book (see last post) I found I was able to manipulate the overall shape of the PBS from this:

1

to this, by altering the beginning of the stitch to a single chain…and as you can tell, things are starting to go in a totally different direction…

CIMG4204

At this stage my thinking was that I would probably use this triangular shape of PBS and the supporting fabric and then just cut it all out and somehow form a little petal shape for the ring..

CIMG4201

So I cut the earlier section of PBS out, together with its gold Acorn brother that you can see here, and started to manipulate them to make them look more like components of a ring… Then I forgot about the ring entirely and started to really STARE at what was happening to the 3-d PBS…

CIMG4202

That was when I made the first of my discoveries.  By moving it around and trying to get it to look like a petal I arrived at this…

PBS 3-Potential

Above you can see the section of PBS is not only flexible but in so doing, IT DOES NOT UNRAVEL !….Now you might think that the remains of the linen was probably still holding it together, but let me tell you, immediately after this photo was taken, I actually pulled all the linen fragments out and it still didn’t unravel.

Then I remembered something I had read in Jacqui Carey’s Sweet Bags book:

“Plaited Braid stitch reminds me of a 4-twill braid…”

With this idea (remember, I know very little about braid-making except what I saw at Kentwell Hall – see earlier post) the ‘explorer’ in me married up this ‘notion’ of an actual braid, together with what I had learned about the Vikings making their upside-down Ceylon stitch wire knitting round a rod or support (can you see where I am headed?)….


….and I produced this:

CIMG4288

This is a completely 3-d ‘braid’ made out of Plaited Braid Stitch that was not stitched onto background fabric first but instead, incorporated a Viking construction method. 

It is the same on all 4 sides, it is square-shaped; even & extremely flexible..

CIMG4295

(Didn’t I tell you this would make you sit bolt upright !)

This is NOT all, next time I’ll show you how I made it and what that led to….!

cya !

Sunday, 5 December 2010

‘Sweet Bags’ by Jacqui Carey – an amazing book

(Warning: long post! – try as I might to make them shorter…)

After I worked out how to make the acorn, but before I made the video, I received a copy of this wonderful book published last year by a textile scholar here in the UK.

The author is a braid maker ‘by trade’ and is actually an expert on Japanese braids.  Well, it turns out that because she was eager to work out how the Elizabethans had made their braids, she also had to study the embroidery on them in very intricate detail.  In so doing, she has handled many extant Sweet Bags stored in various museums around the UK. 

The book is her ‘file’ of discoveries and it contains revolutionary ideas.  She adds that she has compiled further evidence that she may yet publish at some future date.  (I sincerely hope she does.)

The book is wonderfully thick, full of incredible detail and very comprehensive diagrams, oh, and its also paperback ! 

Just to recap a little…

If you recall, I mentioned I felt I needed to have a copy of ‘Twixt Art & Nature’, if for no other reason than to really try and understand the types of metal threads they had back then.  Because of that, I hung on for 6 months to obtain it from an internet bookseller (NOT amazon), who eventually informed me that the Bard Centre were unfortunately not going to print any further copies.  Well from that day, to the day I received Ms Carey’s book, I was a walking heap. 

Now (thankfully) I am certain that whatever is in the ‘Twixt’ book, it cannot possibly contain the same level of ground-breaking, authoritative dissection of minutiae that Ms Carey has put into this major contribution to our understanding of how differently the Elizabethans did things back then.

If I may add, because she is a braid-maker, braid teacher and braid scholar, she has this incredible clarity of purpose with the very technical conundrum of ‘what goes where’ in terms of thread direction, in these closely worked miniature items.  She cuts through all the confusion, in my opinion, by carefully explaining how to read the ‘entrance’, ‘exit’ and ‘orientation’ of the working thread for each stitch. 

Her approach has been as one who is new to the world of embroidery, and in turn her perspective remains open-minded and thus, unencumbered at all times.  Her aim has been to work out ‘what goes where and why’ and to illustrate firm evidence of what their construction methods must have been.     

Cylindrical Ceylon Stitch

Alas, from the book, I also discover that I was not the first to work out Cylindrical Ceylon Stitch in this context, the author refers to it as ‘Tubular Ceylon”.

The corroboration of ideas is consolation indeed.  I am certainly very pleased that its being brought to wide public notice that this was one of the ways worm and butterfly bodies on Sweet Bags were constructed.

Purely English Version of Trellis Stitch

The other major (heart-pounding) moment for me while I flicked through the book for the first time, was the incredible realisation that this lady has seen, worked out and tried and tested an ‘Elizabethan’ working of Trellis stitch and concluded it was NOT knotted !

I have placed a notice on my YouTube videos about this discovery and I look forward very much to ‘having a go’ at this new or rather very old English way of working the stitch. 

This of course got me thinking….if it was not actually a ‘knotted’ stitch, then that means it CAN be made out of metal and in fact when I read this, I immediately pulled out all my books and notes and rummaged (very calmly you understand..) until I found the best illustration I have of Queen Elizabeth I embroidered book binding that she stitched herself for her step-mother, Katherine Parr, and was reminded that SHE had in fact stitched ‘English’ Trellis, IN METAL on the cover of that book! 

In another source I found reference to (English) Trellis (that’s how I shall refer to it from hereon in) ‘resembling Hollie Stitch’, and somewhere else I have noted that ‘Hollie Stitch is said to be a purely English needlelace stitch’, in other words, not imported from Italy!  All of this raises so many questions…

…..more about that later.

Plaited Braid Stitch (PBS)

However, the very first chapter that grabbed my attention was the one concerning Plaited Braid Stitch. 

It contains 4 extremely clear diagrams of how to work the stitch and interestingly shows us how to stitch it vertically, but working from the bottom up. 

On top of that this lady has discovered that there are 2 further ‘variations’ of the stitch, 0f which she has photographic evidence.  This means that their structure has more interlaced ‘overs & unders’ than standard PBS, in the sense of ‘interlacing’ technicalities or put it another way; the appearance of more threads.     

For newbies - This means we now have 3 ways of working PBS:

  • Grace Christie’s version 1920 – very difficult to work, not suited to metal and constructed vertically but from the top down.  Looks different to historical pieces.  Incorrect number of ‘unders & overs’ compared to historical items.   
  • Leon Conrad’s version c.2003 – worked sideways, does look like historical examples and suited to metal.  Correct number of ‘overs & unders’ compared to historical items.  Danger of little legs poking out. 
  • Jacqui Carey’s version 2009 – worked vertically, from the bottom up, suited to metal and looks exactly the same as historical examples.  (In my view, no fiddly bits).  Correct number of ‘overs & unders’ compared to historical items.  No danger of little legs poking out. 

Because of the clarity of her diagrams and her careful explanation that ‘modern’ Plaited Braid (Mrs Christie’s version) is unlike Elizabethan PBS, for the simple reason that the modern version does not have the requisite number of ‘overs & unders’. 

She goes on to prove that the Elizabethans must have worked the stitch in the opposite direction.  She includes stunningly clear high definition digital photography of historic examples and you can see instantly that they are exactly the same as the stitching she reproduces to make her own sweetbag through the book.  The book however, is not primarily about her sweetbag but about the historic bags she has studied.  In fact there is only one close-up of her own sweetbag!  The book is really about deciphering historical stitches!

PBS re-cap

Well, with that I went over to my stash and set to work, because her findings had really got me thinking

Now, I don’t know about you, but it has always bothered me how long it takes to stitch PBS.  I seem to sit there, all tense, shoulders hunched, thinking: ‘oh dear, here we go, its PBS time’.  Perhaps, more than anything else, because there was one bit of it that always seemed rather ‘fiddly’ (and awkward) to me. 

So, the instant I realised that Ms Carey’s diagrams blew away any personal residual cobwebs I harboured about how to do the stitch, off I went to try it, noticing immediately that my stitching felt smoother. 

I think it helps me a lot to stitch it vertically, as I can really see what I need to do next and by watching the thread being pulled through, the right way up, I can tell more readily when to stop pulling or put it another way, one part ‘fits round’ the preceding section more readily.  There is also no danger oftiny legs’ appearing when worked this way.

This is my first attempt...

CIMG4199  

Above you can see the blue PBS I made last year which is ostensibly quite square-looking. 

Then, next to it, is the little patch of gold I made after following Ms Carey’s diagrams.  This section took me 10 minutes to stitch and I had not stitched PBS for about a year.  Are you thinking what I’m thinking?

Here’s a another patch of PBS that took me less than 3 minutes to complete whilst also chatting...

1

Same example below but upside down2

And here sideways

3

In these two horizontal views I think you can see that the overall effect is very balanced e.g. you could draw a line down the middle and both sides would, methinks, look the same. 

Personally, I think this is a very important aim when we talk about striving for ‘neat’ PBS.  Previously my PBS was not balanced and the left hand side always looked more ‘squashed’ or rather the stitches lay at a slightly different angle than the other side.  I have since investigated why this used happen and I’ll talk about that next time.

4

My conclusion is that the Elizabethan stitcher had to have worked PBS at quite a fast pace and probably chatted while she did so because it was usual for them to stitch in groups. 

Embroidered Ring – stage 2

So, as I explained, these amazing diagrams have helped me to relax with the stitch, so much so that I decided to include PBS it in the design of the Embroidered Ring that I spoke about a few weeks ago.

First I thought the ring would be silver and light blue but no matter what I did with it, it just didn’t really ever get off the ground.  Then I discussed it further with the intended recipient and we agreed she would prefer emerald green and silver…now I’m excited !!

This ring is a little difficult to work out because unusually I know what I want the ‘last part’ to look like, as opposed to just embellishing to my heart’s content.

Here is a picture of the non-starter:

7

I know where I went wrong with this thing, when I was at the Ashmolean recently, the last thing I looked at was the display case of very gorgeous, but utterly sentimental, Victorian rings.  Bad idea, as you can see, this proto-type has too many petals and is basically not what I am aiming for at all.  I’m aiming for something Celtic-looking.   

The only thing that really worked was that I managed to keep it very small, as I have been flatly told NOT to make a ‘tarantula’ of a finger-ring !!!

The Bag

Because the ‘Sweet Bags’  book puts forward overwhelming results of virtually scientific scrutiny, that the Elizabethans had their own, uniquely ‘English’ way of working their stitches, irrespective of the mountain of received opinion we have from modern books about how to produce those stitches, I have started to test out some of these ideas for myself. 

This means that the background of the repro bag will not be slanted encroaching Gobelin Stitch afterall, but what Ms Carey calls ‘Elizabethan Ground Stitch’.  I am very happy so far with my experiments on this subject and here is a wee taster worked in Smooth Passing number 4, non-tarnish.  A nice thread to work with!

CIMG4238

Big News

I’ll talk more about this incredible book and the aesthetics of PBS next time, but for now I wanted to give you a bit of advance notice about something I am leading up to.

Because of a particular idea put forward in this book and because of the need to complete the embroidered ring very soon, I have been catapulted into making  a truly serendipitous discovery regarding PBS…(in short, if you’ll permit me to say: get your goose-bumps ready, because you are going to need them!!!)

cya !

Thursday, 18 November 2010

Announcing my new video on YouTube

I’ve just put 2 new videos on there.

I’ve embedded them below.

This is a very tired Beth Lea bidding you Goodnight!…………………..ZZZZZzzzzzzzzz


This one is for stitchers…


This one is for Jewellery Makers…..


…………….yeah, I know they look the same…but one is shorter with different MUSIC and different emphasis…

Sunday, 14 November 2010

My visit to ‘Wrought with a Needle’ - I

This post is in 2 parts…

Witney Antiques

With DH at the wheel and D.Dog in the back, we set off on a blustery Sunday afternoon for Witneys.

The exhibition was excellent, so much so, that I really hope to mark it as an annual fixture in my diary.

What I saw

(For the first 30 minutes I was the only one there, which to me was blissful!) 

Although Witney is a large antique shop, they run exhibitions of museum quality.  I mentioned before that it was my intention to take copious notes and make sketches.  Well, I was admitted by the owner, who then came around with me for a while and we chatted about who I was and what my interests were, as I took in the first room of exhibits. 

He showed me their wonderful catalogue and from that I could see there was no point in my writing anything down as the catalogue had great high definition photographs (9), some of which are A4 size.  Lots of historical background and lots of smaller pictures.  (A must-have at only £12.00)     

Even though he could probably tell by then that I was not going to purchase any antiques, he explained that they are very committed to furthering the education of stitchers and respect stitchers the world over.  In fact their catalogue mentions the huge success and interest ‘Twixt Art & Nature’ exhibition has stirred in the vintage textile world. 

Indeed, if  you were an investor in antique needlework, you would probably have seen a lot of pieces there that you might want to consider.  I’m no expert but, I saw for instance, some very nicely worked small colourful samplers, framed, for around £8,000… 

I don’t quite know how one would set about storing an item like that, in order to preserve its wonderful colours and fibres from the ravages of time.  Perhaps Witneys, like upper end wine merchants, offer storage solutions that uphold the specification of museum experts?  You would have to make those enquiries yourself.   

It’s also worth pointing out what a delight it was viewing these wonderful artefacts in lighter surroundings than say, at the V&A, which can be quite dark at times (understandably).  Witneys, being the professionals they are however, naturally ensure ultra-violet proof windows and furthermore, as I understand it, in addition to being dealers, they also undertake restoration of textiles. 

The V&A is wonderful, but you do tend to get a lot of cast shadows from the tall display cases, invariably when you are trying to peer at things that are often set quite far back.  At Witneys you can get really  close to the exhibit and this is so important when you are trying to work out how on earth they did something…..     

So just from glimpsing the exhibits at a distance, I could tell the vibrant colours were one of the main things this exhibition was about, I mean how could they have:

“survived four centuries looking so bright”.

The Oxford Times said of the exhibition:

“Elizabethan needlework in fine condition is extremely rare”.

Mary Baker Her Basket 1670

The first thing I saw was a magnificent wire beaded ‘Layette’ basket worked in a wide spectrum of colours including the then, very expensive orange and red beads.  I later found out that that was not the only rare thing about this particular basket.  In case you didn’t know, these baskets could be ready-purchased, just like the wooden workbox caskets.  Some believe they were decorated to commemorate a marriage or engagement.  The scene depicted on this one is of The Garden of Eden.  I saw a similar one at the V&A recently that has mainly blue, green and brown beads.  I must preferred Witneys because its such a joyful piece. 

As I was speaking to the owner, my mind was racing as to the rarity and expense of those red beads.  

I later read that the basket is:

“of exceptional rarity as it is the only known named and dated example to survive”. 

Reading from the wonderful catalogue, (which I decided to buy after I saw the most amazing pair of goldwork gloves), it quotes a young Hannah Woolley, then aged 14, to illustrate how accomplished girls were in those days: ‘taught beading in the same way as other forms of needlework and embroidery’: 

“I can work well all manner of works which is to be wrought with a needle, also transparent works.  Shell-work, Mos-Work, also cutting of prints….all kinds of beugle (bead)-works, upon wyres and otherwise…”

Gentleman’s Cap circa 1600

Then in the distance I could see a magnificent Gentleman’s Cap (of which there is also a wonderful A4 sized photograph of a portion of its detail):

“and the beau would feign sickness to show his nightcap fine.”

Close by was a fabulous ladies Coif, not mentioned in the catalogue.  Both these head coverings were embroidered to a very high standard by the domestic embroideress.  But what amazed me more than anything, and this is why I travelled to see this show, was the very small scale to which the embroidered elements were worked. 

Personally, I’m a little worried about the danger of relying too much on the study of huge close-up photographs of motifs.  Scale is certainly a big consideration if one desires to be as ‘authentic’ as possible.  I have to keep reminding myself how very tiny their versions were and these were the days before spectacles! 

They used  an eye-glass for sure.  In fact at the V&A I was struck by how relatively easy it is to tell which pieces were made with an eye glass and which were worked later on with the balancing quality of spectacles, there’s a kind of ‘bigger picture’ mentality that creeps in. 

The wow factor in historic times was certainly not merely limited to the quality of stitching, but possibly, just as important was the fascination of minute scale.  I saw tiny acorns on Stump work mirrors that were no bigger than half the size of the nail on your little finger! 

For example, the cornflowers on both these head coverings were perfectly stitched to a width not much larger than a large thumbnail!

The Plaited Braid scrolling stem on these items was also much, much finer than we ever think possible.  I’m always struck when I see these things how fine in fact their metal thread was and how supremely pliable.  They gilded onto silver, we gild onto copper, can the difference in flexibility be that great between the two base metals??      

Back Panel of a Ladies Jacket or Bodice.  Late 16th/Early 17th century.

Then I saw the “fabulous jacket panel” that ‘Needleprint’ blog reported was sold at Christies some years ago.  This piece again, is very bright and extremely similar to the  Margaret Layton (Laton) jacket in the V&A.  It includes all the familiar motifs: strawberries, roses, rosehips, foxgloves, folded pansies, heartsease, cornflowers, cowslips and aquilegia and scrolling stems. 

At an event like this, you really begin to notice how the same motifs pop up and again and again.  Not so much the same fashion, as the exact same shape and view of a motif.  It  really makes you think about the pattern books they had back then and how well thumbed they must have been. 

I’ve managed to do a little further research on that subject and I read on the V&A website that there were actually only 4 pattern books in circulation at that time.

(As a result of that piece of research, I have made a very exciting discovery that I will share with you next time but for now -  What if I told you I have been speaking to someone whose husband was thumbing through some brick-a-brack in 1940 at a flea market in Shropshire and found ONE of those very pattern books in a box on the floor….more later)


Elizabethan Book or Folio Cover.  Circa 1600

Then I saw the framed Folio Cover which completely blew me away!  If you haven’t already done so, I would urge you to order a copy of the catalogue just for the close-up of this Folio Cover. 

Apart from a huge variety of stitches and techniques, indeed when read about early references to needlework, its often described as ‘cunning’, I think that word really would describe this piece.  It’s a feast for the eyes!  Gorgeous colours, very fresh and so many darling little squirrels, rabbits and birds as well as the usual charming flowers. 

But unusually, instead of Plaited Braid being employed for coiling stems, this time it represents a repeated single stem bowing graciously under the pendulous weight of its flora.  What a wonderful combination of silk and metal thread. 

I tell you, this would make a wonderful piece to reproduce, not too big, but enough work for a year or two of close study….I think I’m going to copy a couple of those cute motifs (she says…).  Another thing to note about this one is the direction of the stitching being used to describe form.  I’m very interested in that idea because its directly related to brush strokes in painting…

Another thing that I thought was unusual about this piece, was the way they had used Detached Buttonhole, which is after all a couching stitch, to work some lighter threads over darker rows with the effect of increasing the tonality of the paler silks.  The result is ‘shimmering’, nice touch!

Well, you know me by now, I couldn’t resist, here are a few sketches of the Foxglove motif on the Folio Cover:

folio cover

Imagine this only 2 feet away from you, sparkling as it picks up the light… (the tip of this gel pen is a little bit chunky, but I hope you get the idea)

 folio cover 01

 folio cover 02

 folio cover 03

  folio cover 04

This piece must have been professionally made, its so wonderfully self-assured.  Worth noting that an embroidered book cover of this kind would also have been protected by an embroidered bag.  I don’t think this piece was ever mounted over a book, perhaps they  thought it really ought to be displayed?? 

The Pair of Gauntlets Circa 1600 – 1640

Those elegant gloves made my eyes water.  There’s a fantastic close-up of them in the catalogue (reason I had to buy it) and again, its high definition and so you could, in theory, work from that image.  I’ve seen later, French needlework that is similar to this, using bobbin lace for the fringe.  This fringe however, is described as being made entirely out of needle lace.  Can you imagine using gold plate as if it were just thick thread?  Well they have here.

A lot of this kind of work would have been picked out in later times, in order to re-use the gold.  Here’s a link to an article by Margaret Jourdain called ‘Gold and Silver Lace Part 1’ for The Connoisseur

"The earliest pieces have the appearance of braid, with a simple lozenge pattern, but geometric patterns in plaited and twisted gold and silver thread were made about the end of the sixteenth century…"

to be continued……


g2g !